• Skip to main content
  • Skip to primary sidebar
  • Skip to footer

  • Home
  • About
  • Gallery
  • Classes
  • Trips
  • Books
  • Blog
  • Contact
  • Sign Up For My Blog

Blog

Spring Thaw

March 29, 2026 6 Comments

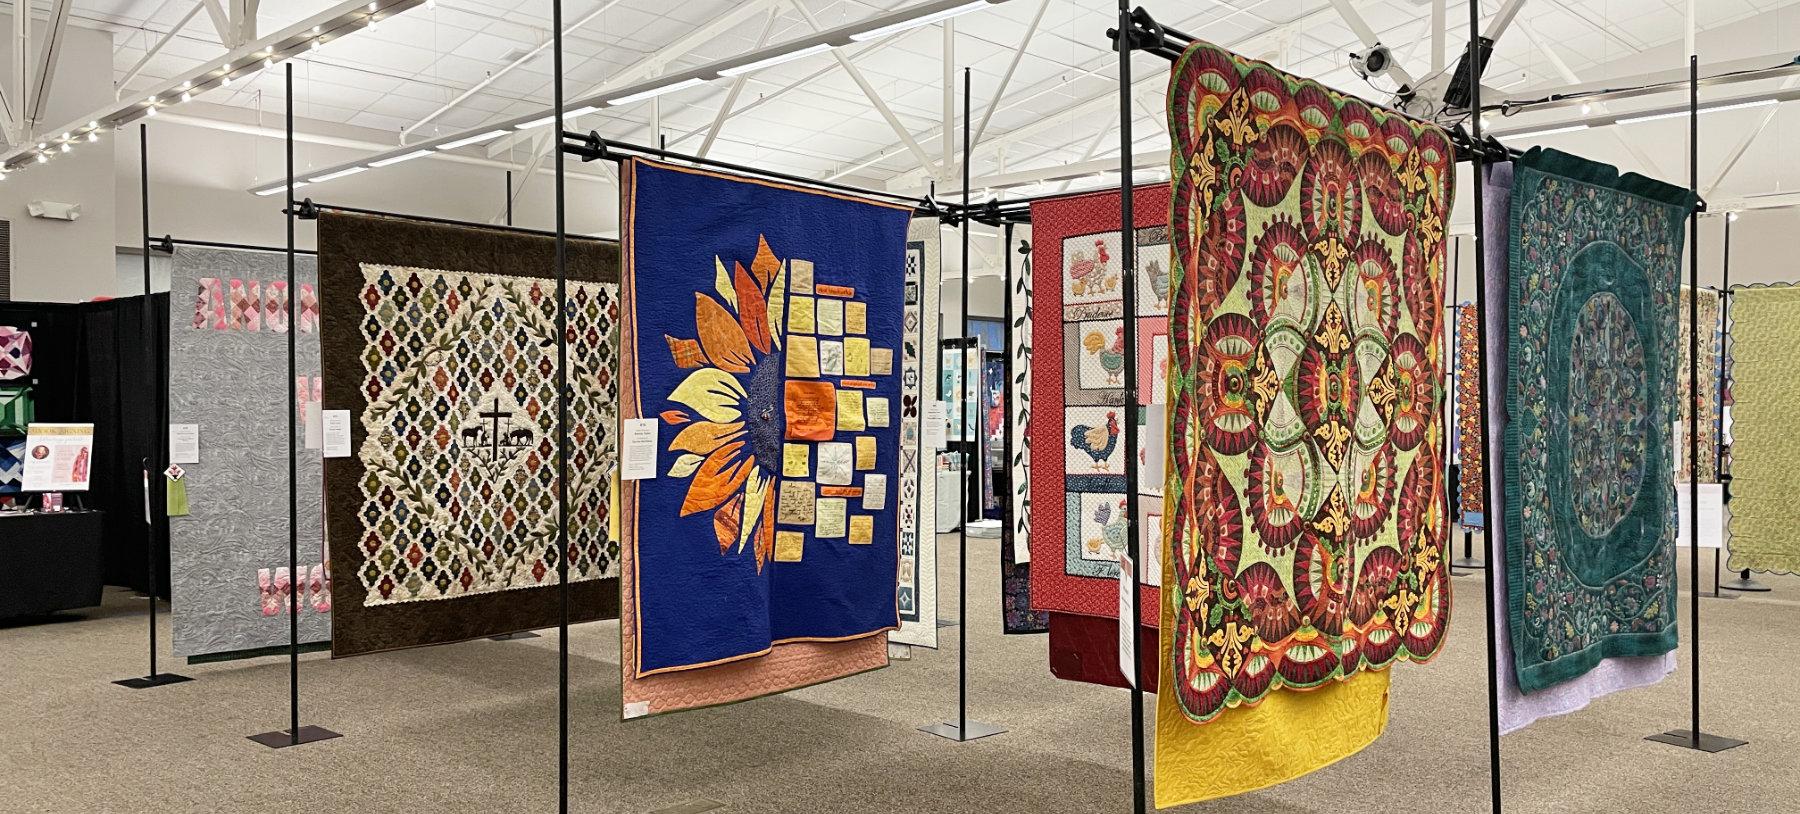
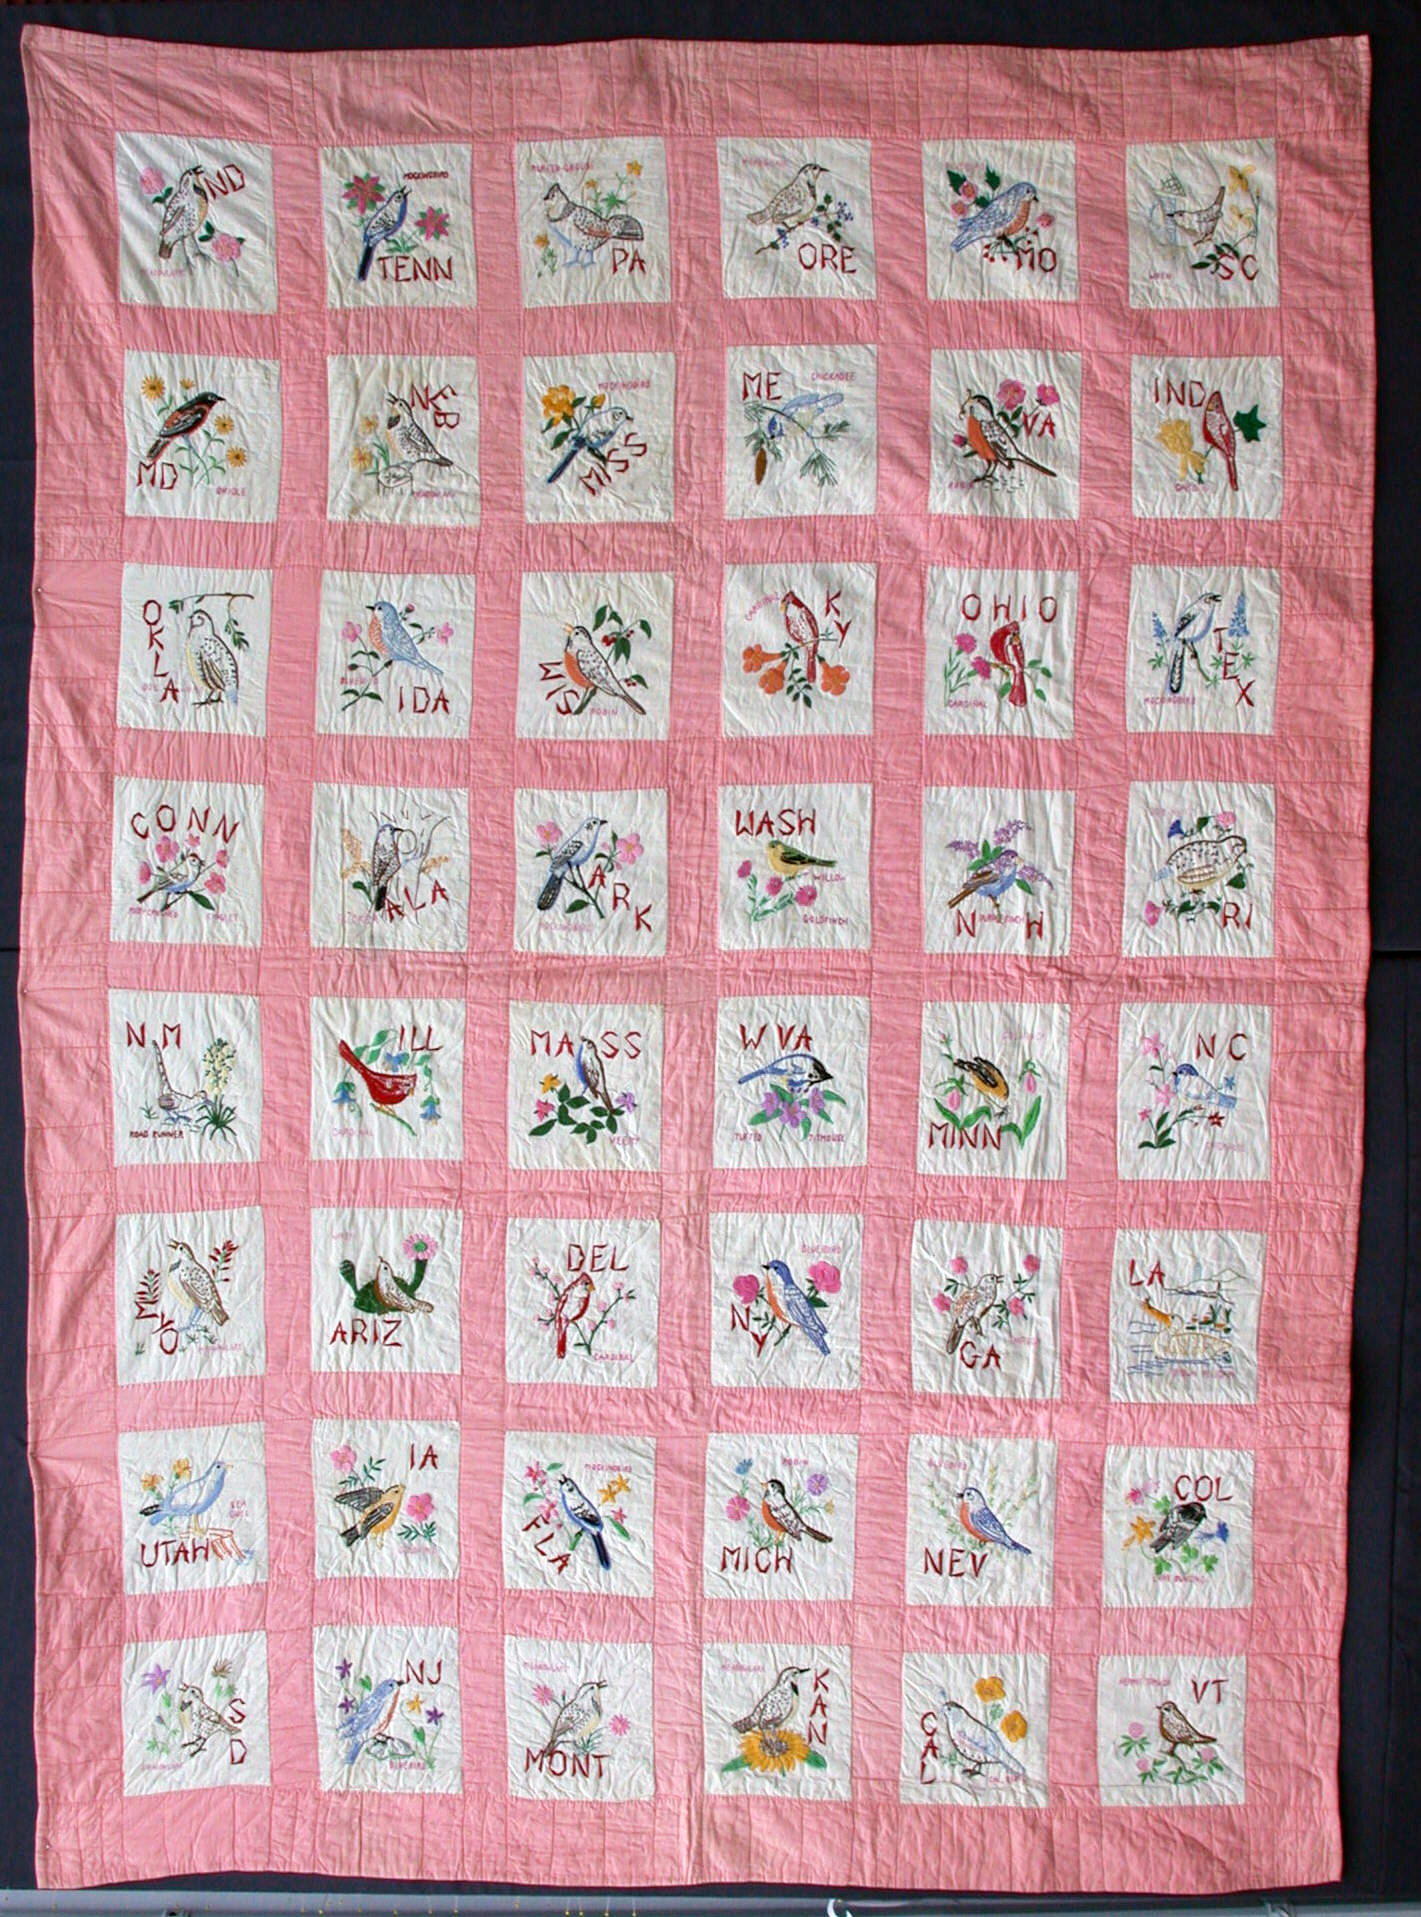
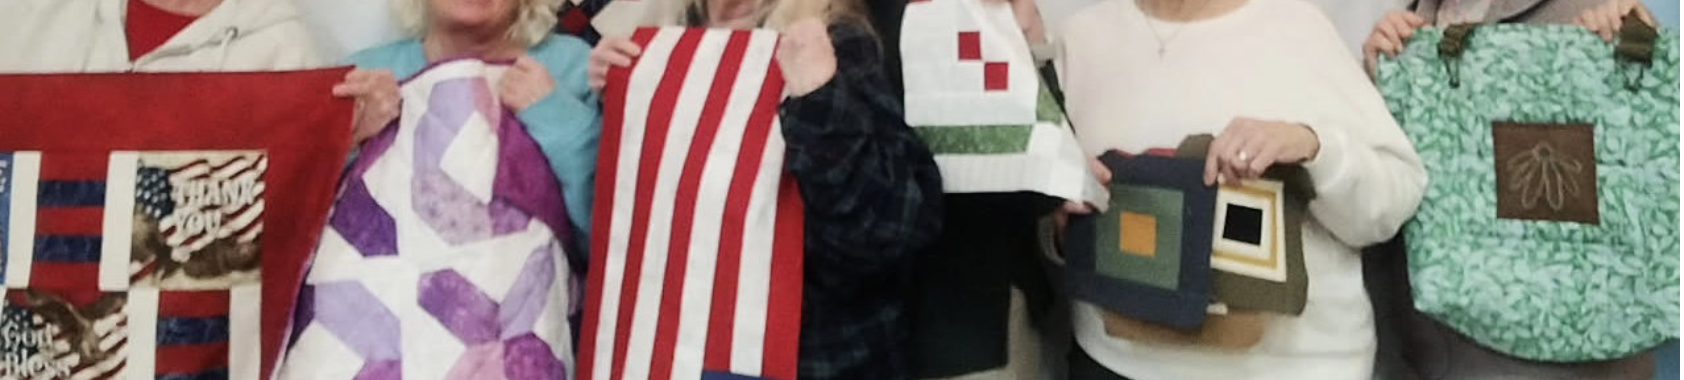
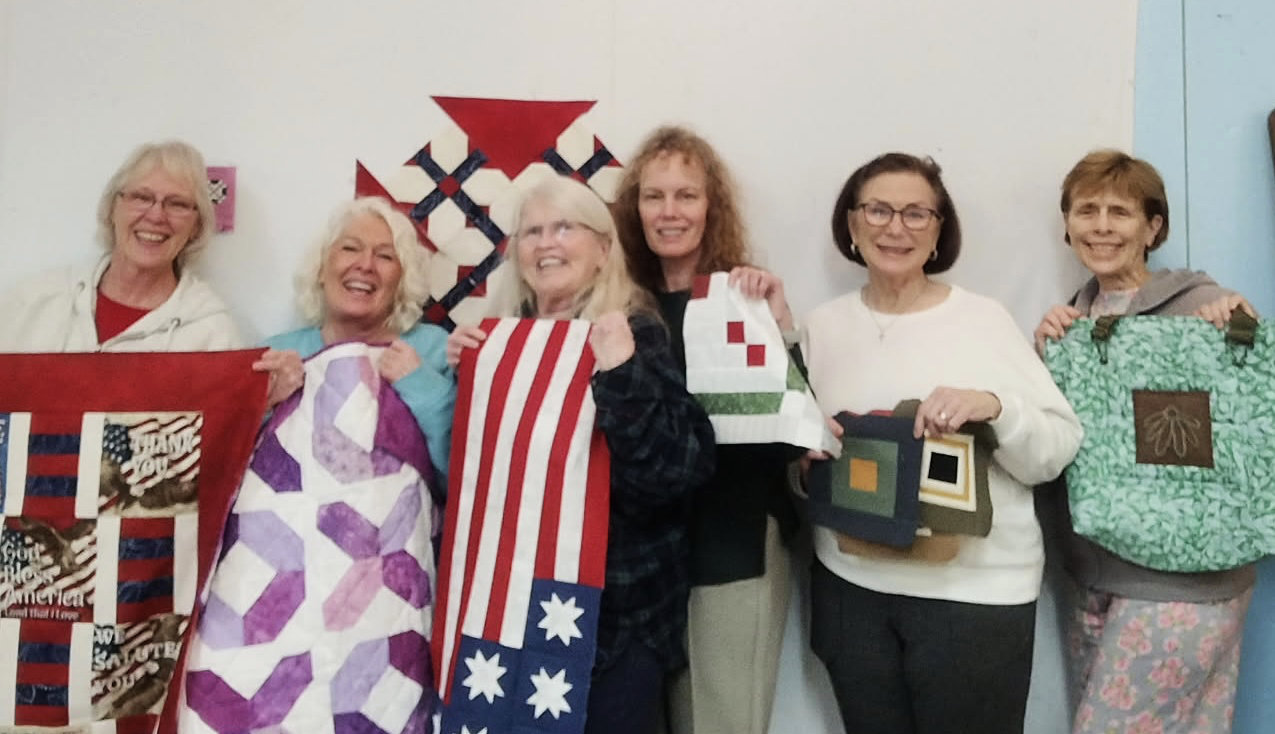
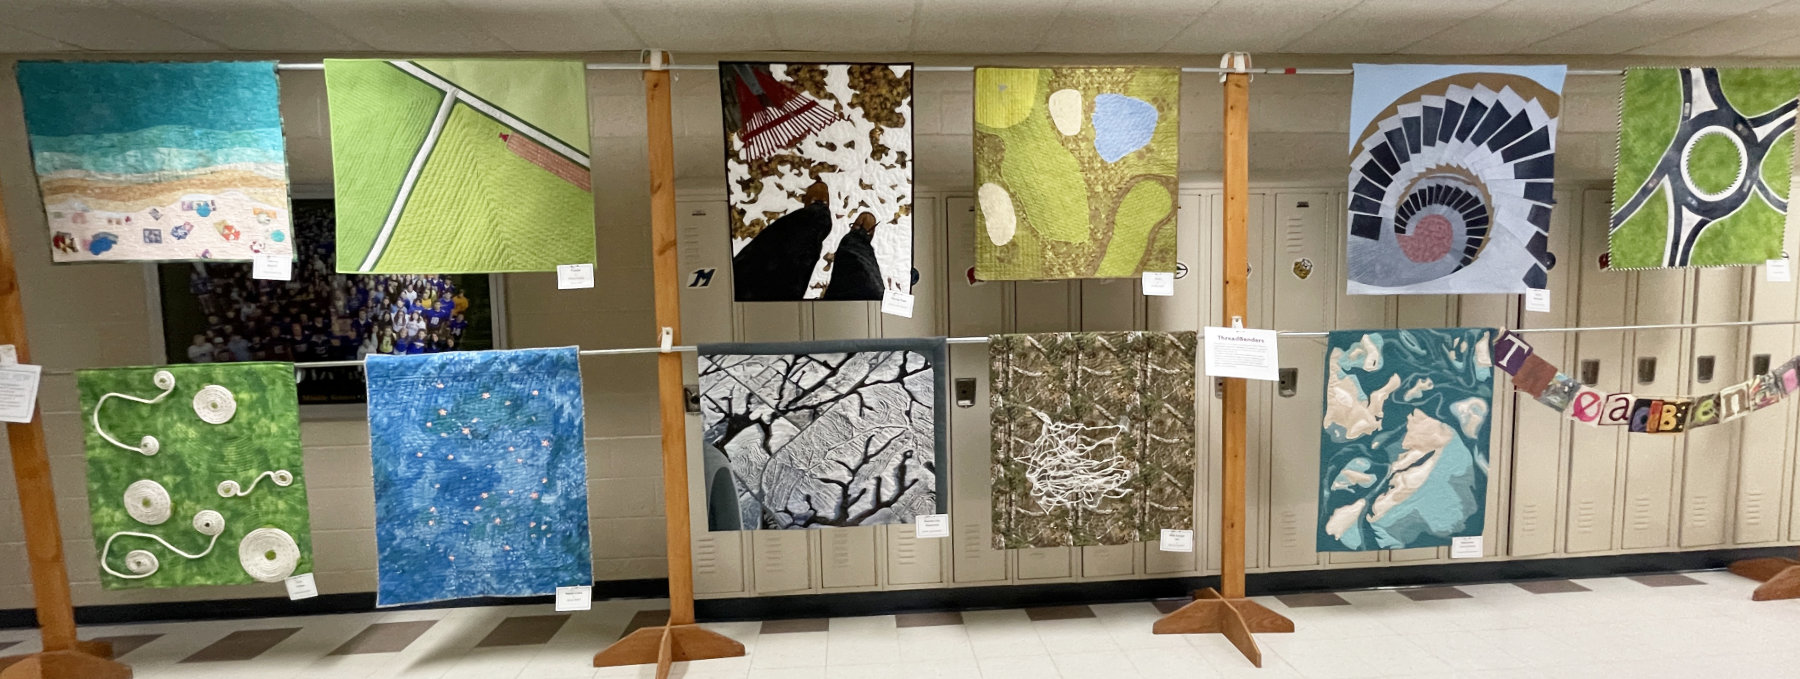
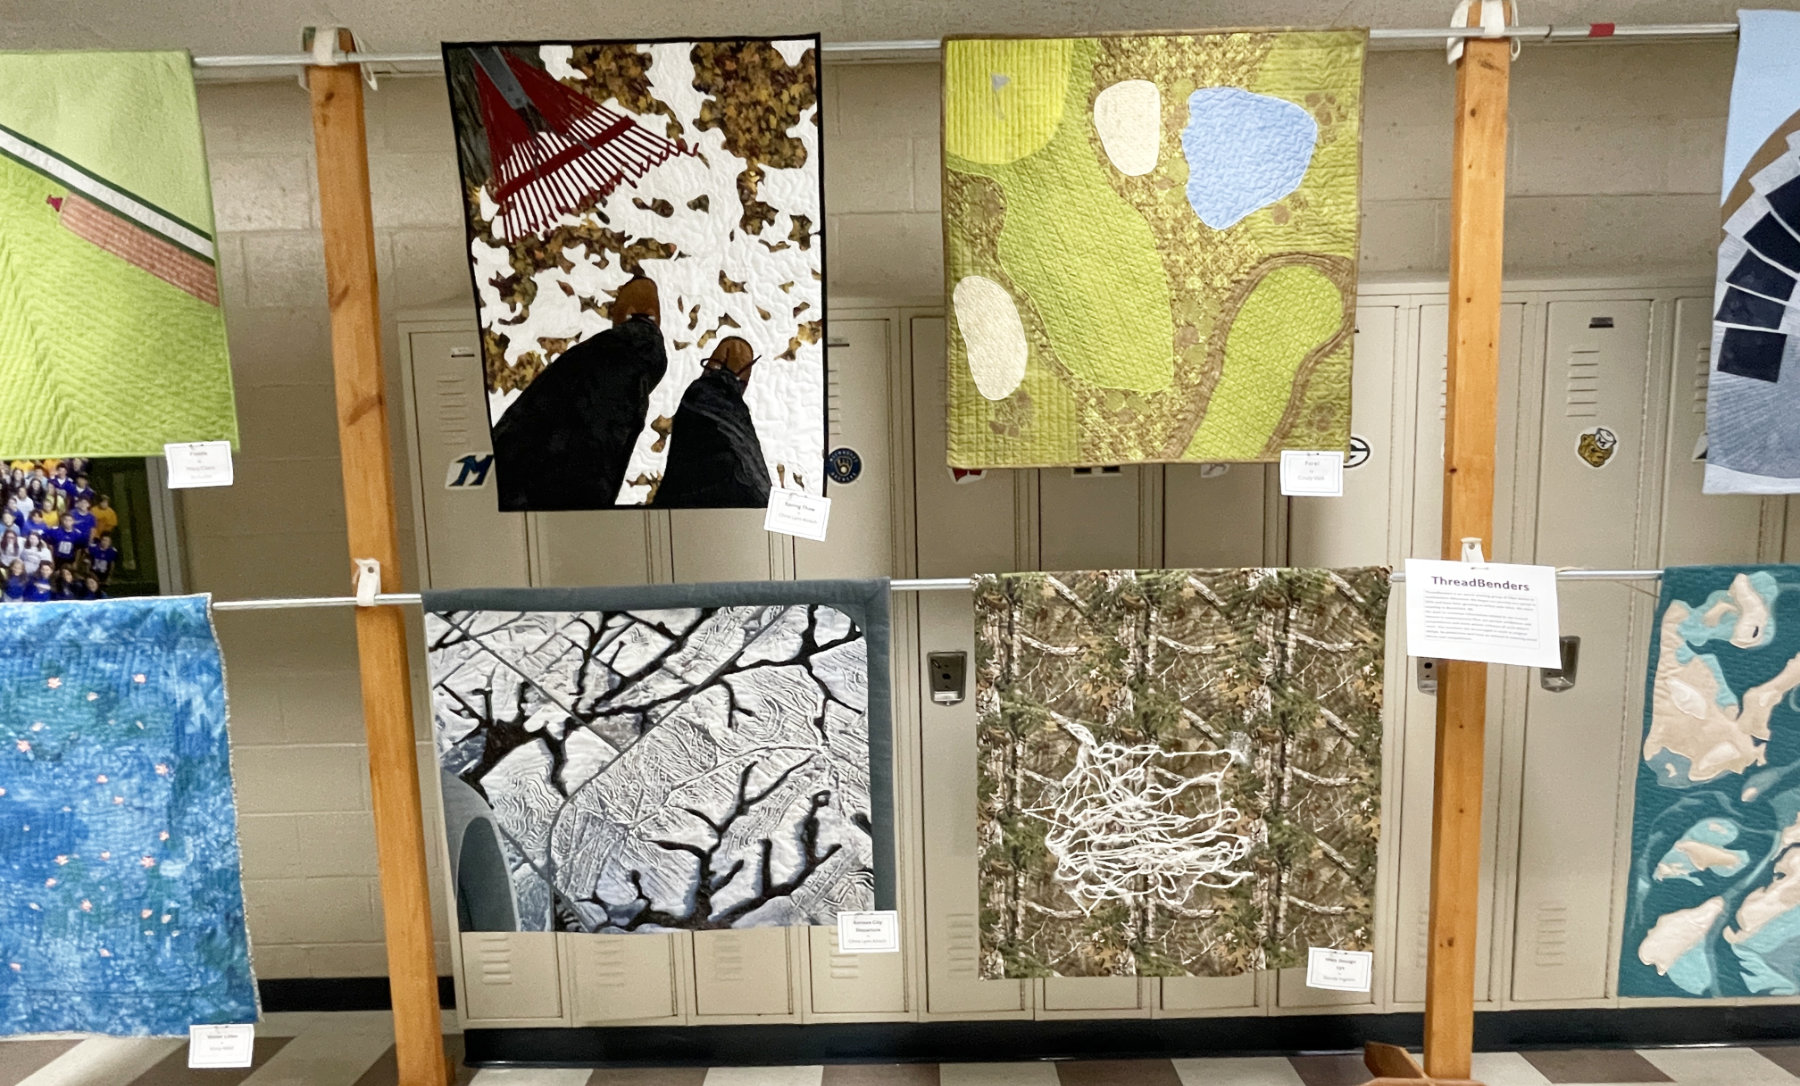
I shared the ThreadBender’s recent challenge “Birds Eye View” a few weeks ago. This weekend those quilts are hanging at the Crazy Quilter’s show in Mukwonago, WI. The photo at the top of this post shows them all hanging together and they look great! (if I do say so myself 😊). The show is open until 3pm today, so if you live nearby and have a free Sunday afternoon, please head to the middle school in Mukwonago.

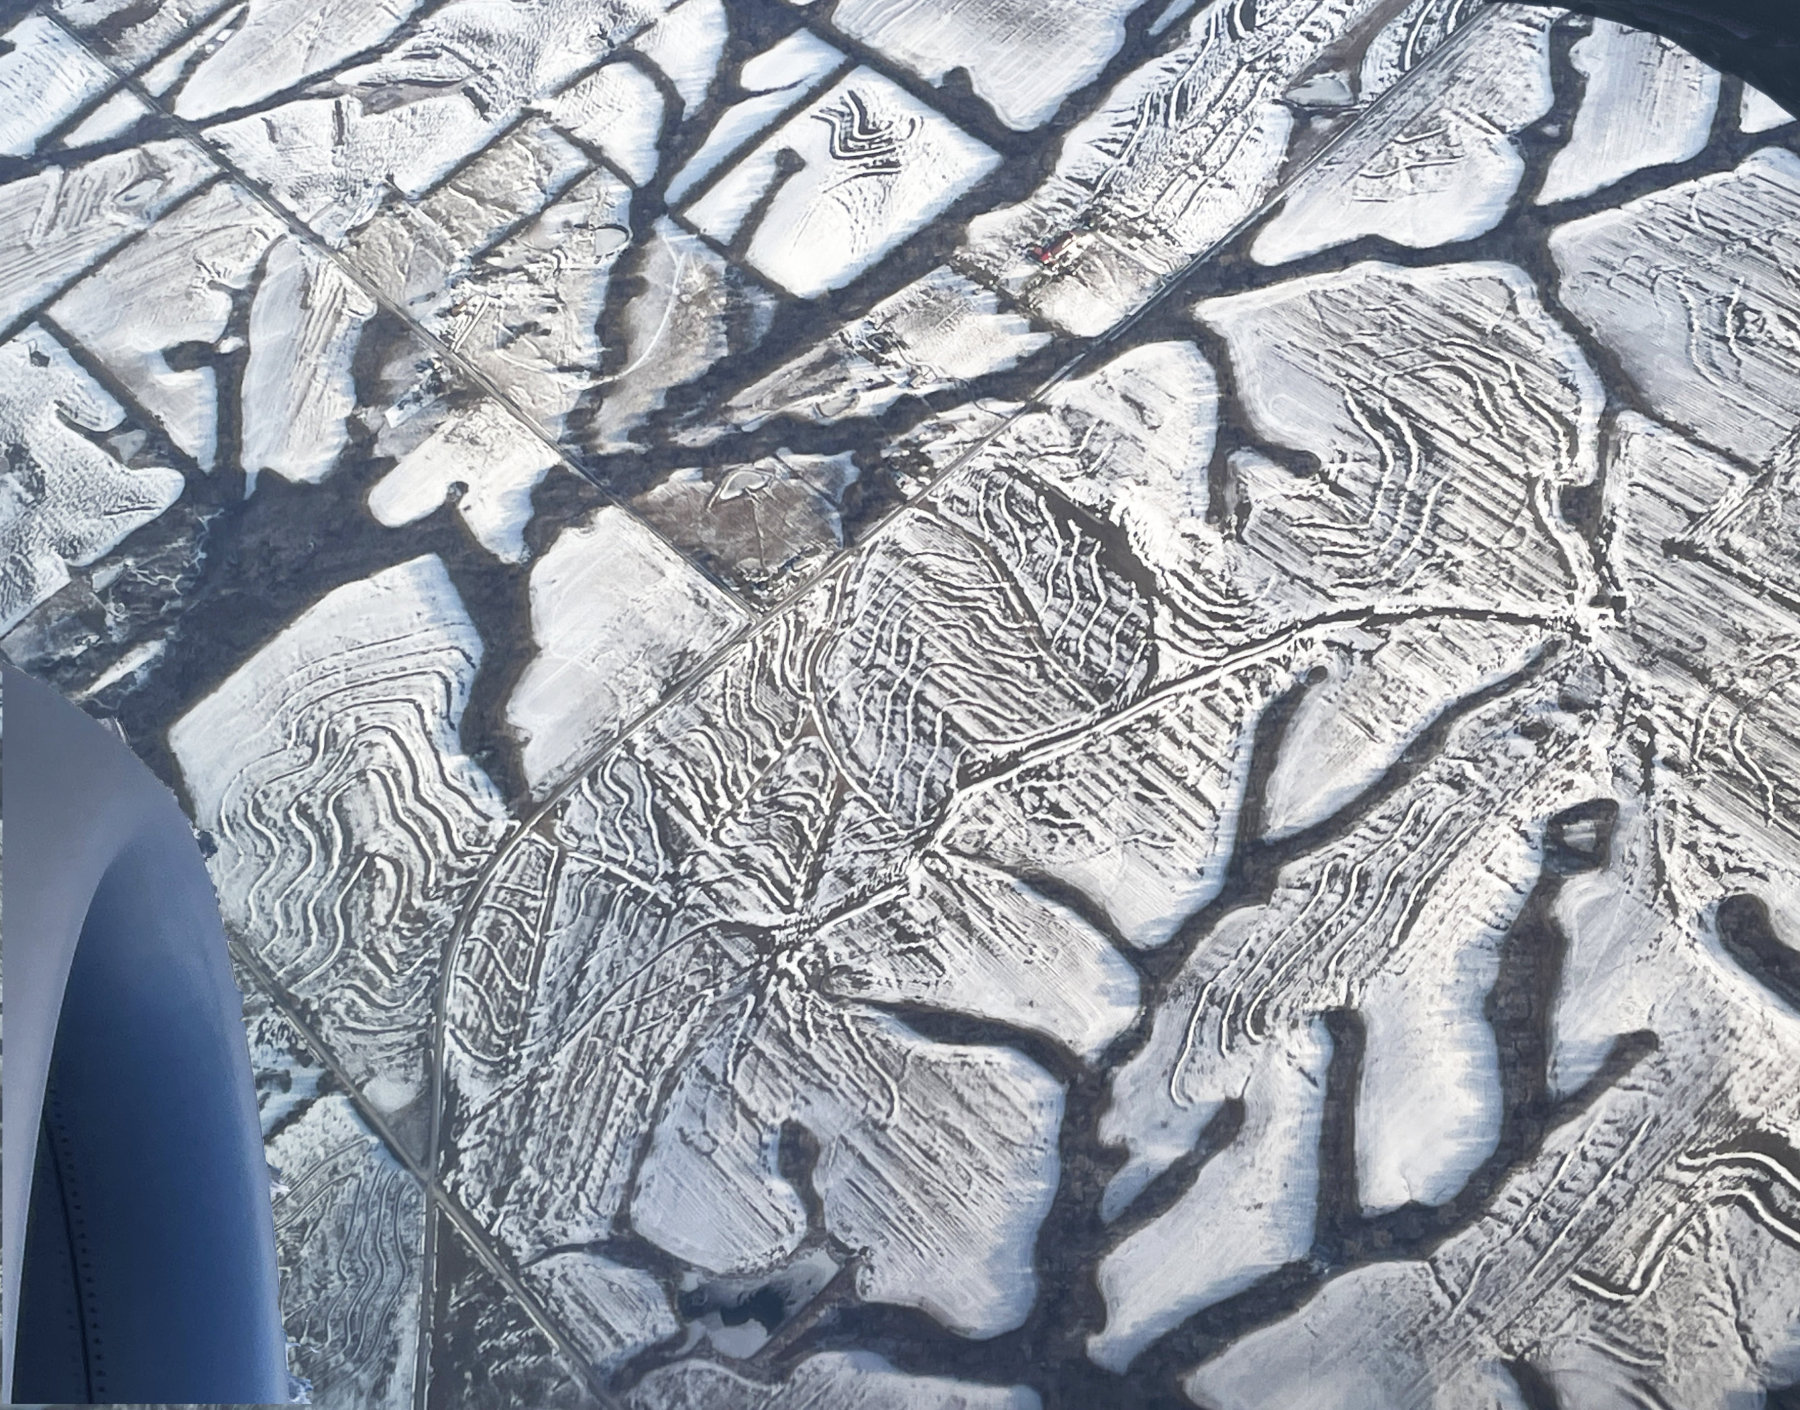
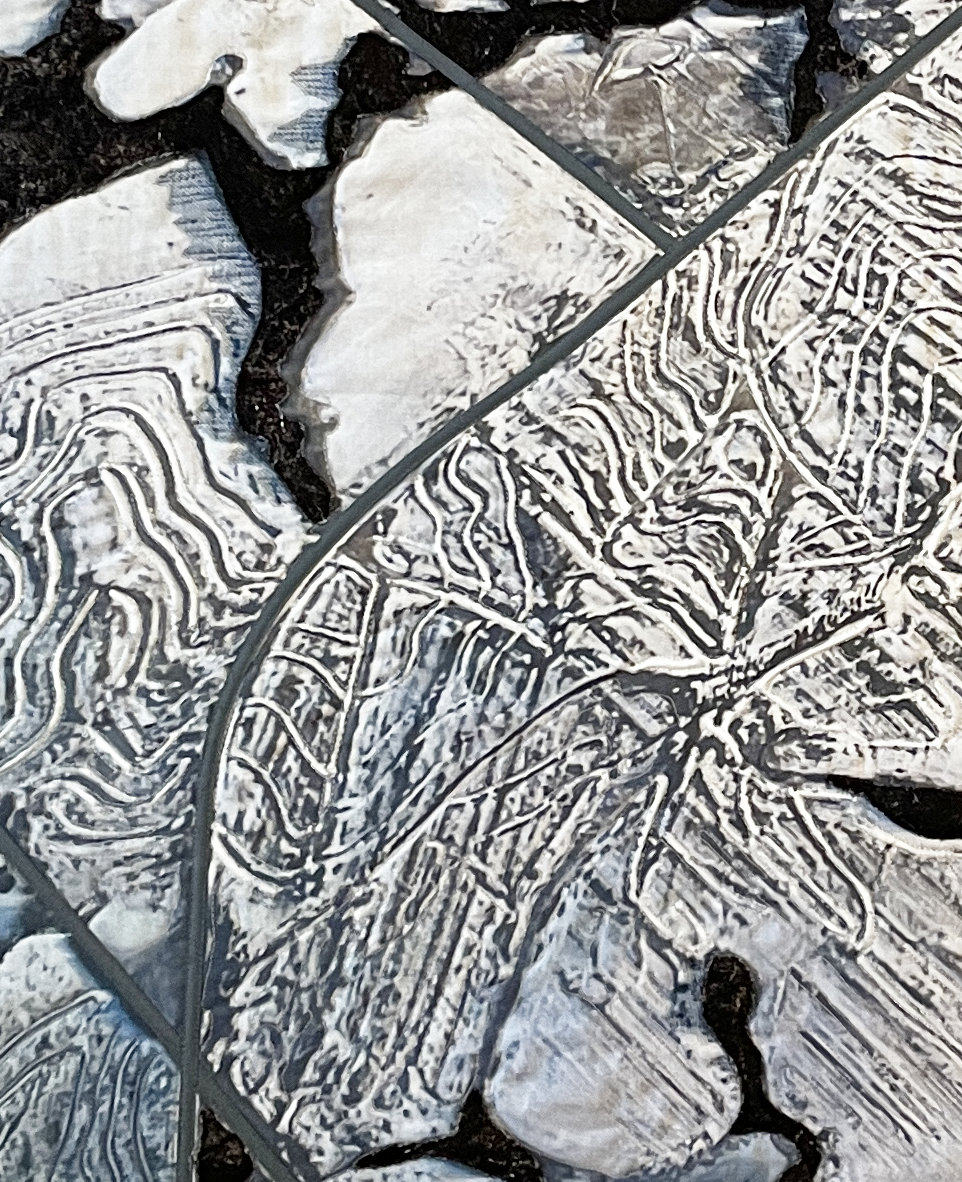
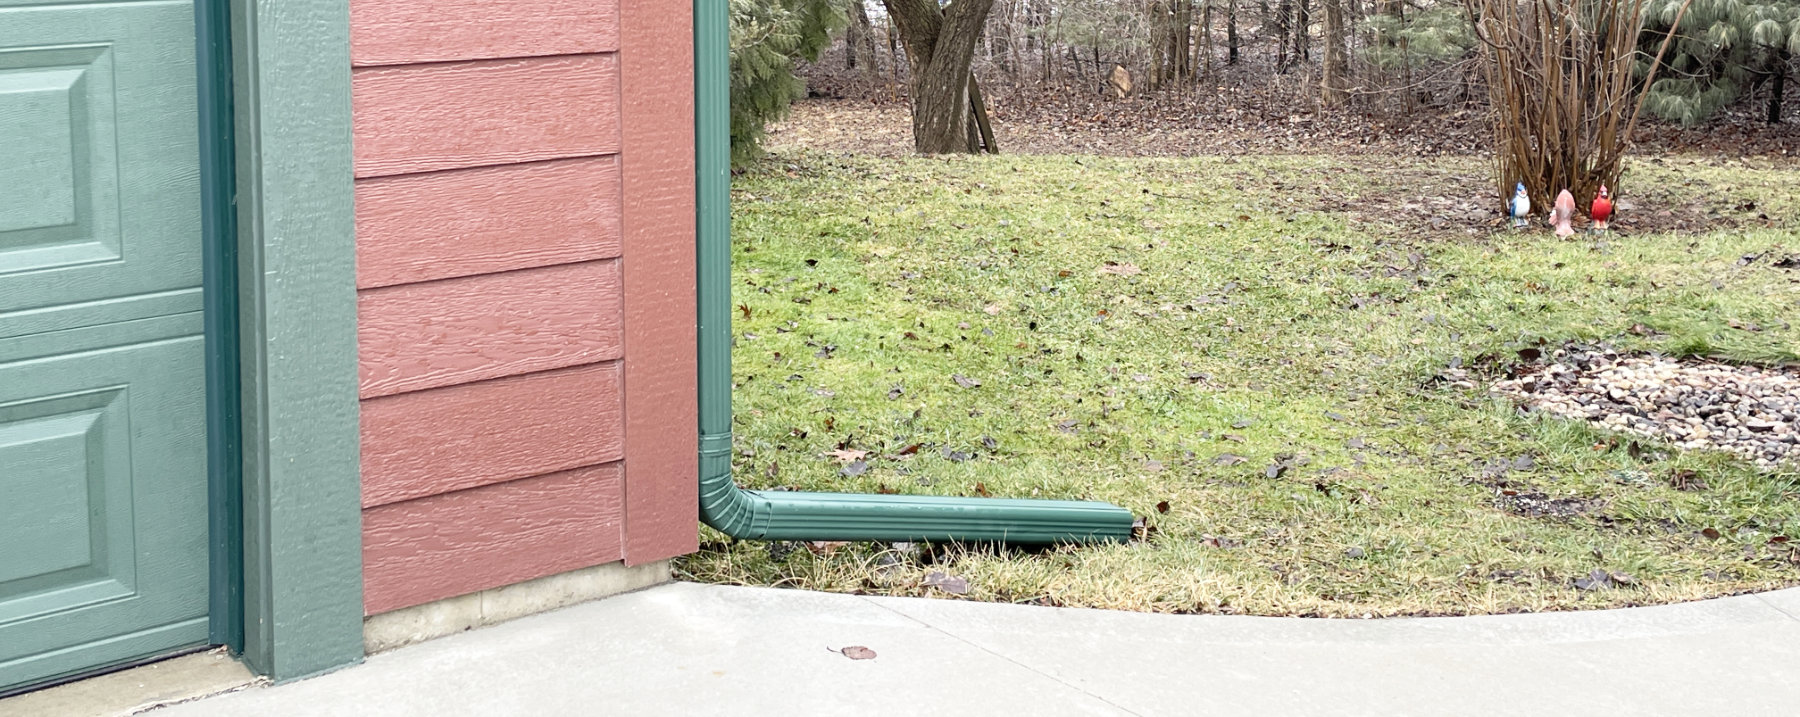
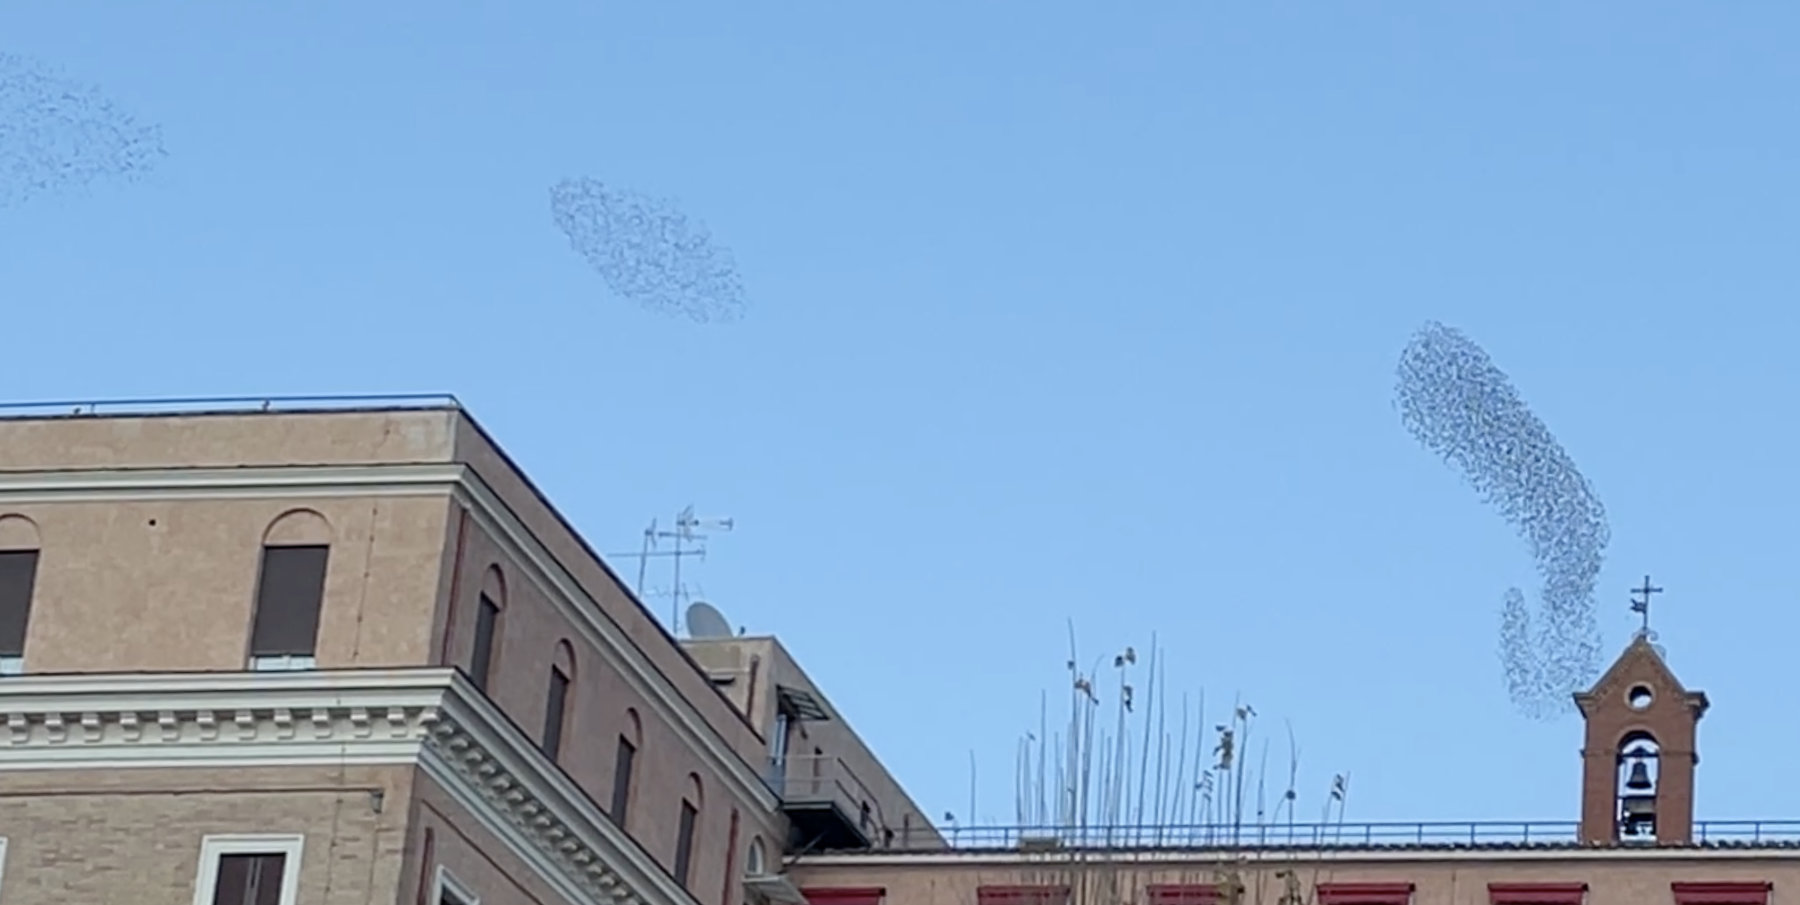
Those who are very observant might have noticed a quilt in the above photo that wasn’t previously on the ThreadBender’s site. A week before those quilts were due, I was on a Cattail retreat with friends. While Mary and I went for a walk through the melting snow I came upon a moment when I just had to snap a photo;

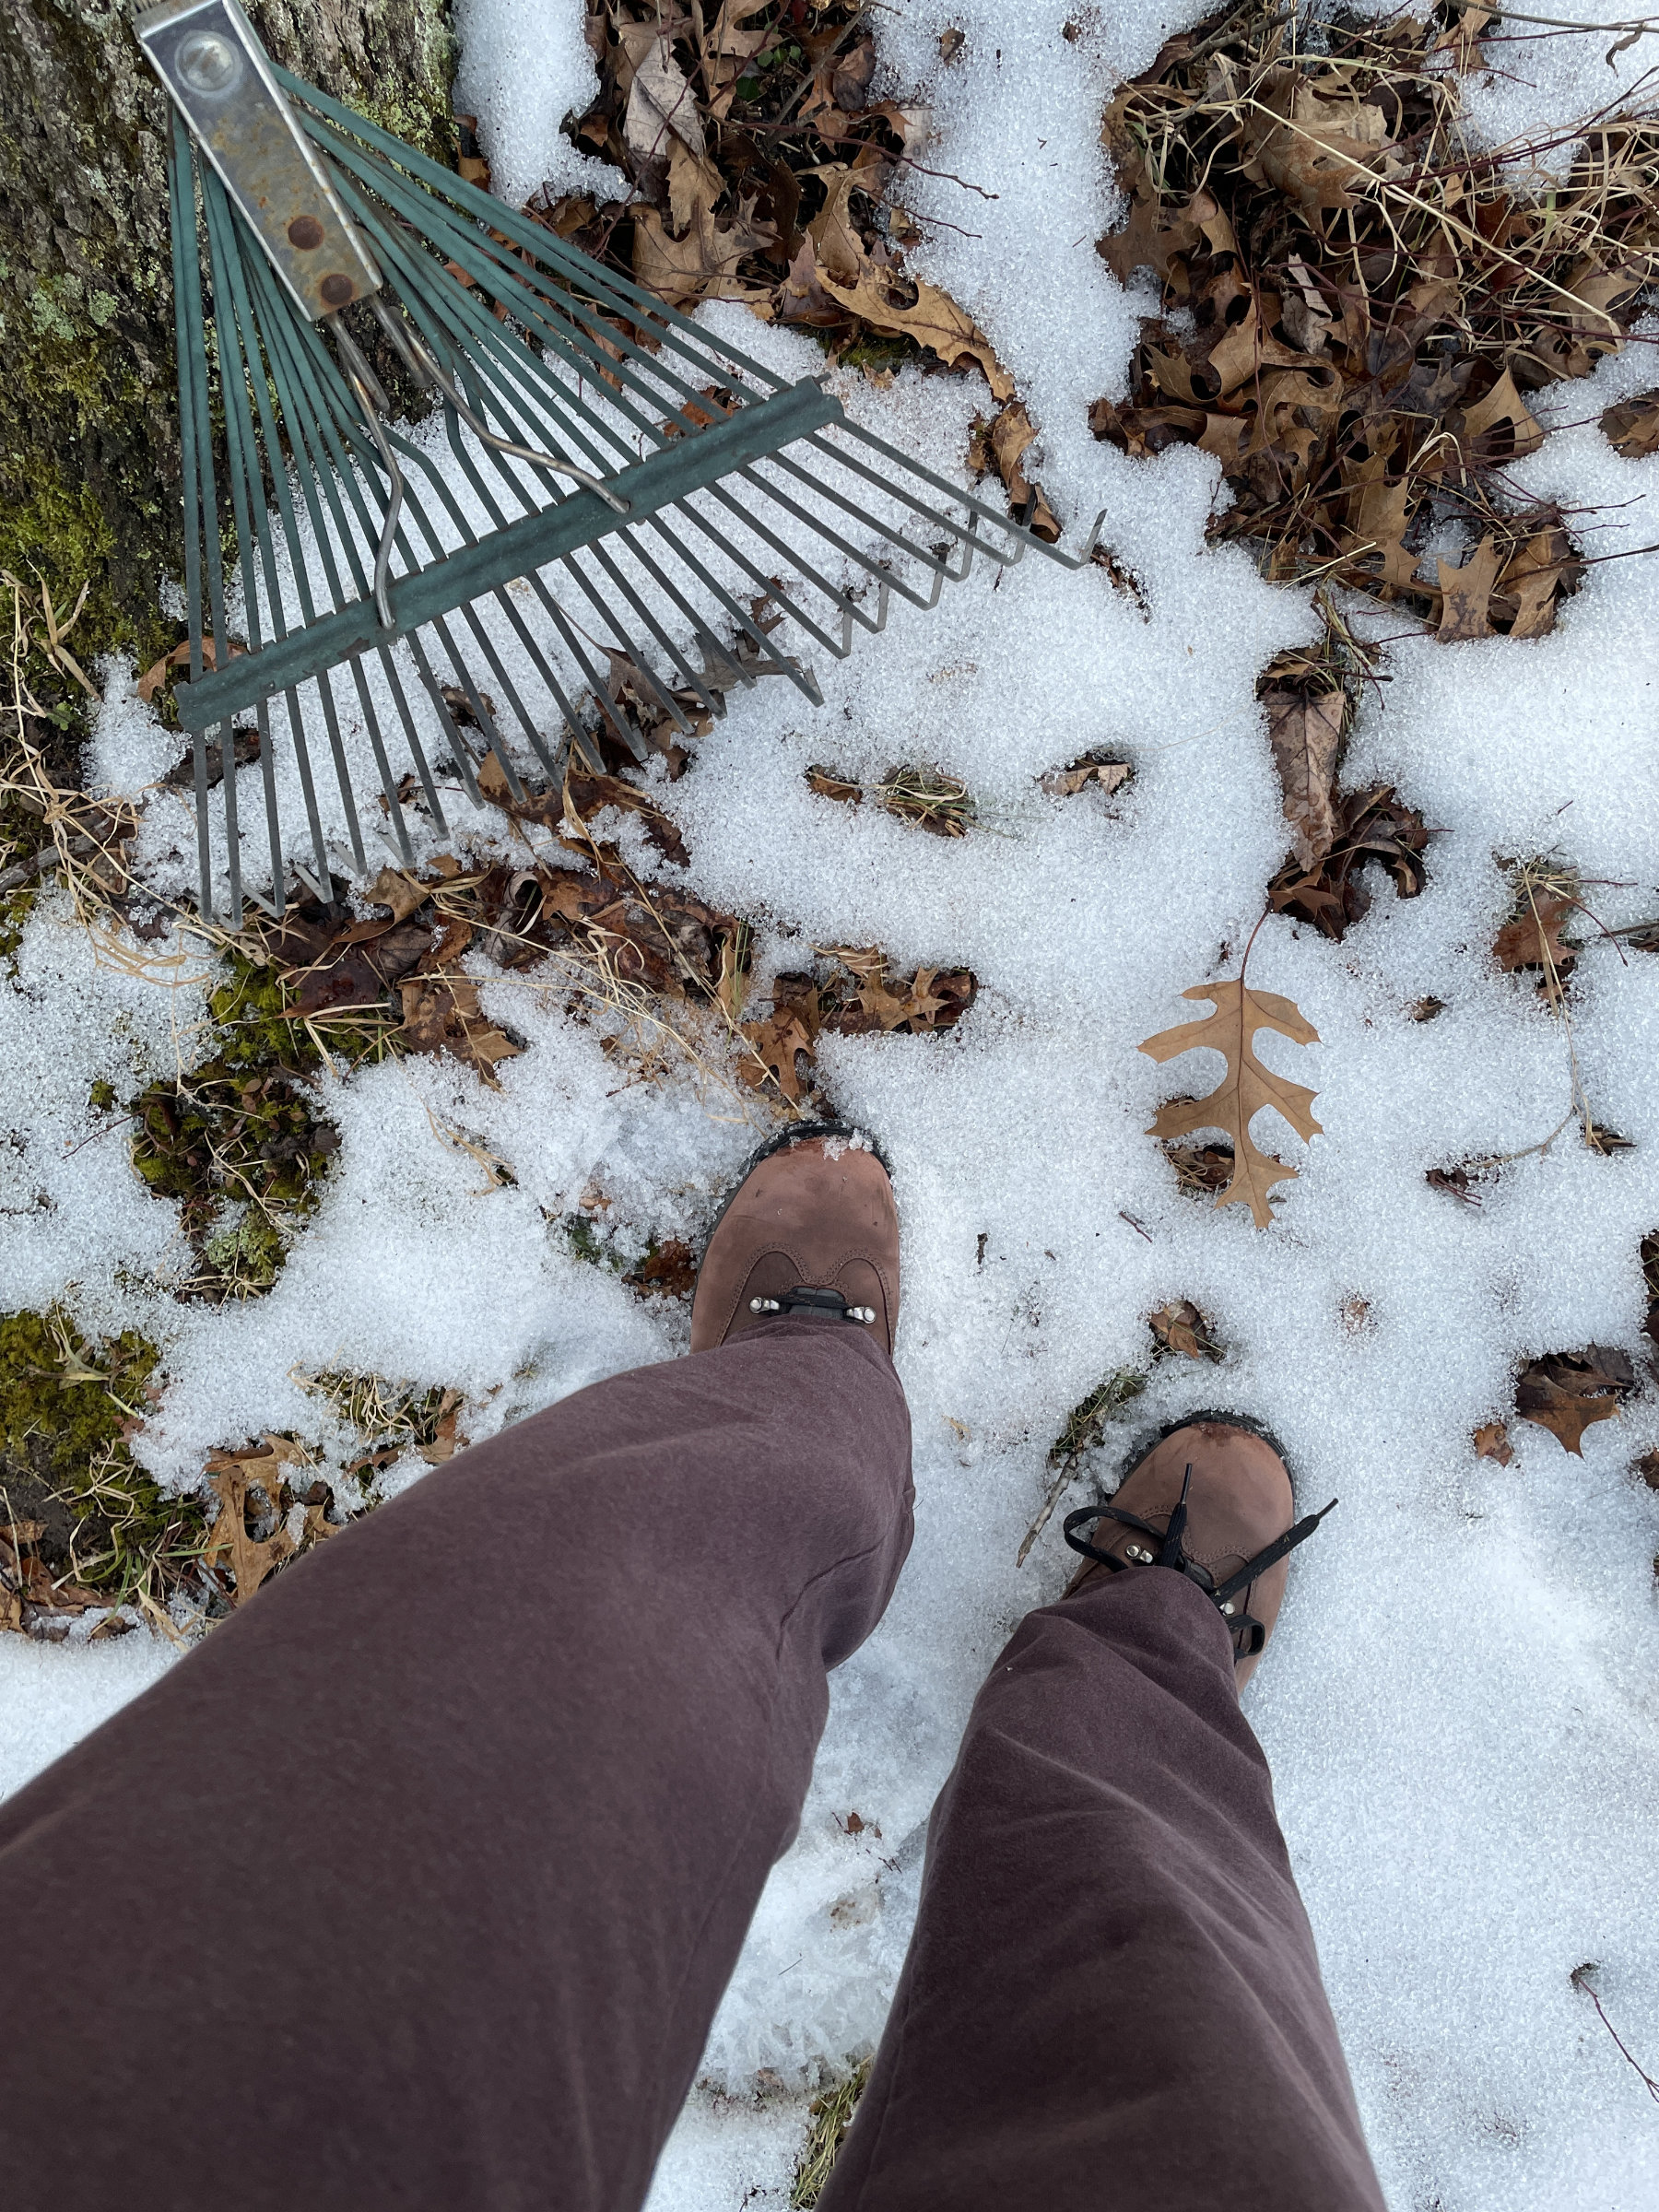
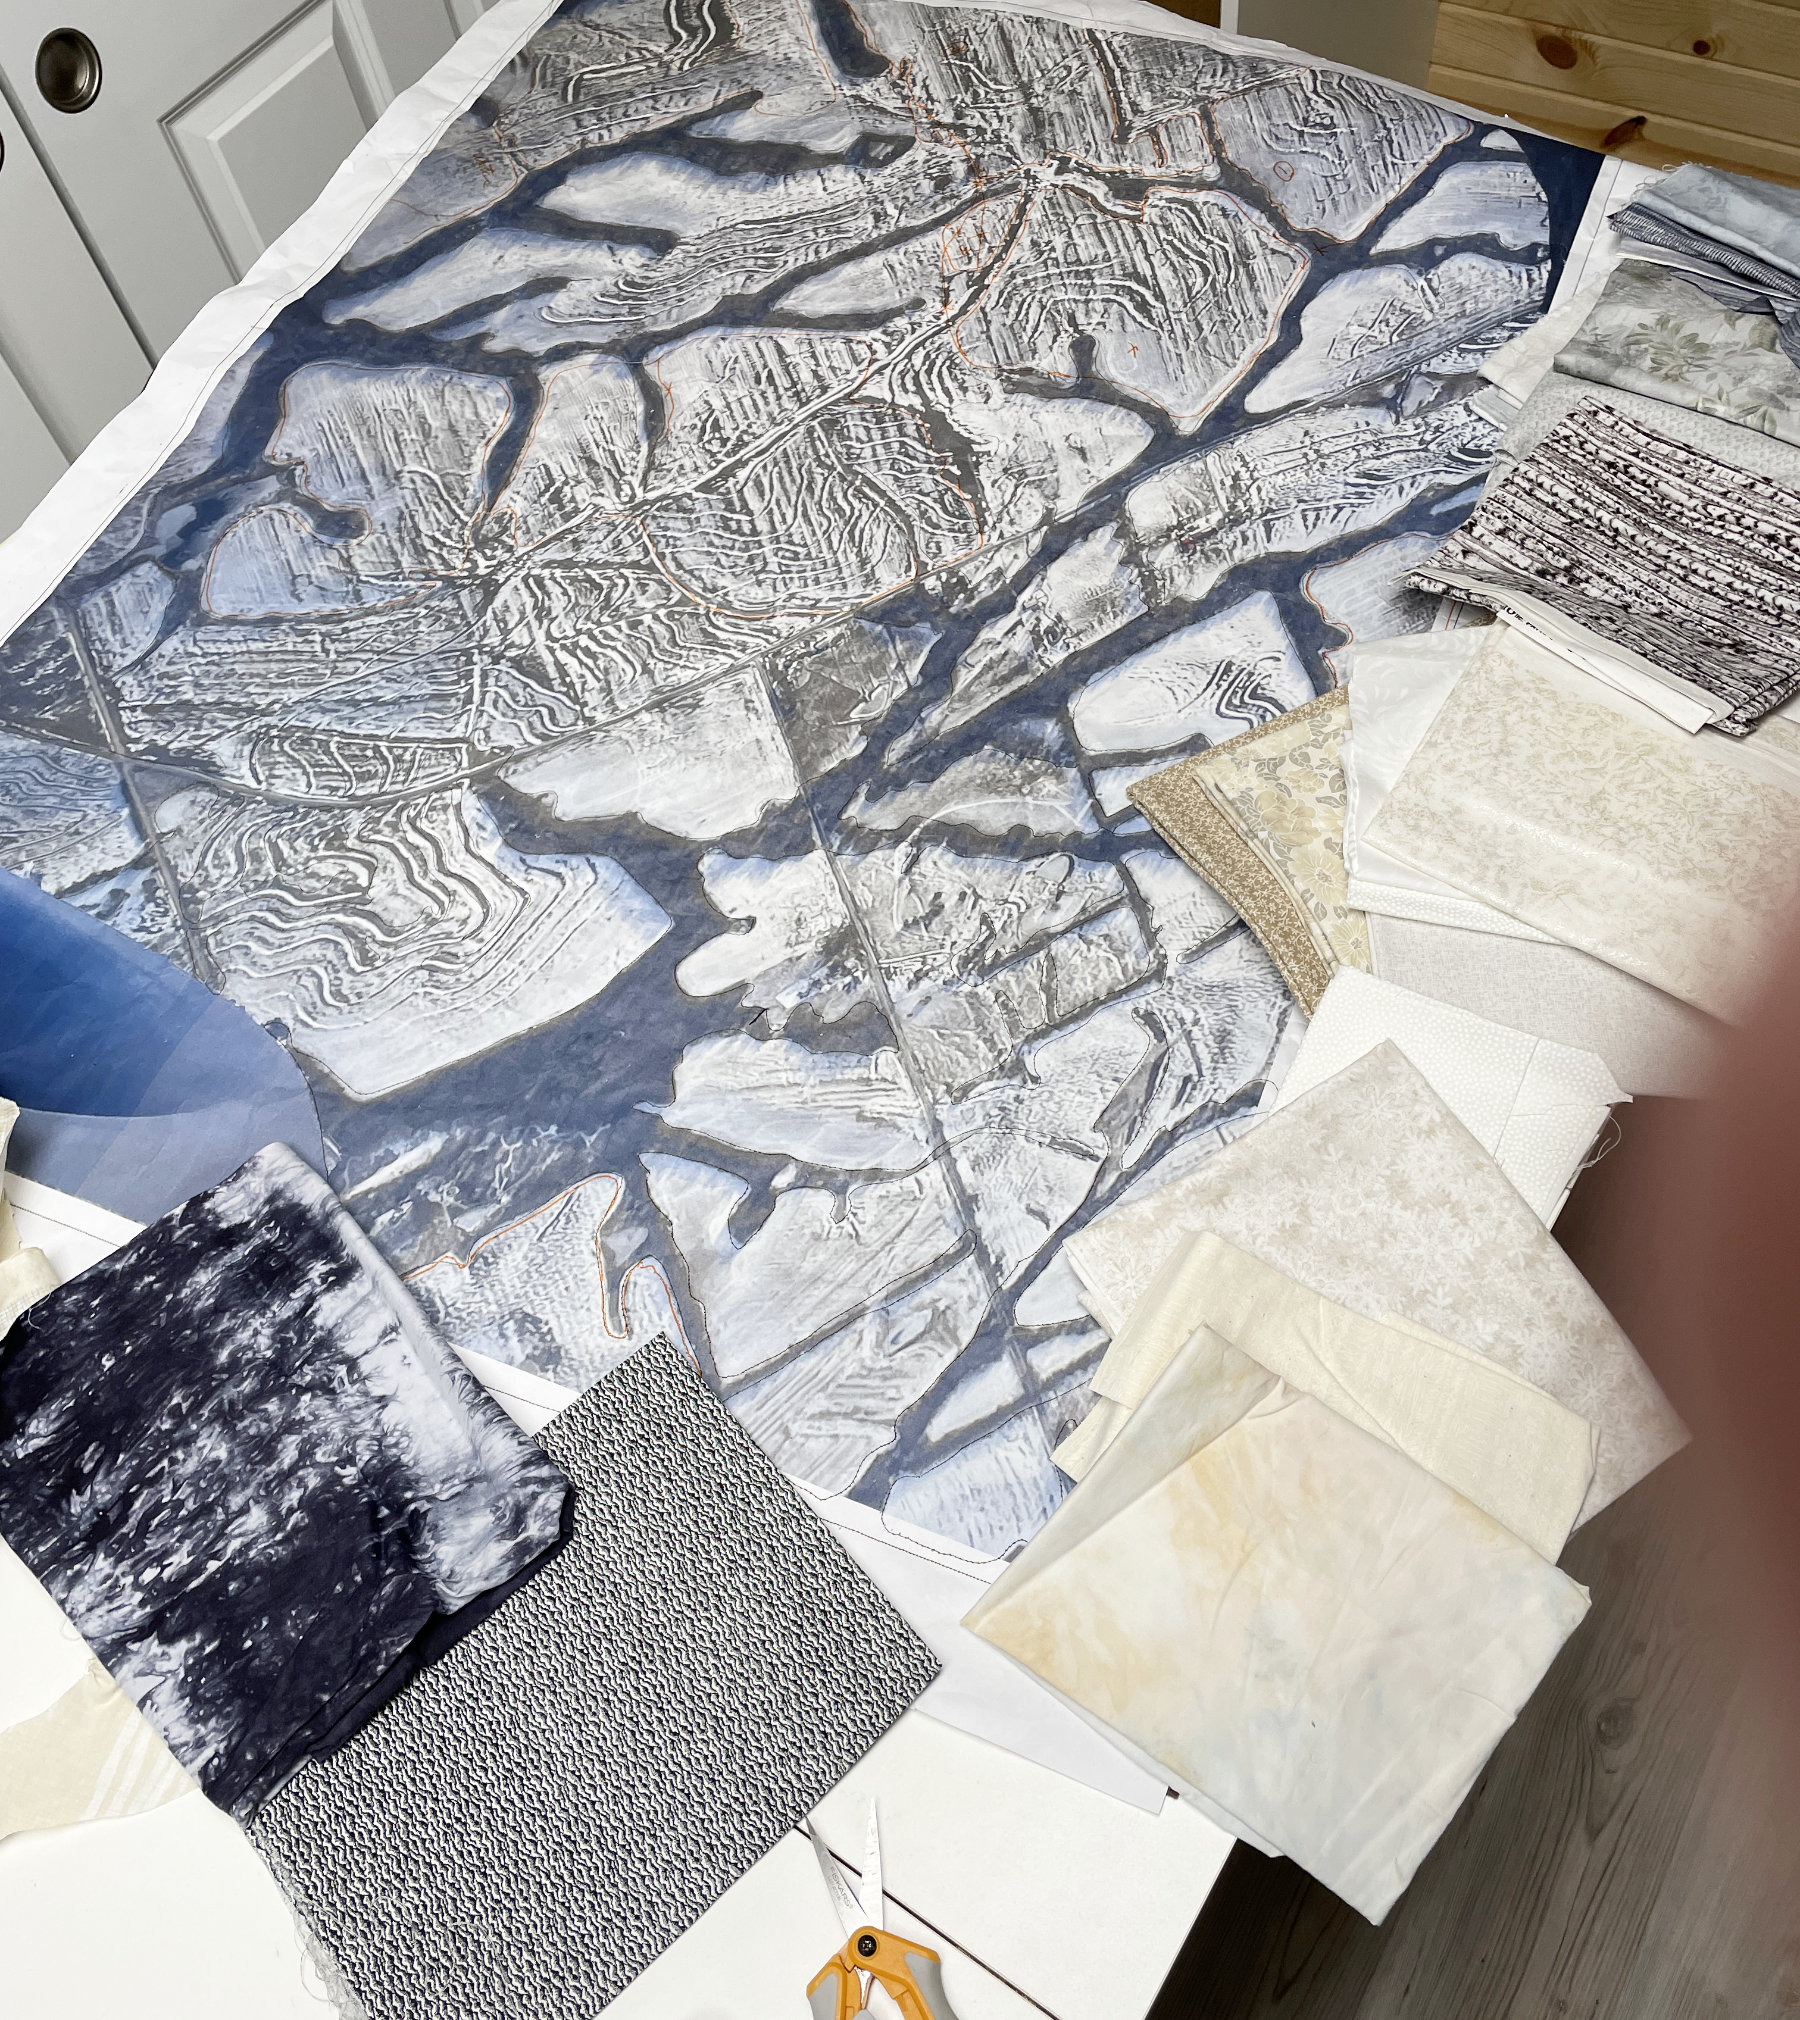
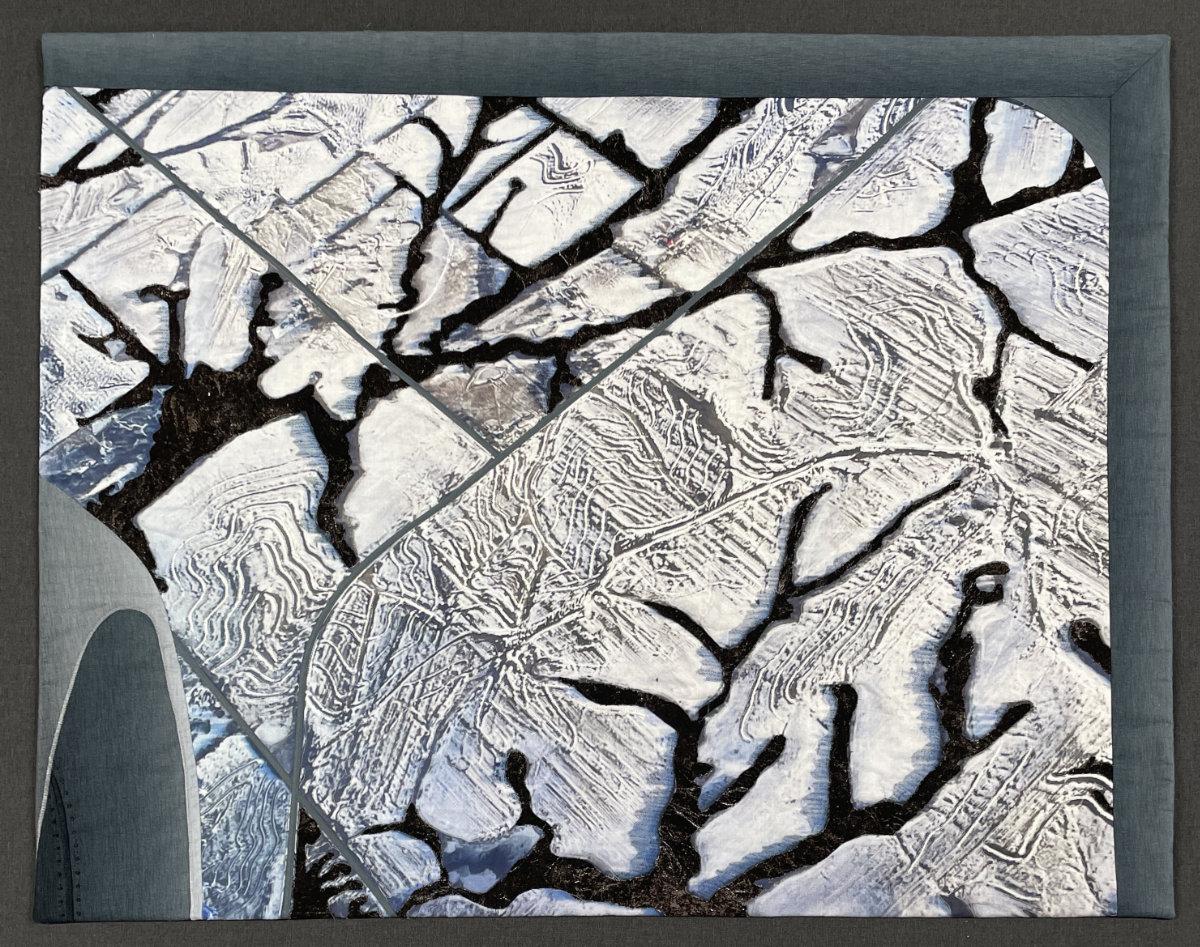
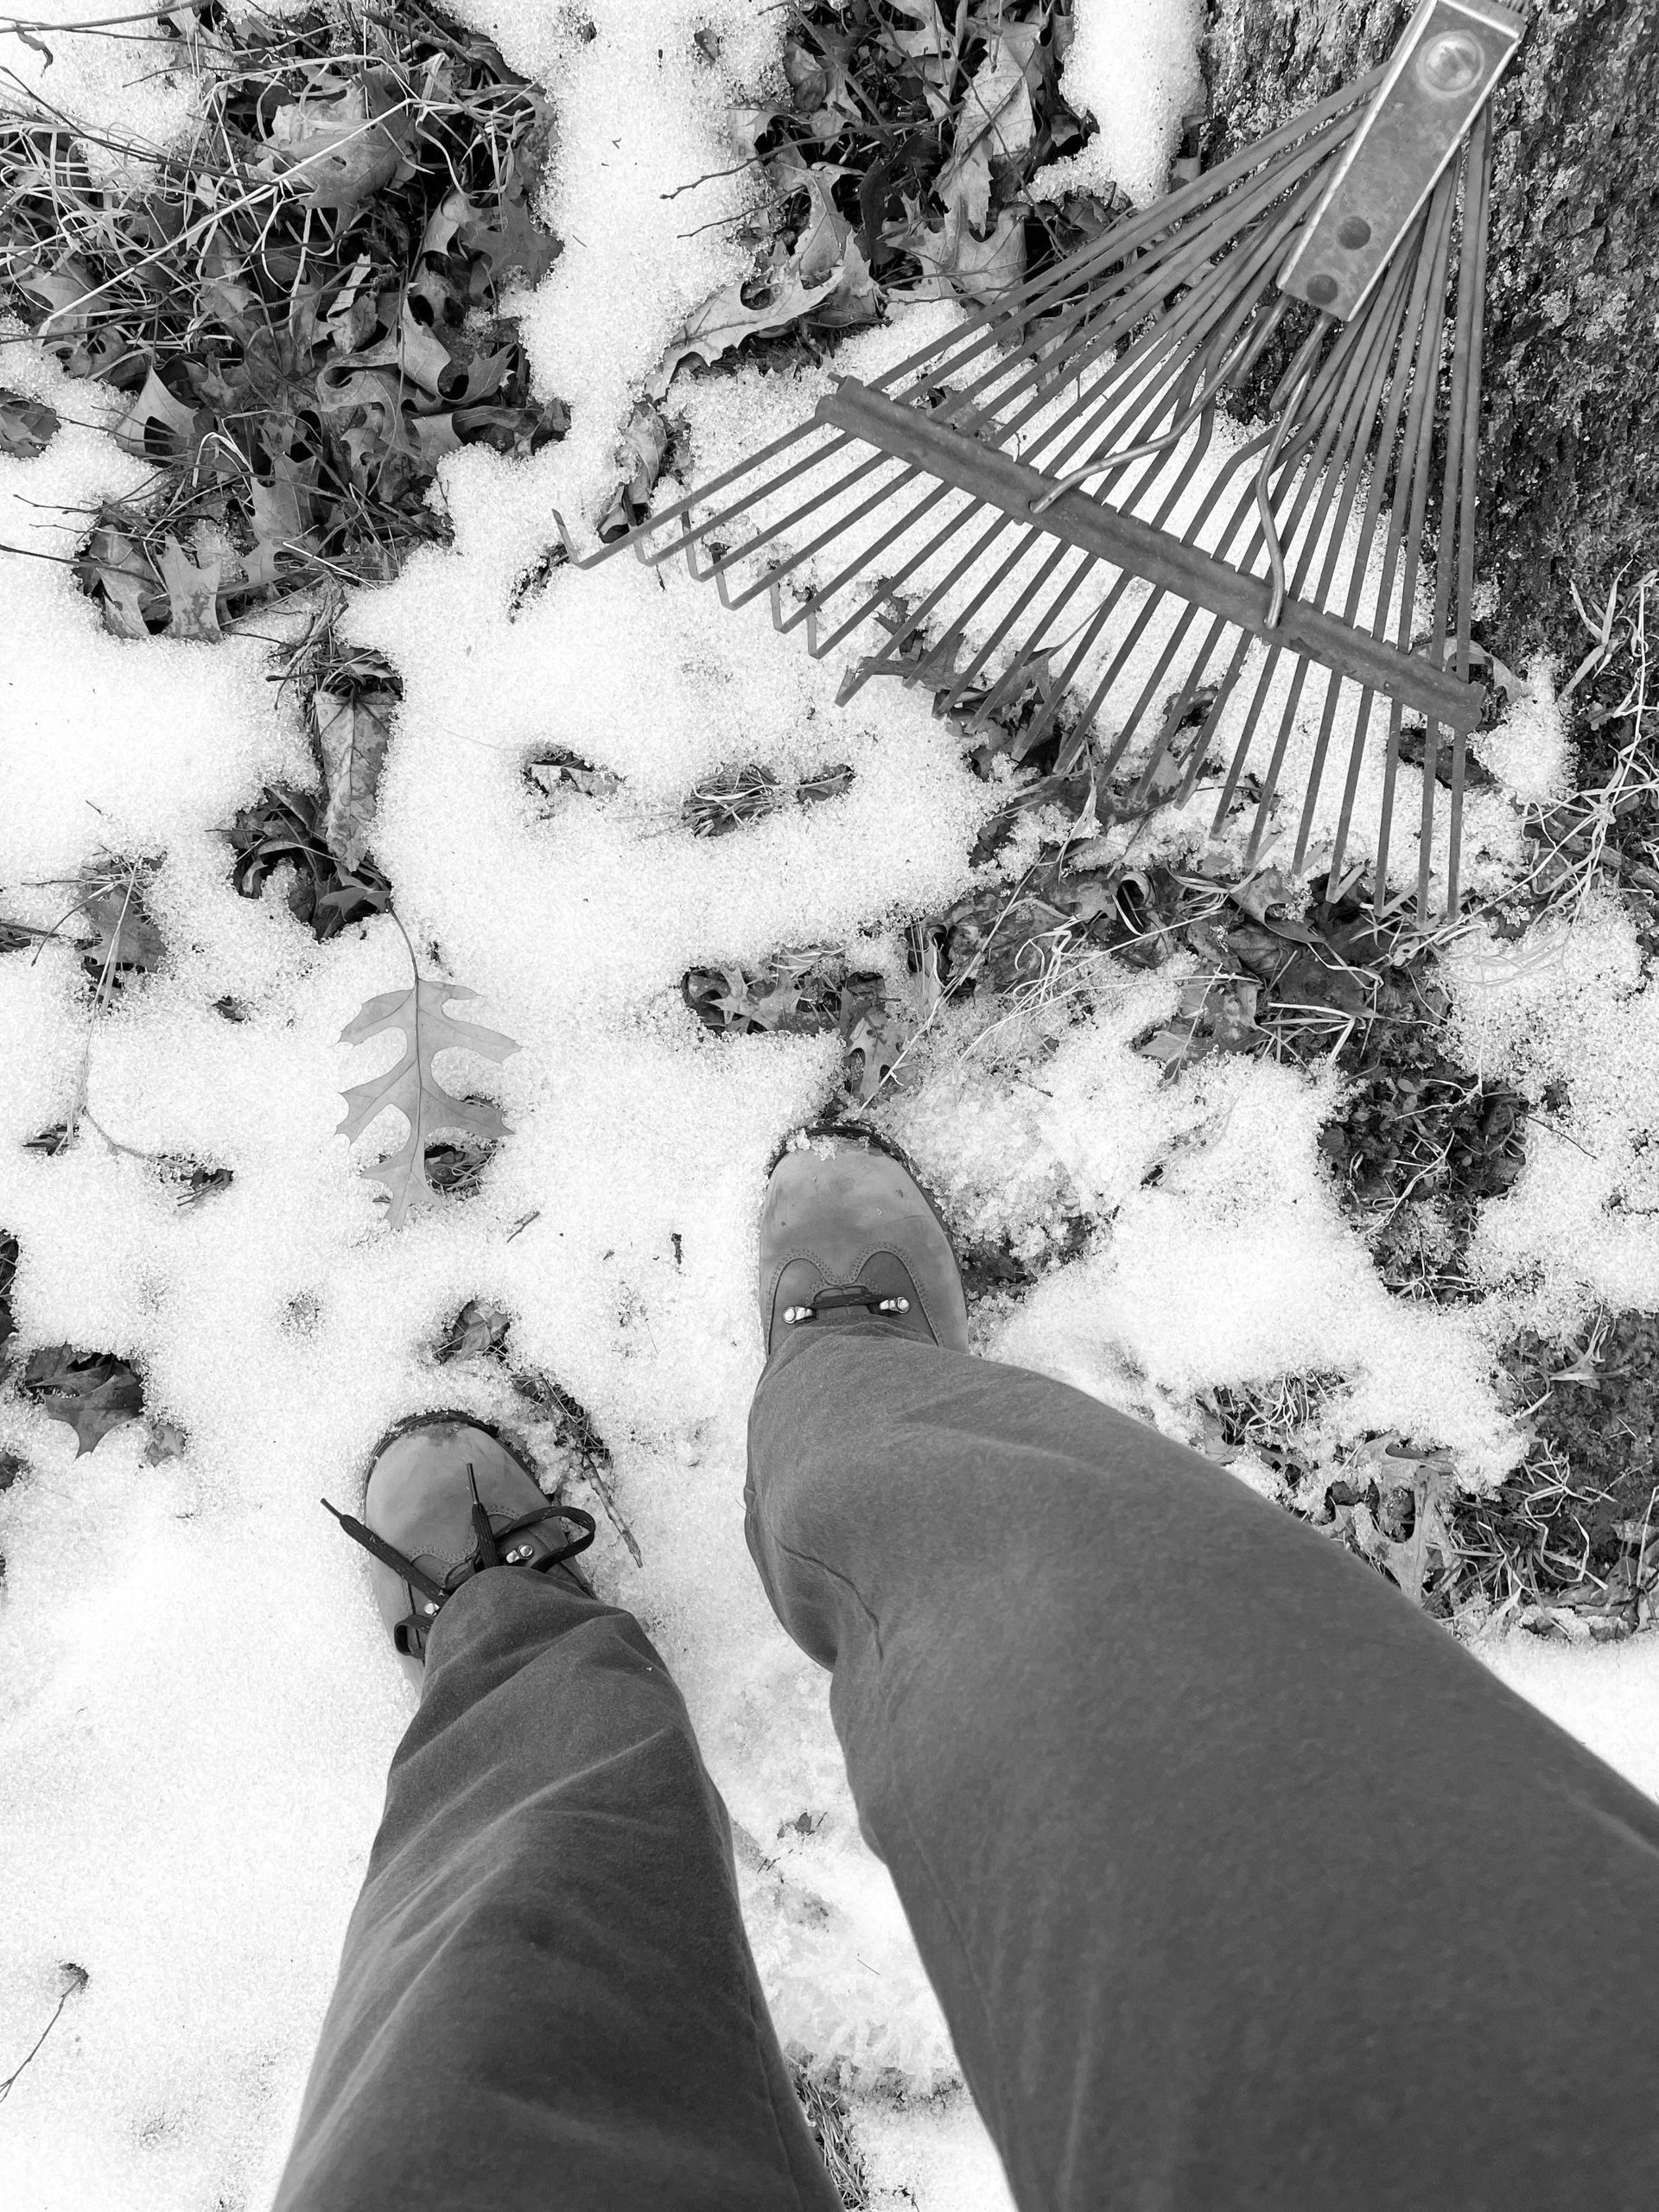
It was a close range “Birds Eye View” type image, and it really intrigued me. I’d already made my challenge quilt ~ “Kansas City Departure” (click here to read that post), but I had this strange desire to make another. A week after those quilts were due for jurying at the guild meeting, I changed the photo to grayscale,

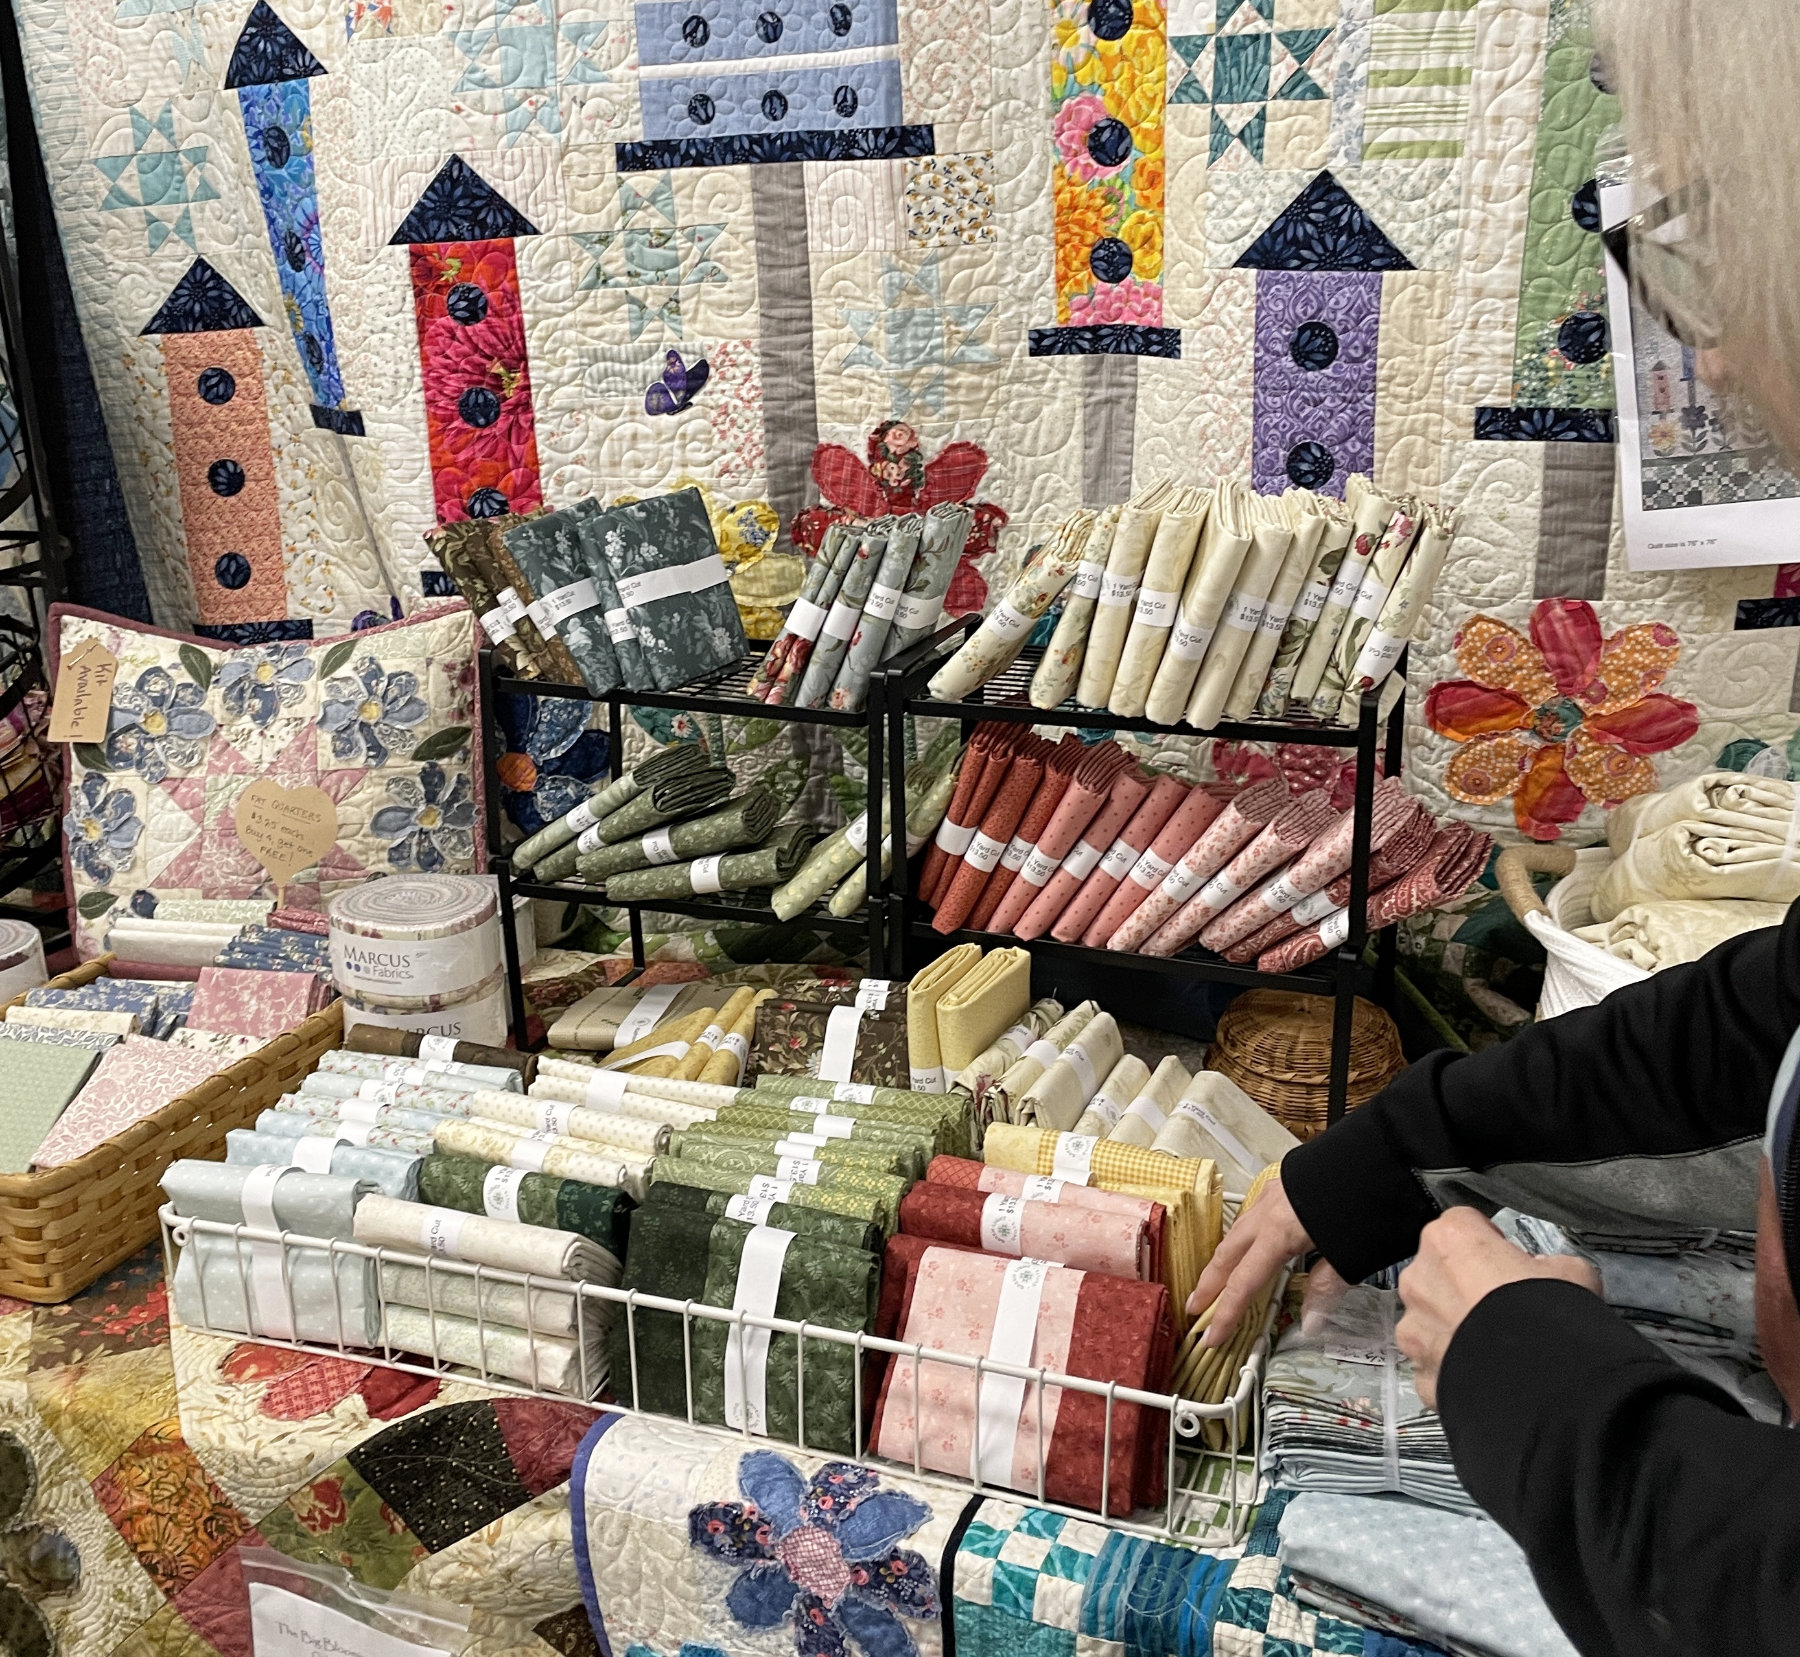
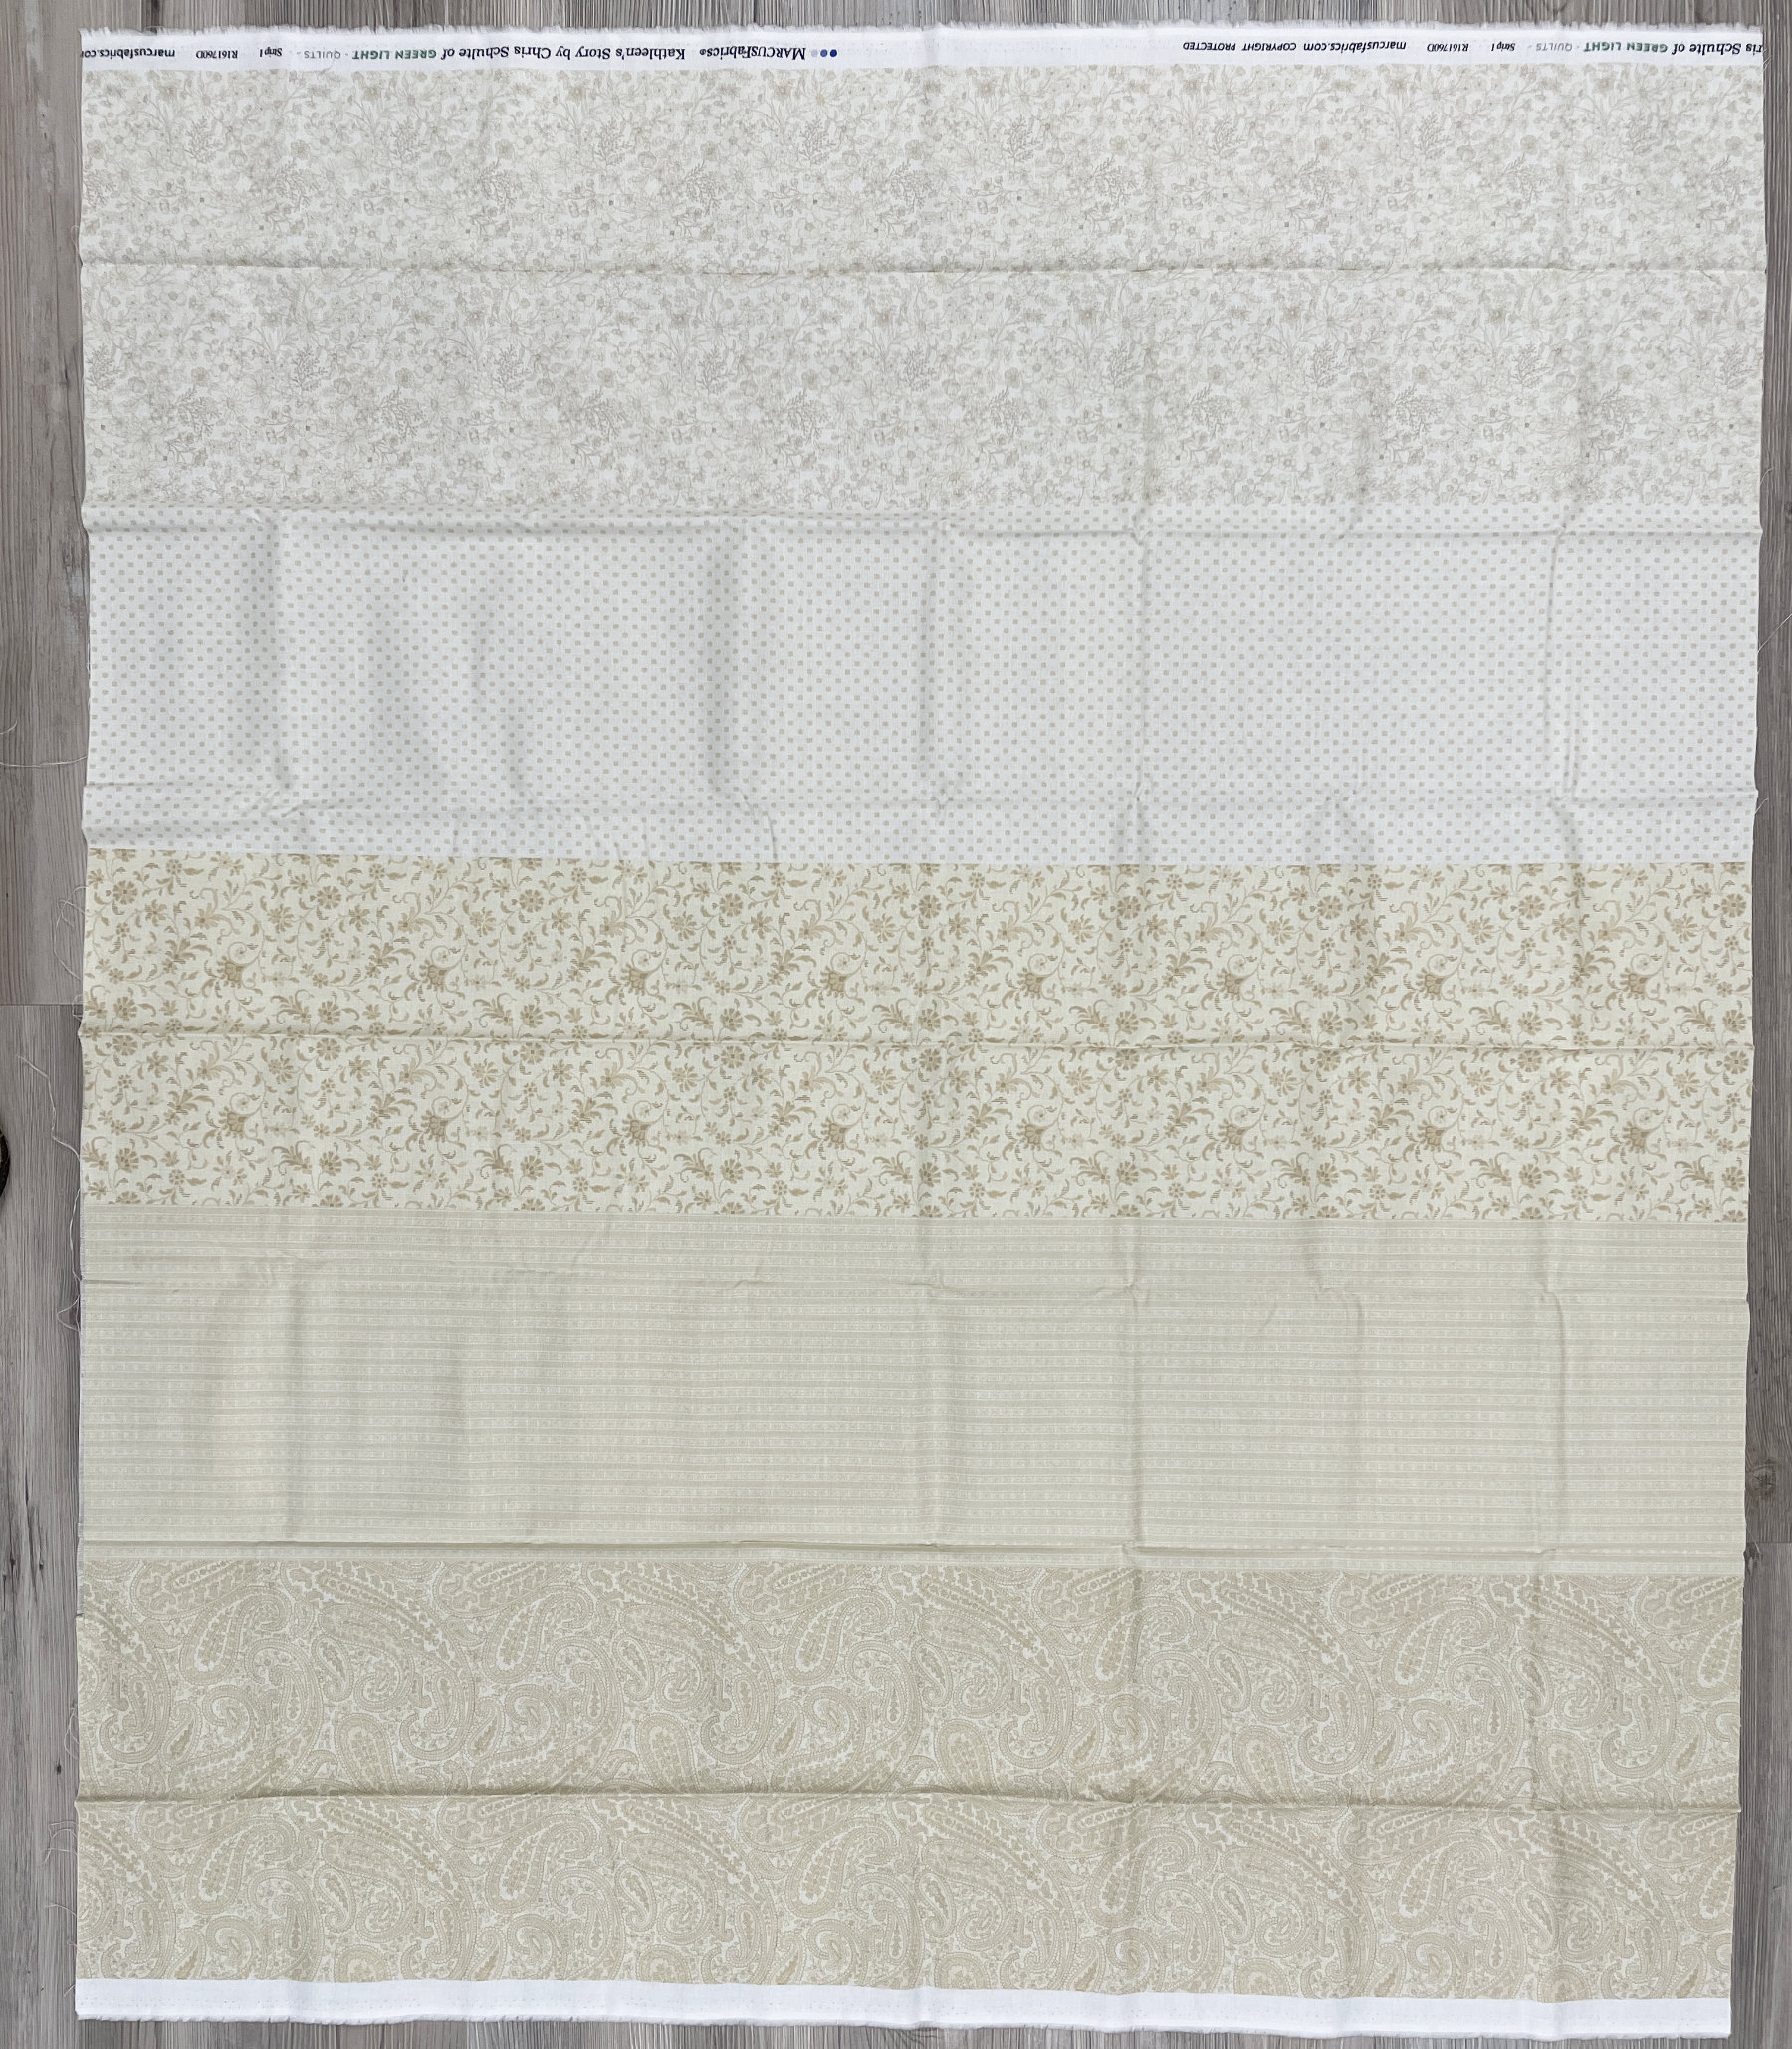
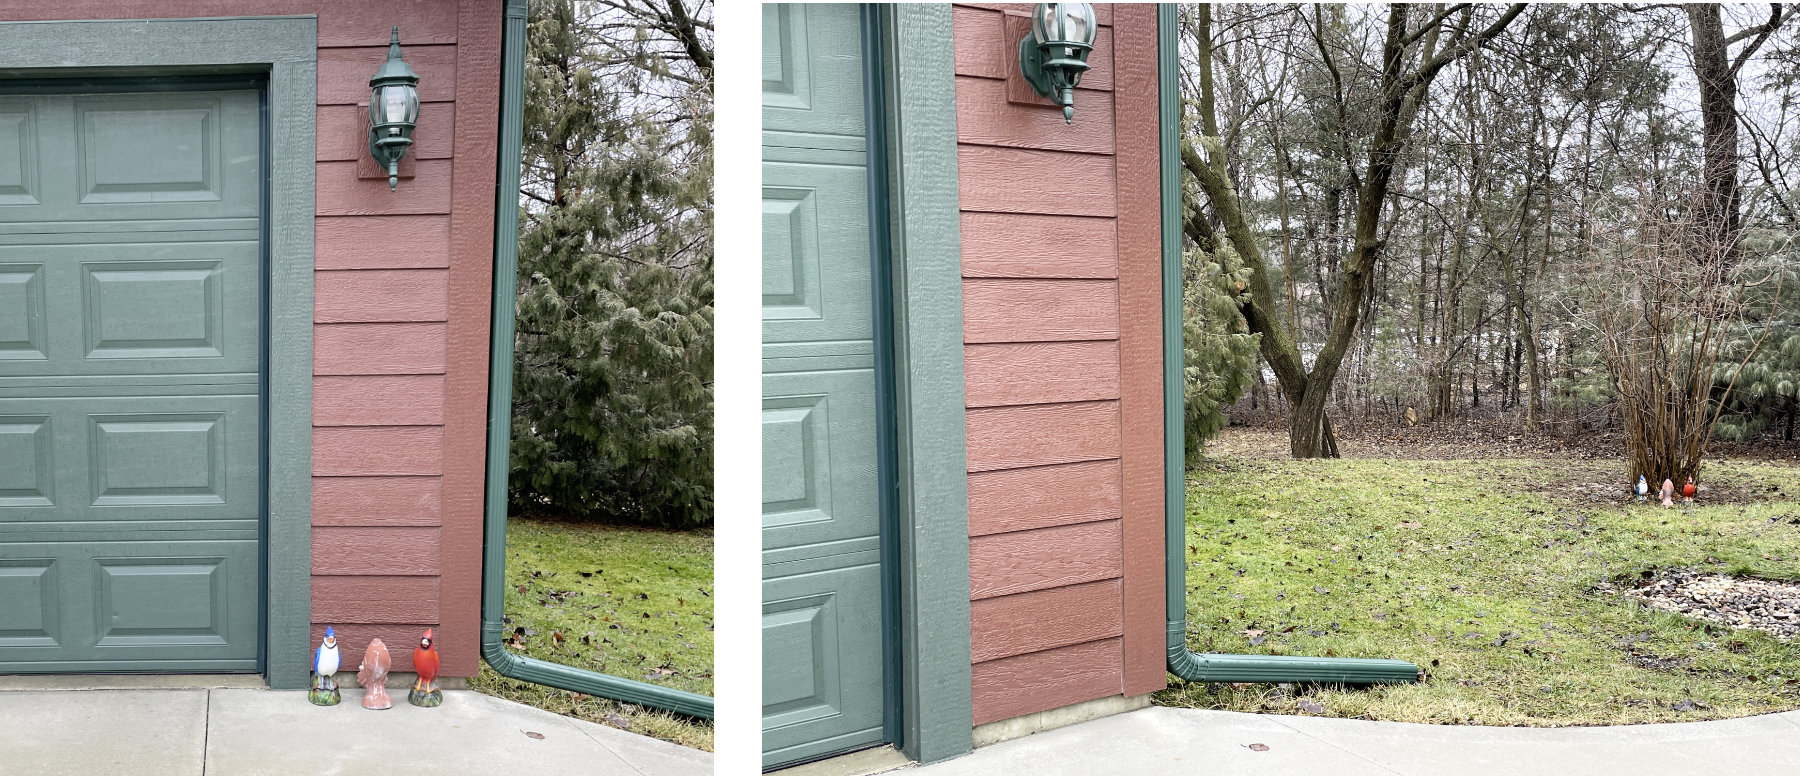
and enlarged it to the proper size using MS Excel™. I then printed many 8 1/2″ x 11″ paper sheets using a technique I’ve posted about before (click here for that post), and taped them together to make my full sized pattern. I knew I needed a good leafy fabric and found the perfect one online.

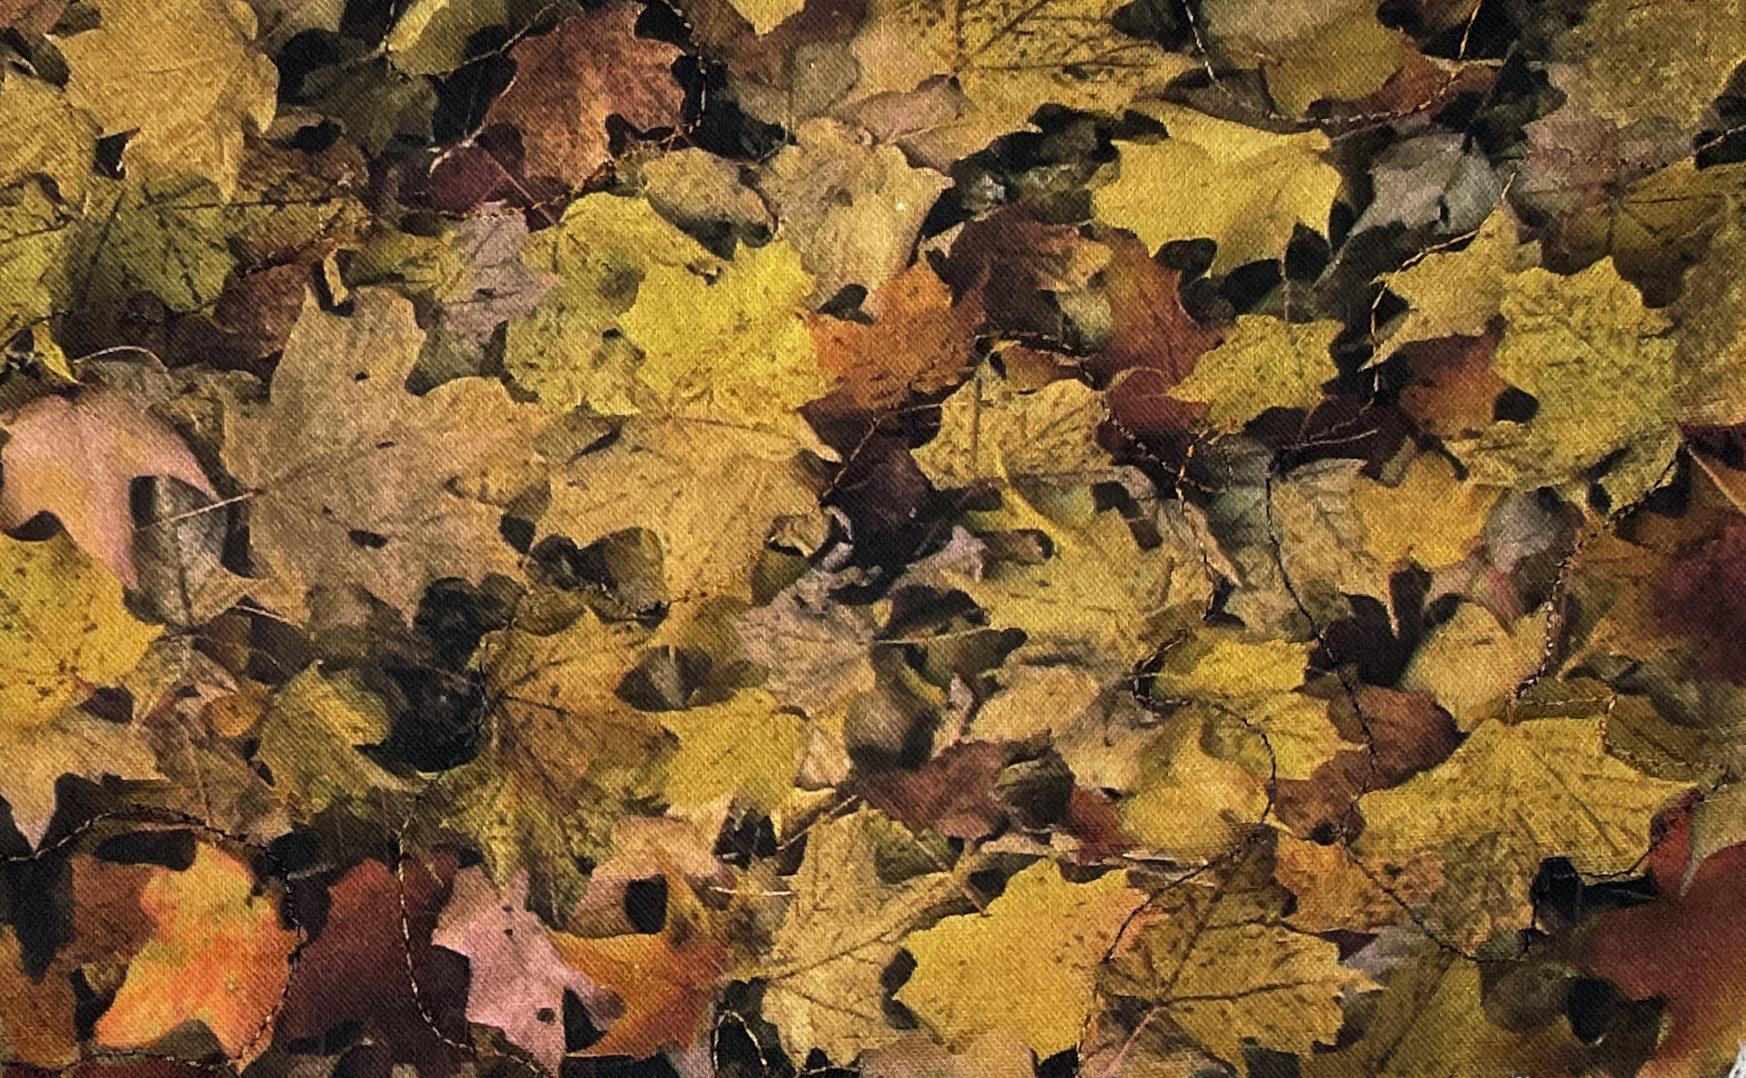
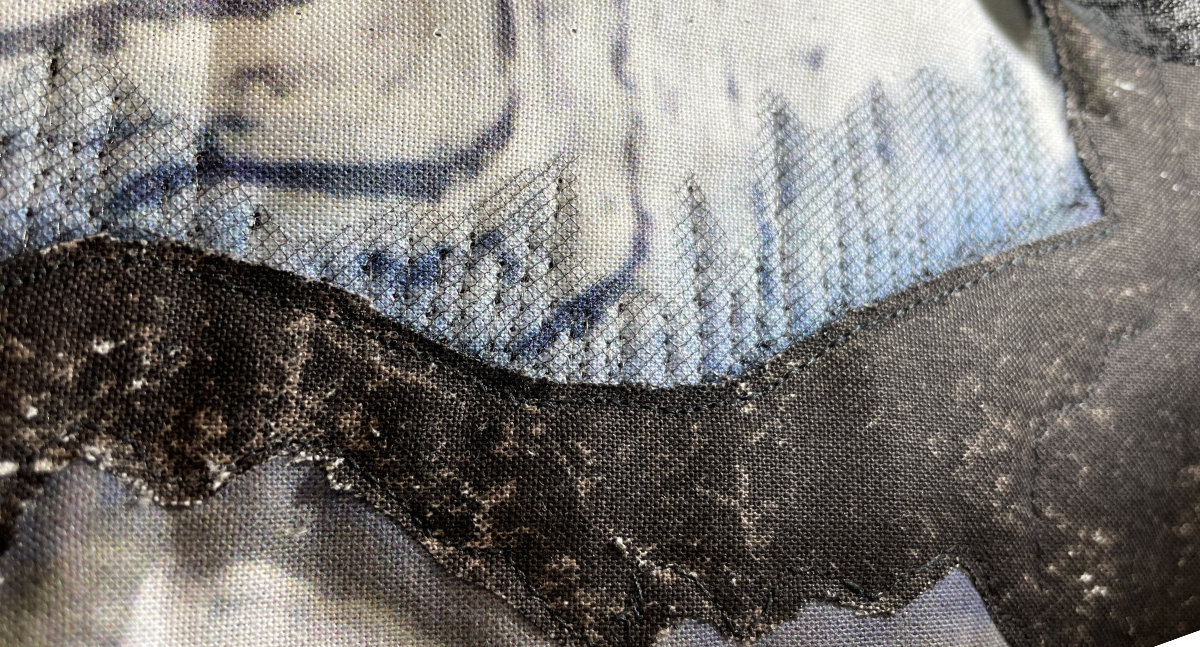
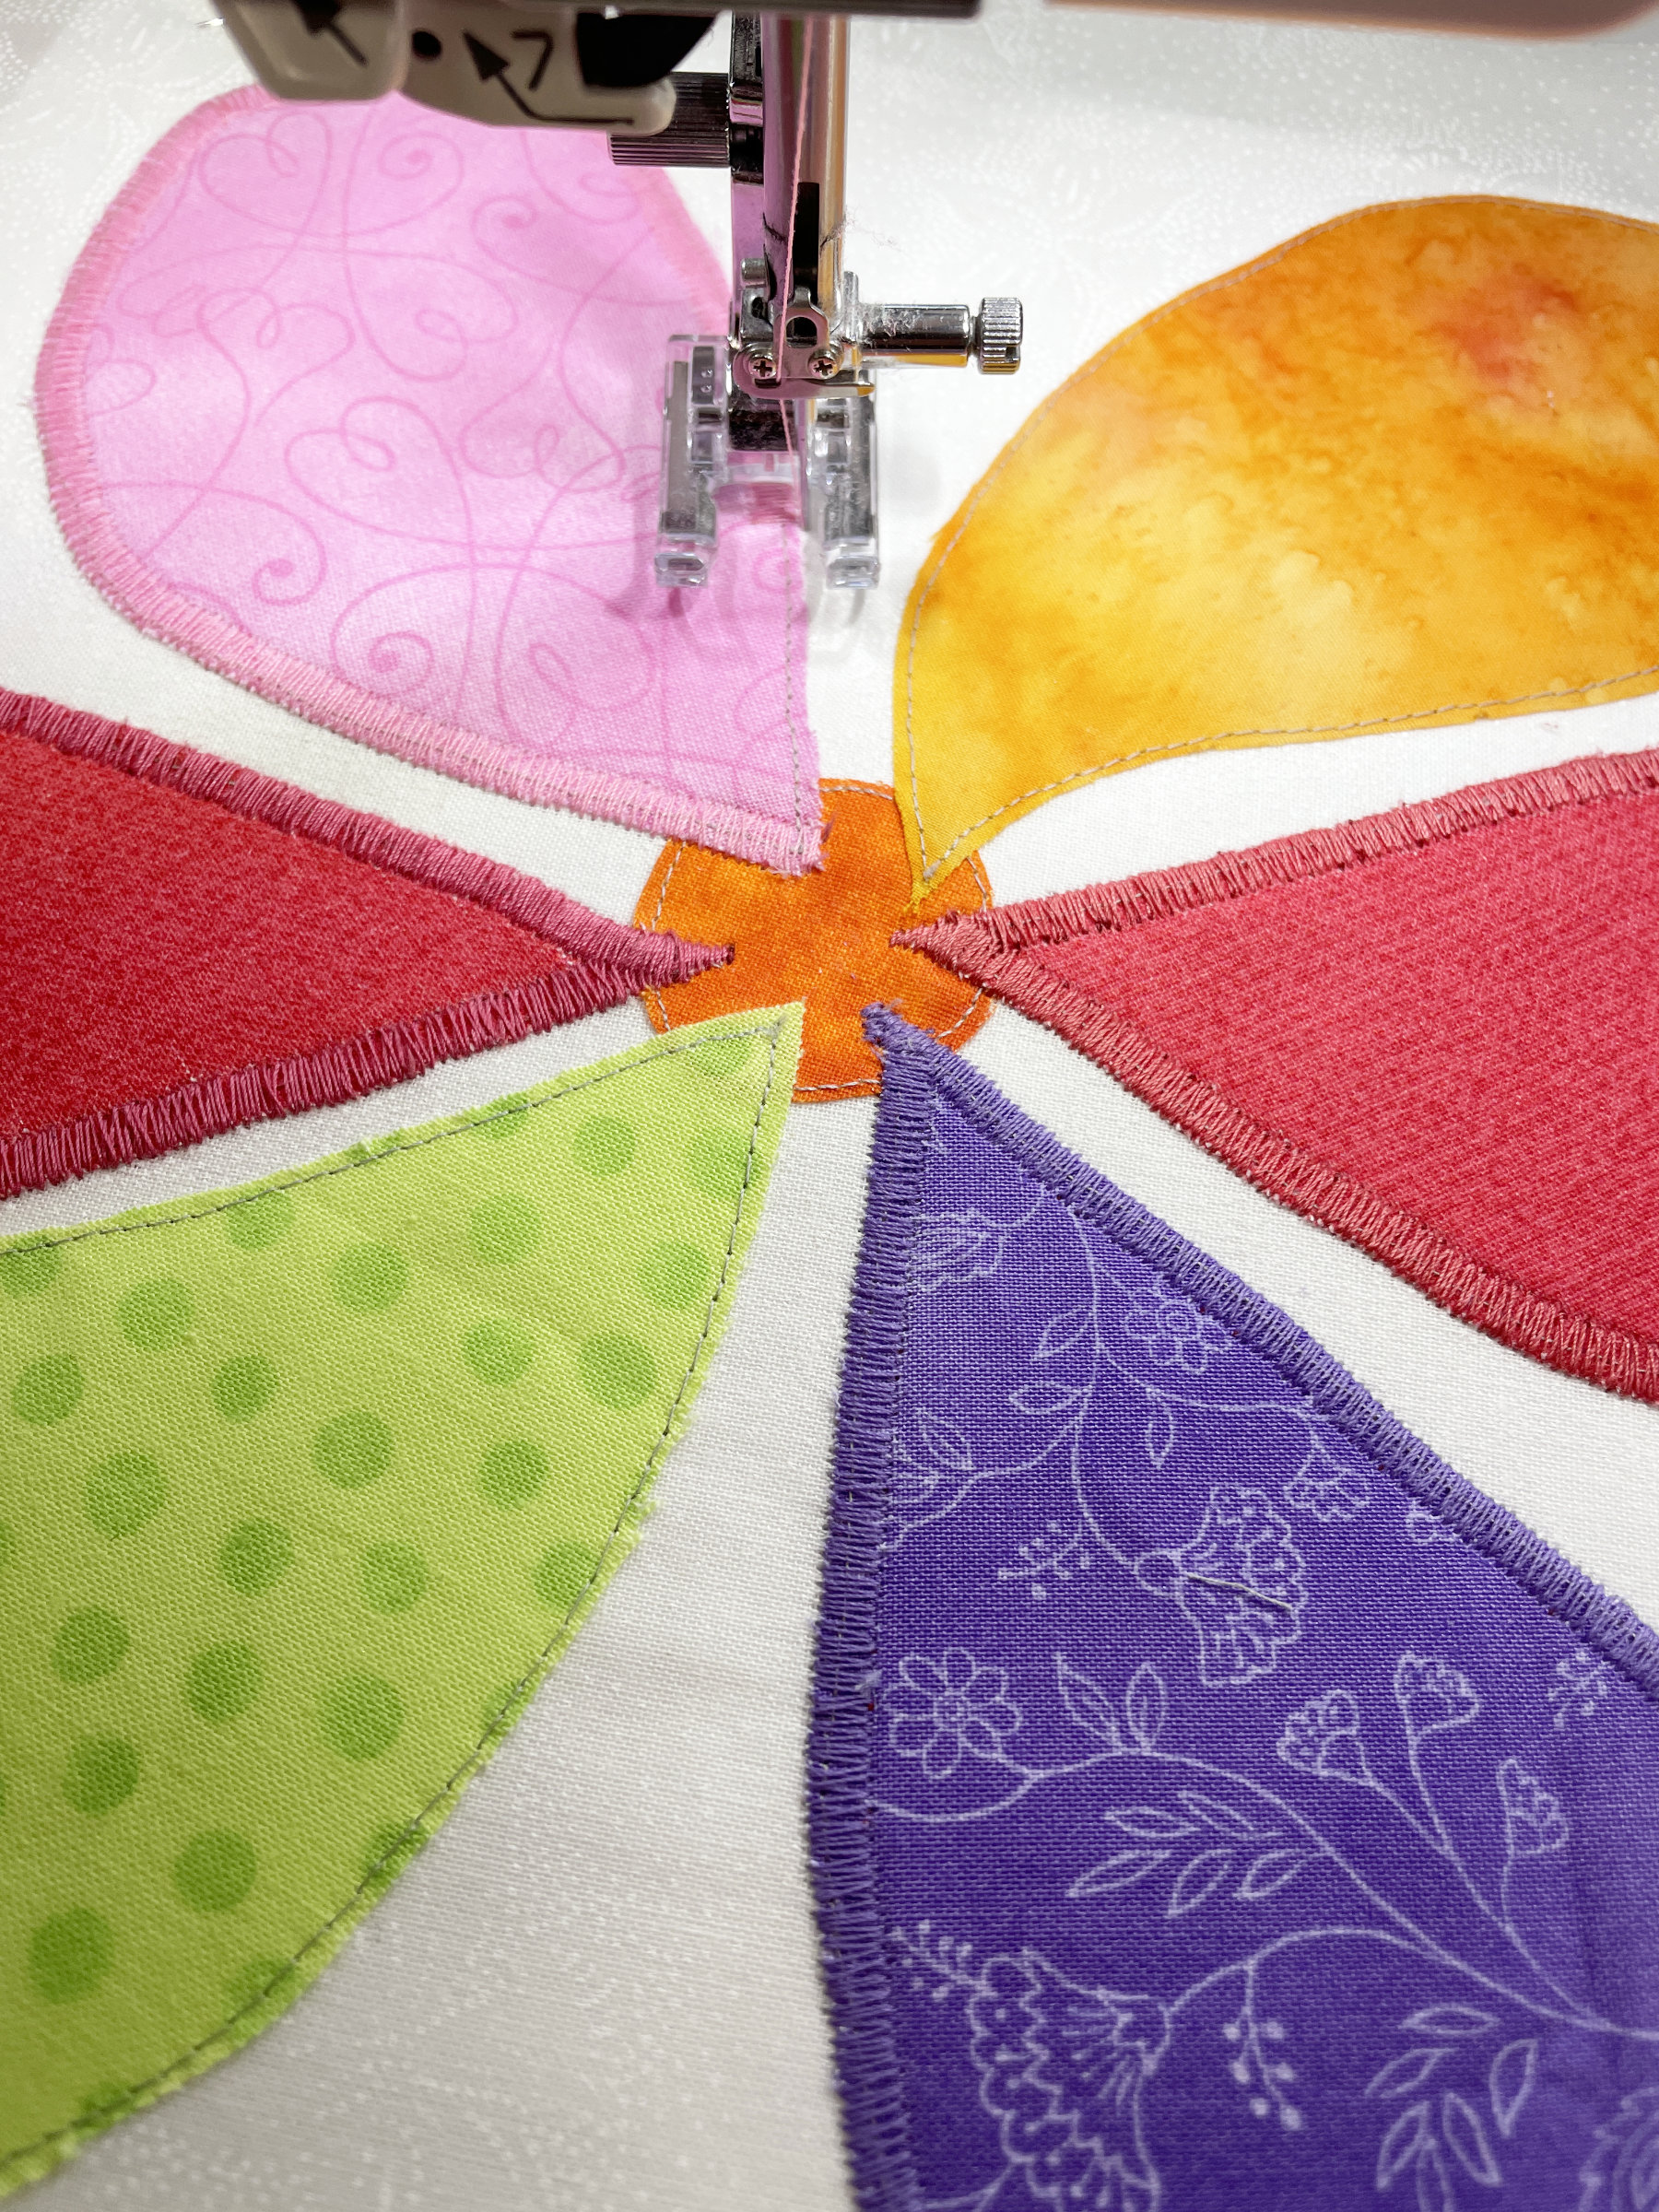
The rest of the fabrics were pulled from my stash and the fun began. I chose to sew directly onto the printed photo using raw-edged Repliqué, beginning by adding the snow to the leaf fabric (you might notice – I forgot to take photos while making the quilt, so these were taken later and include quilting).

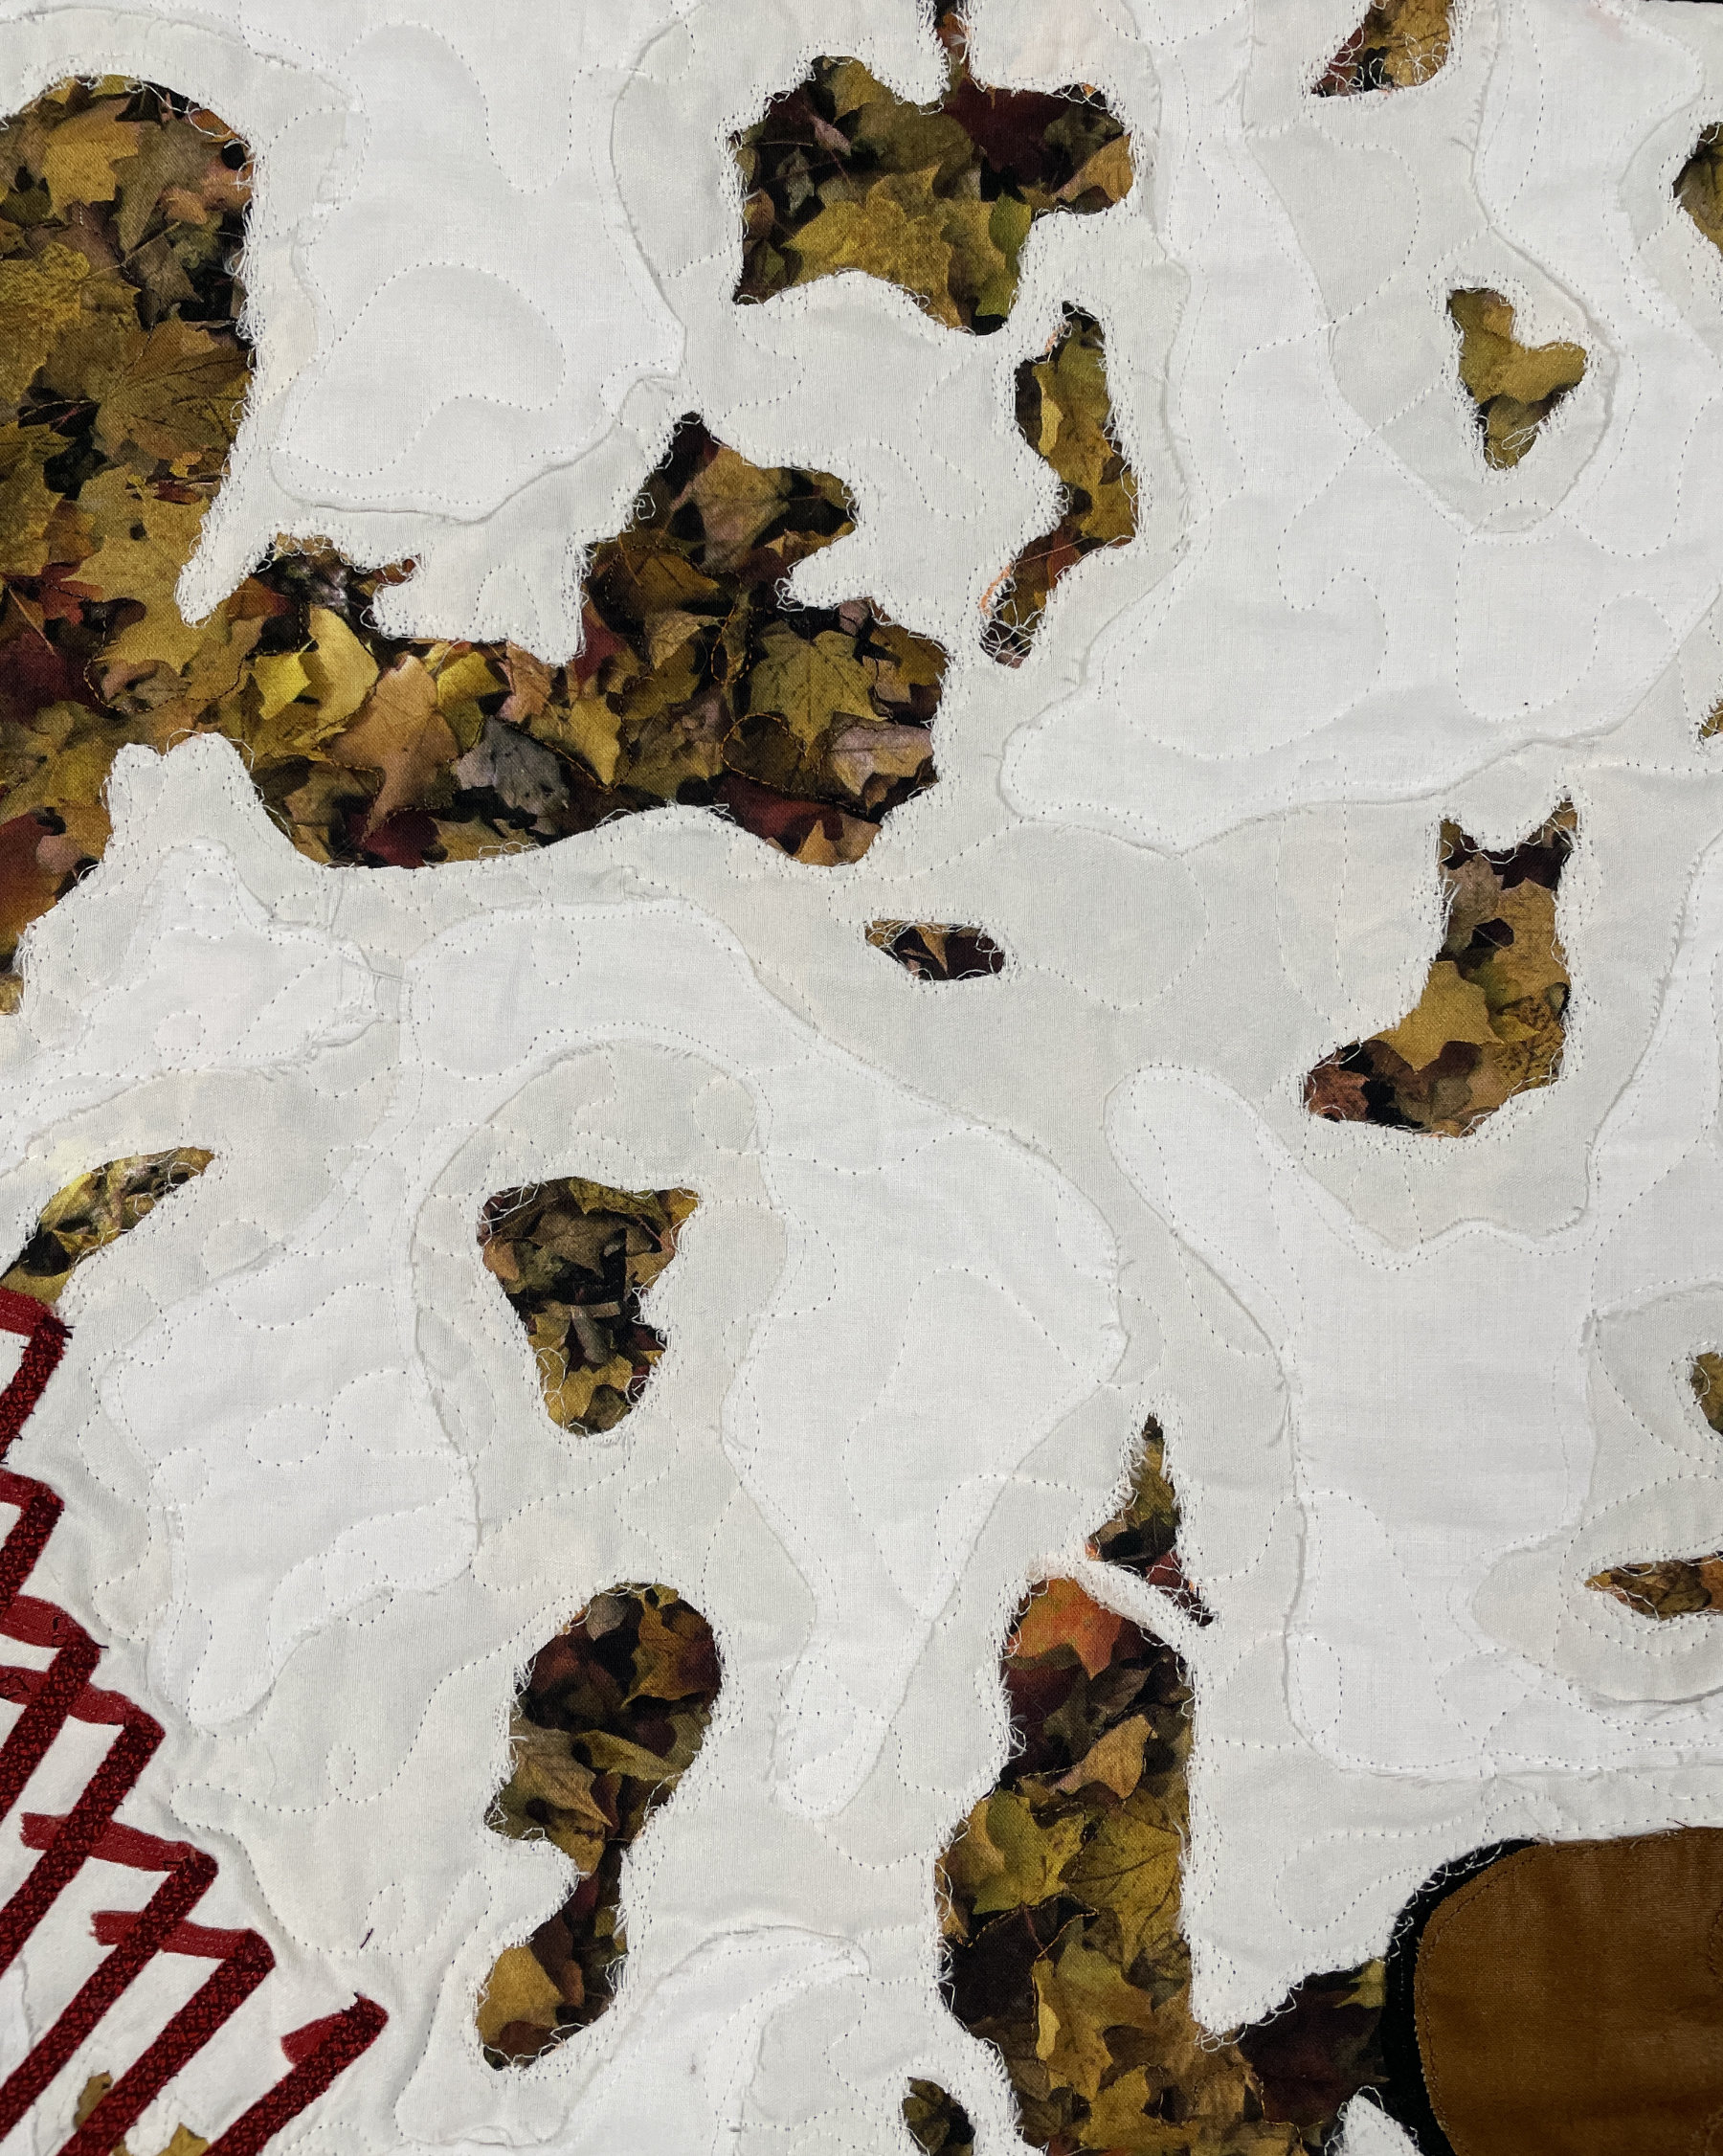
Then the tree trunk and the rake were stitched in place (I liked red better than the green on the original photo).

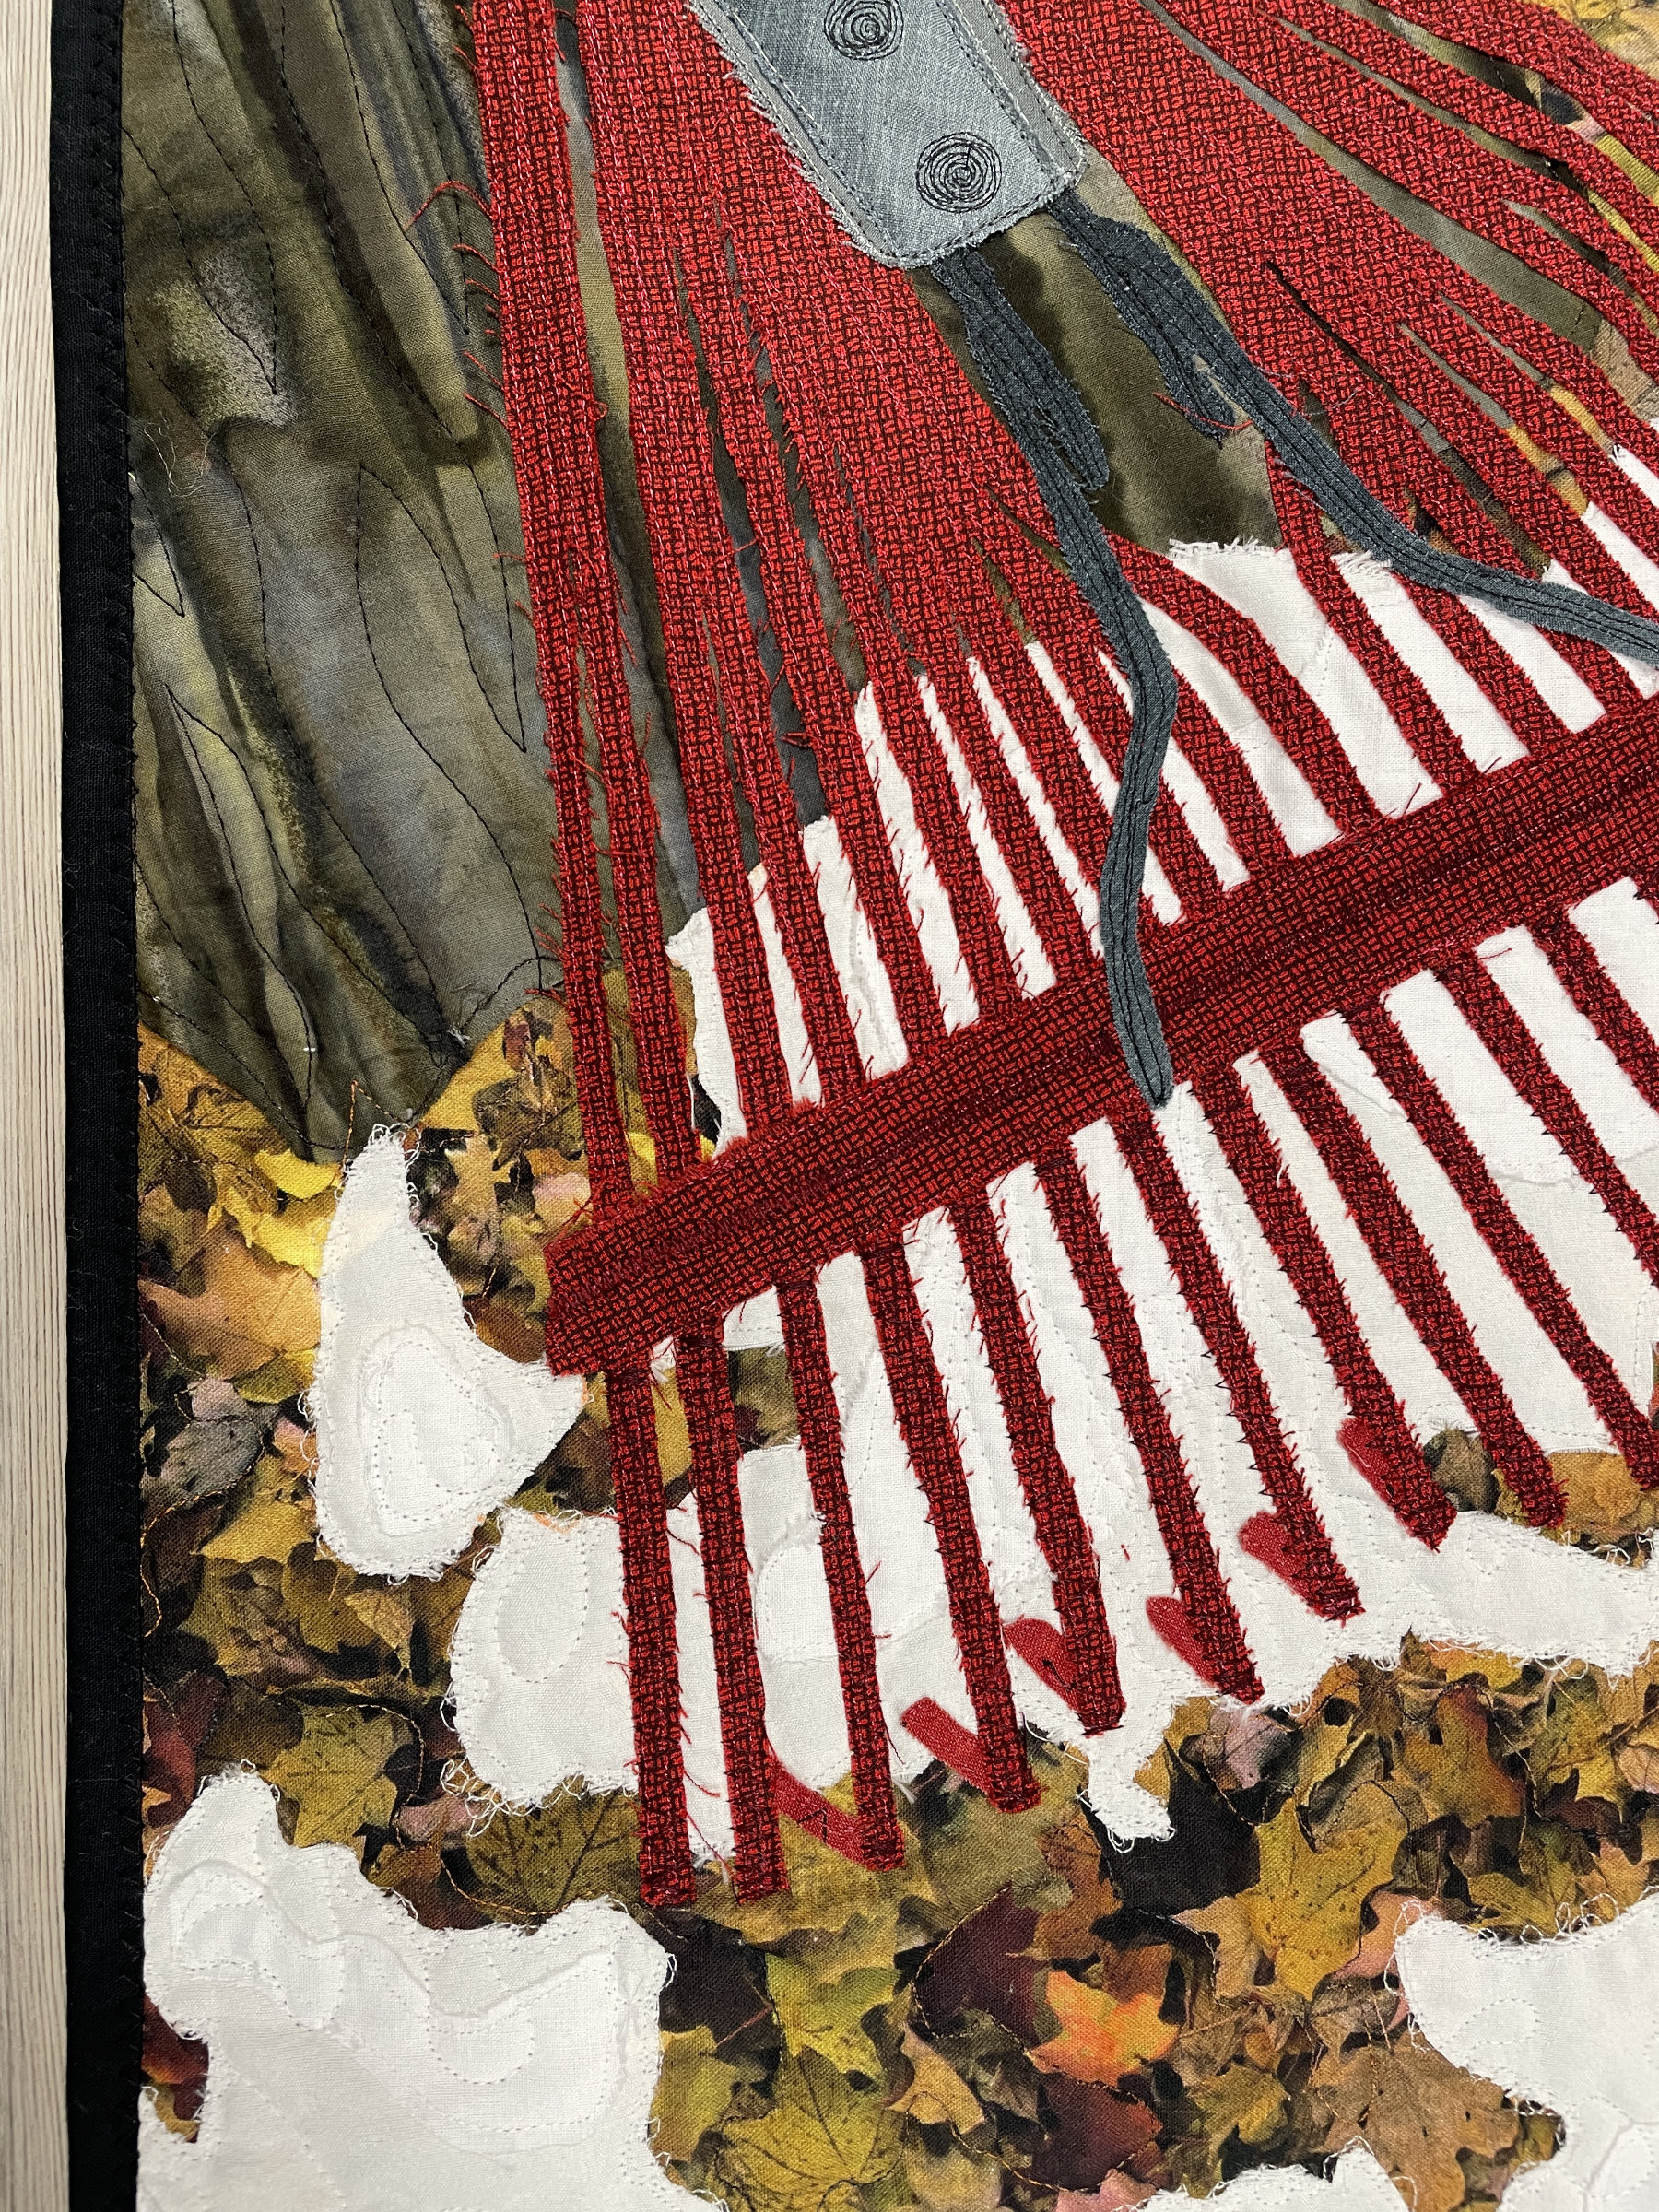
I knew that doing this all raw edged would result in some fuzzy edges ~ and I’m trying not to let it bother me 😂.

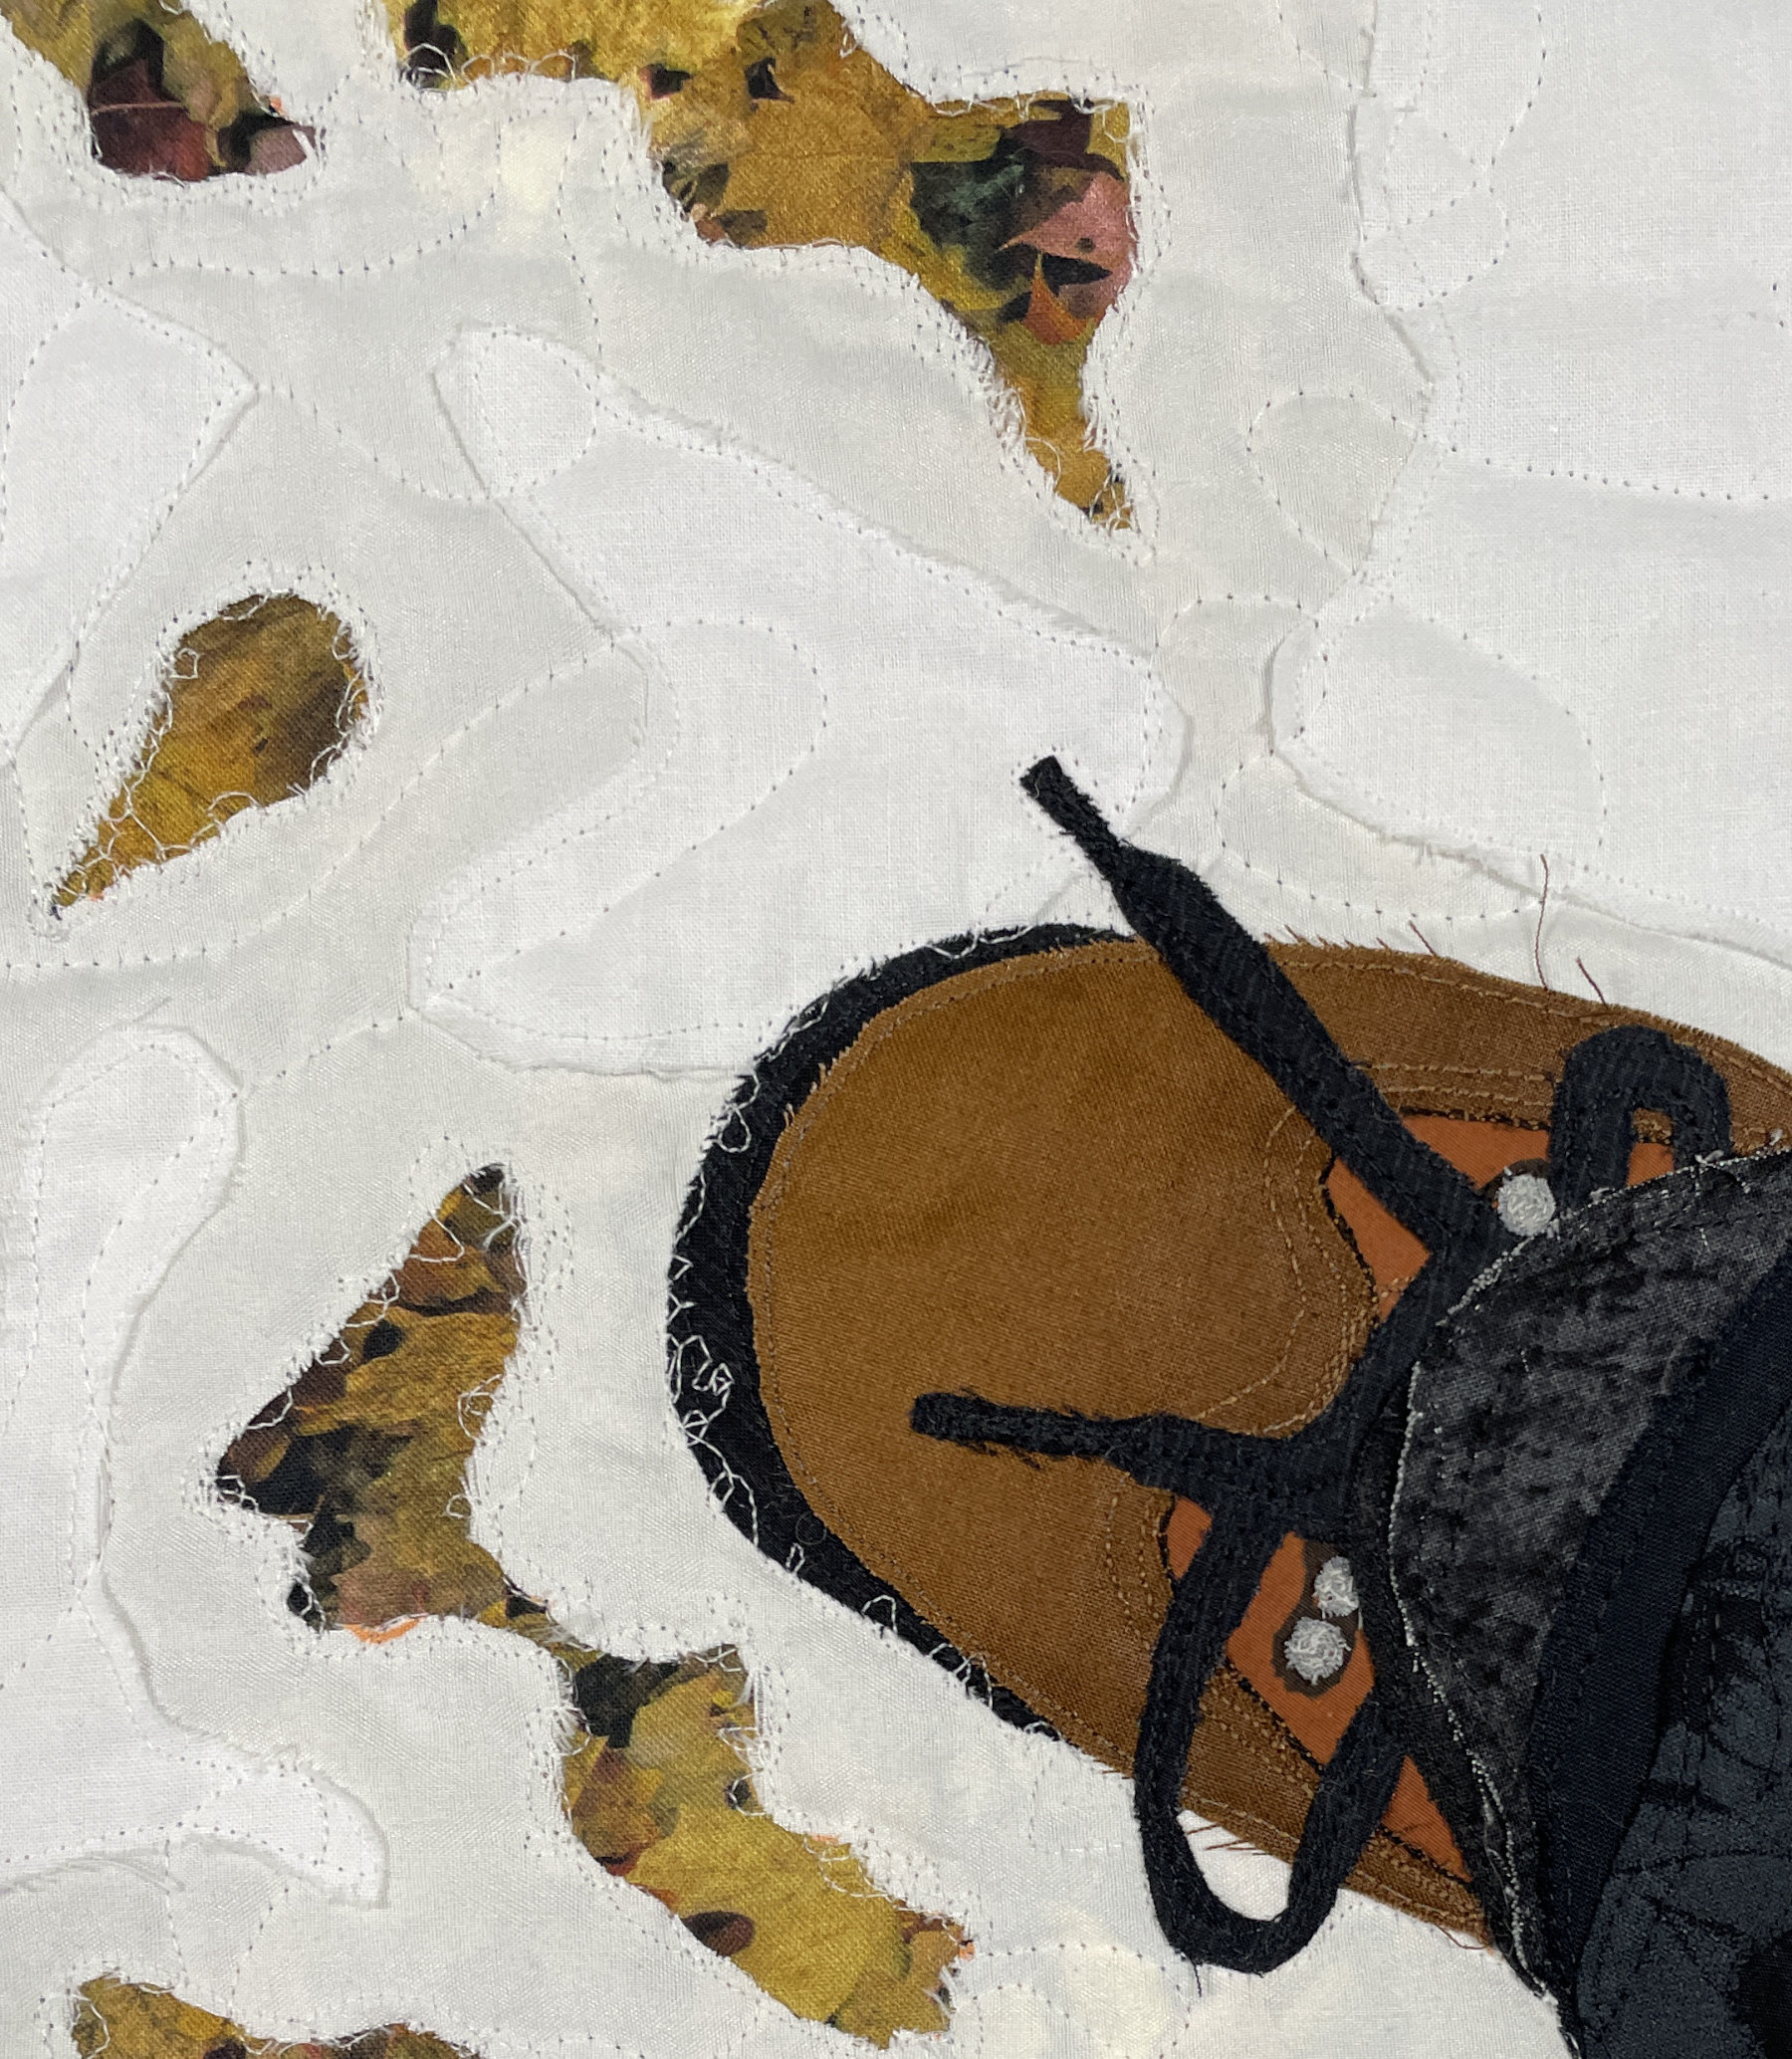
Finally my boots and legs were added. I enjoyed the entire process and had it finished quite quickly ~ simply because I was having fun.

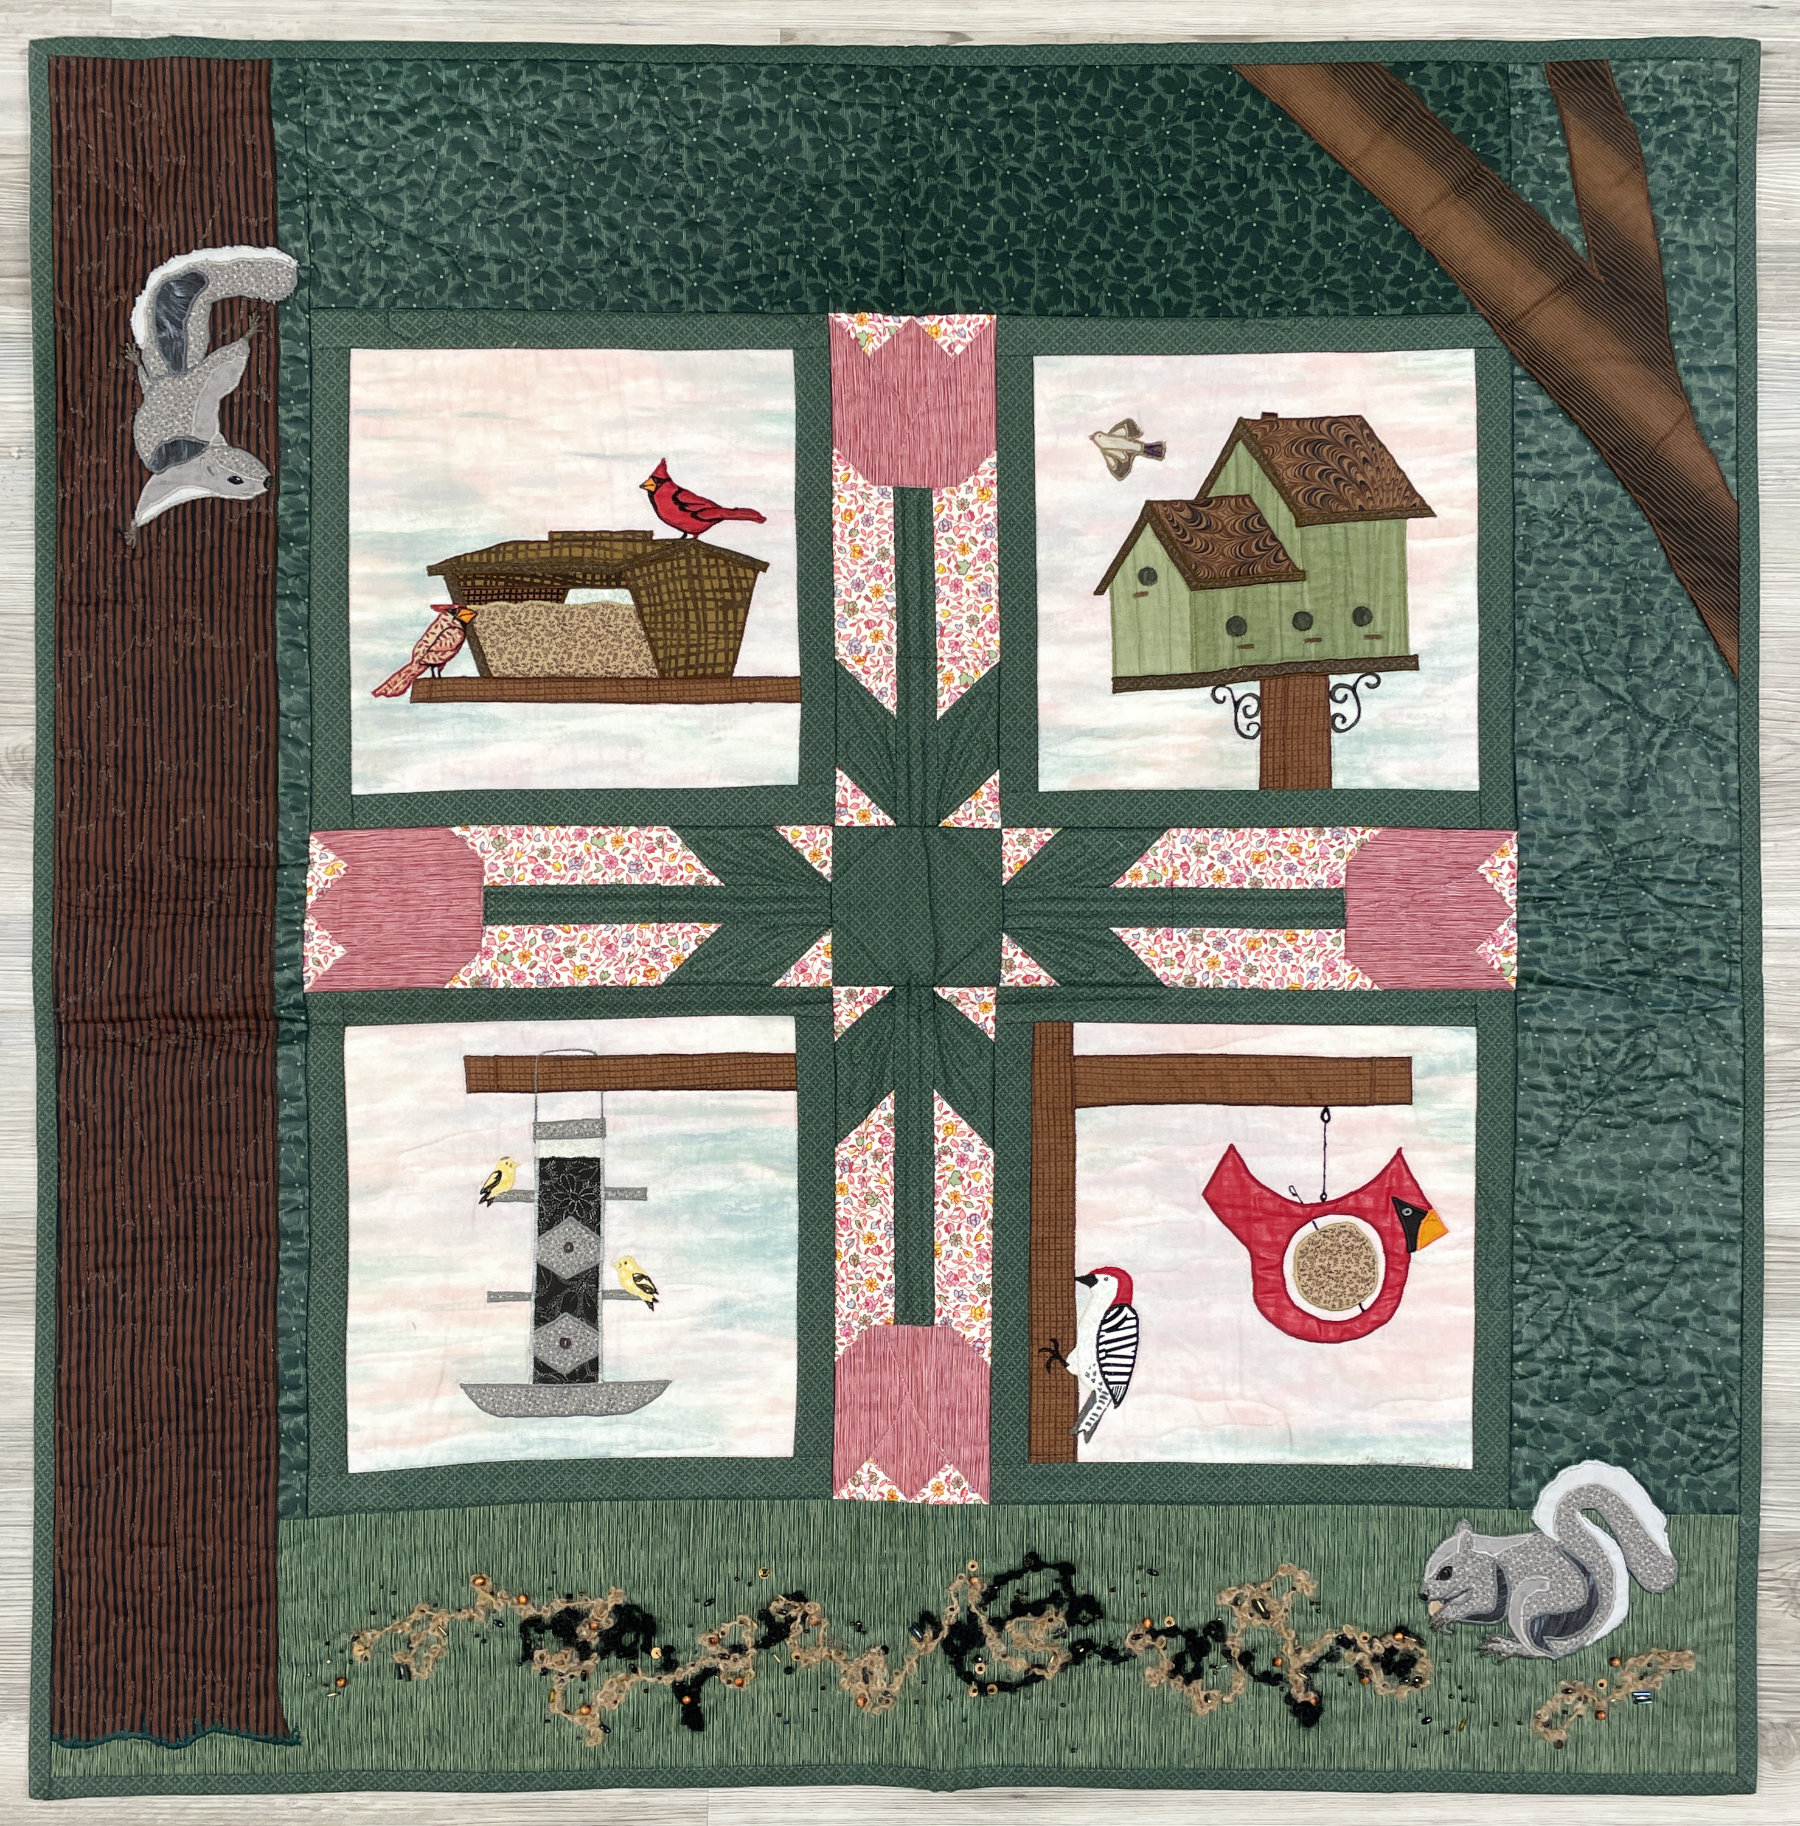
It was done in time for the Crazy Quilter’s show and I named it “Spring Thaw”.

I was thrilled to have it hanging with the entire exhibit.

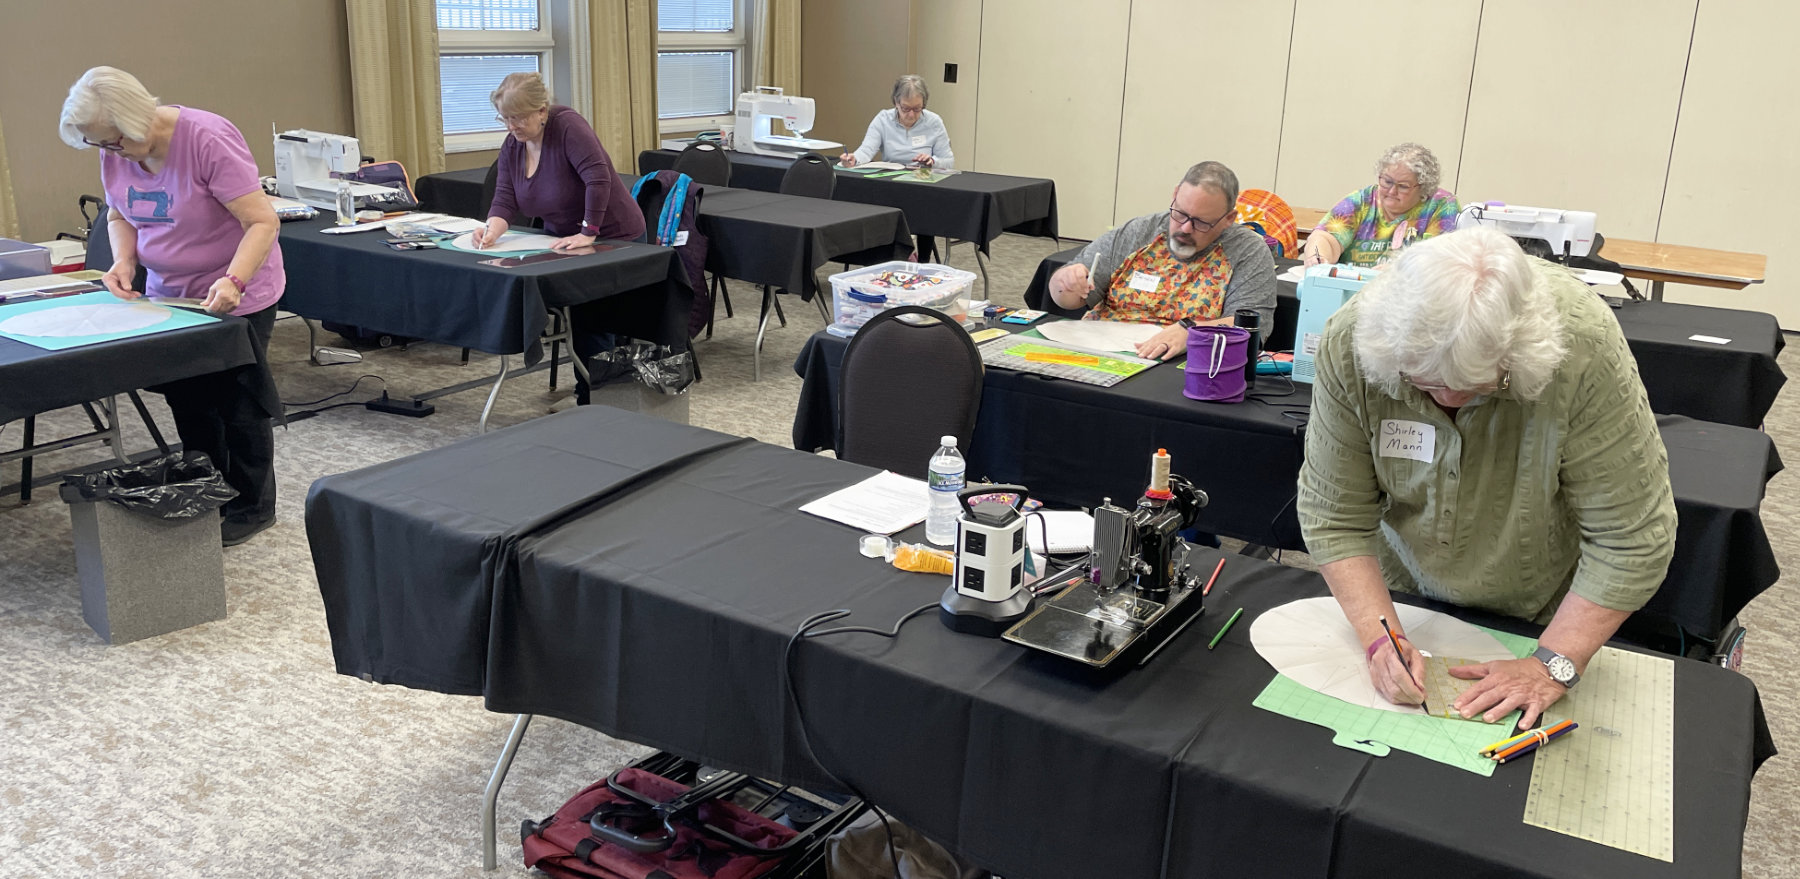
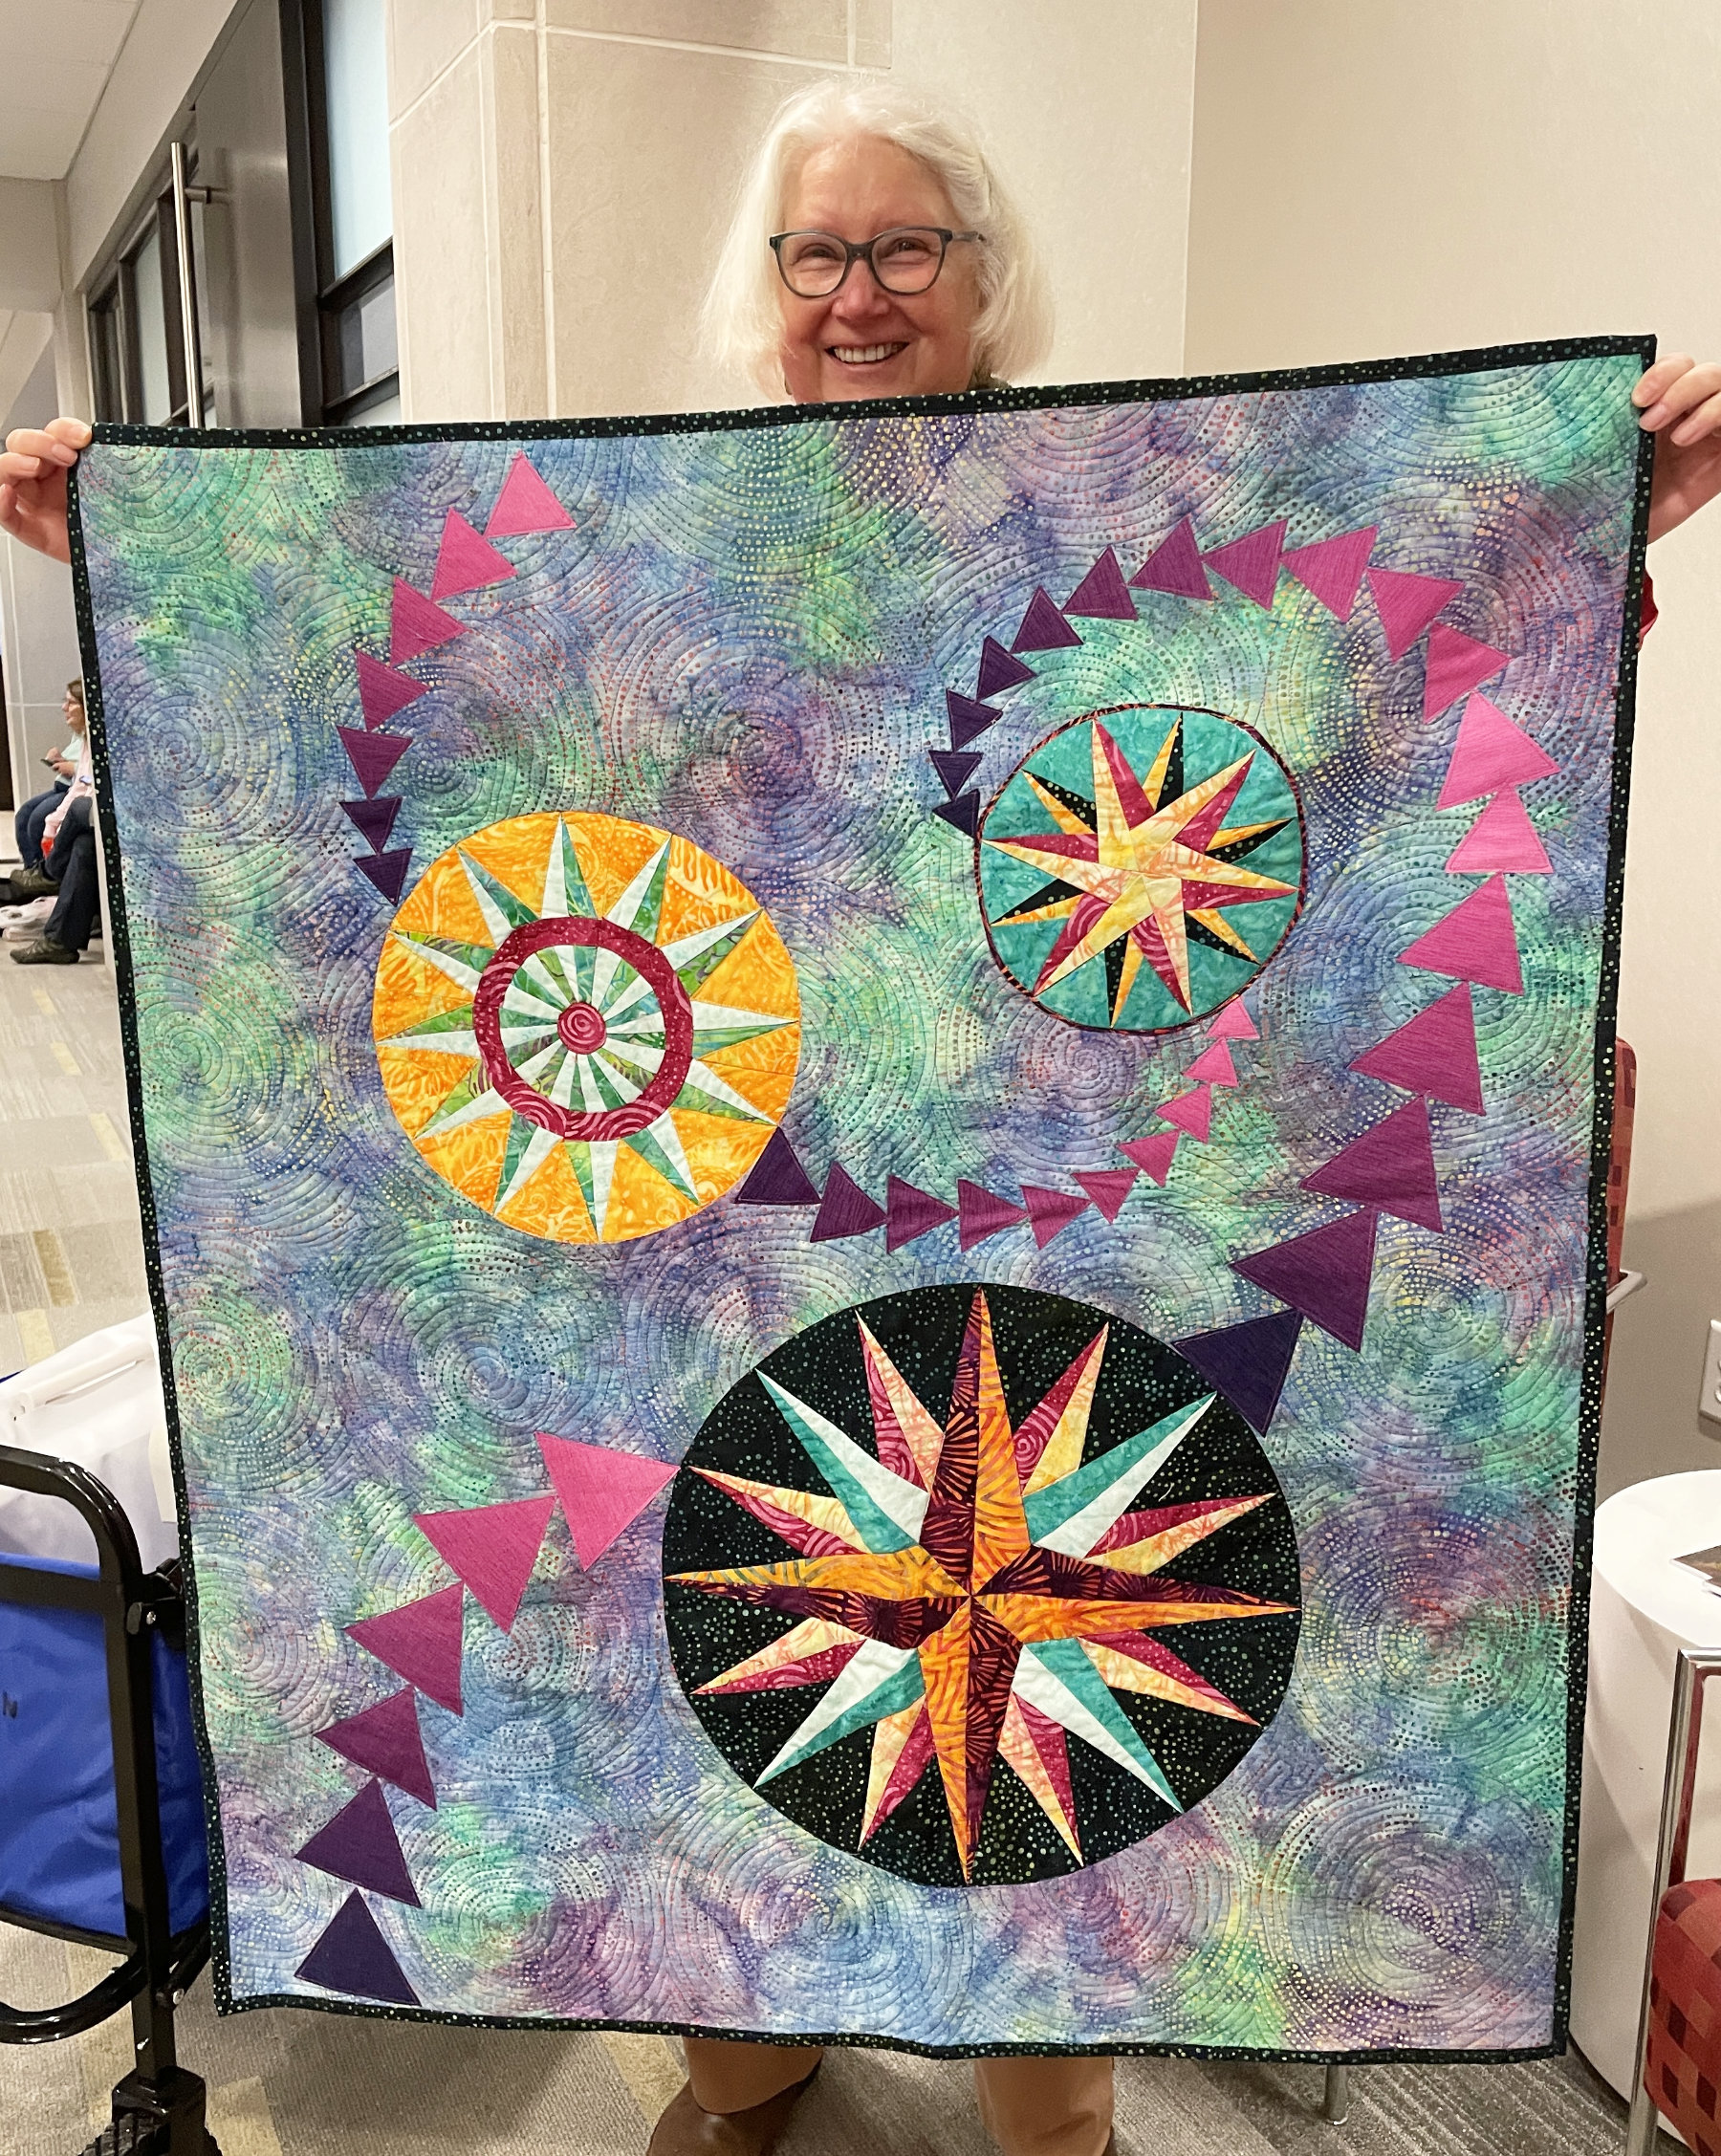
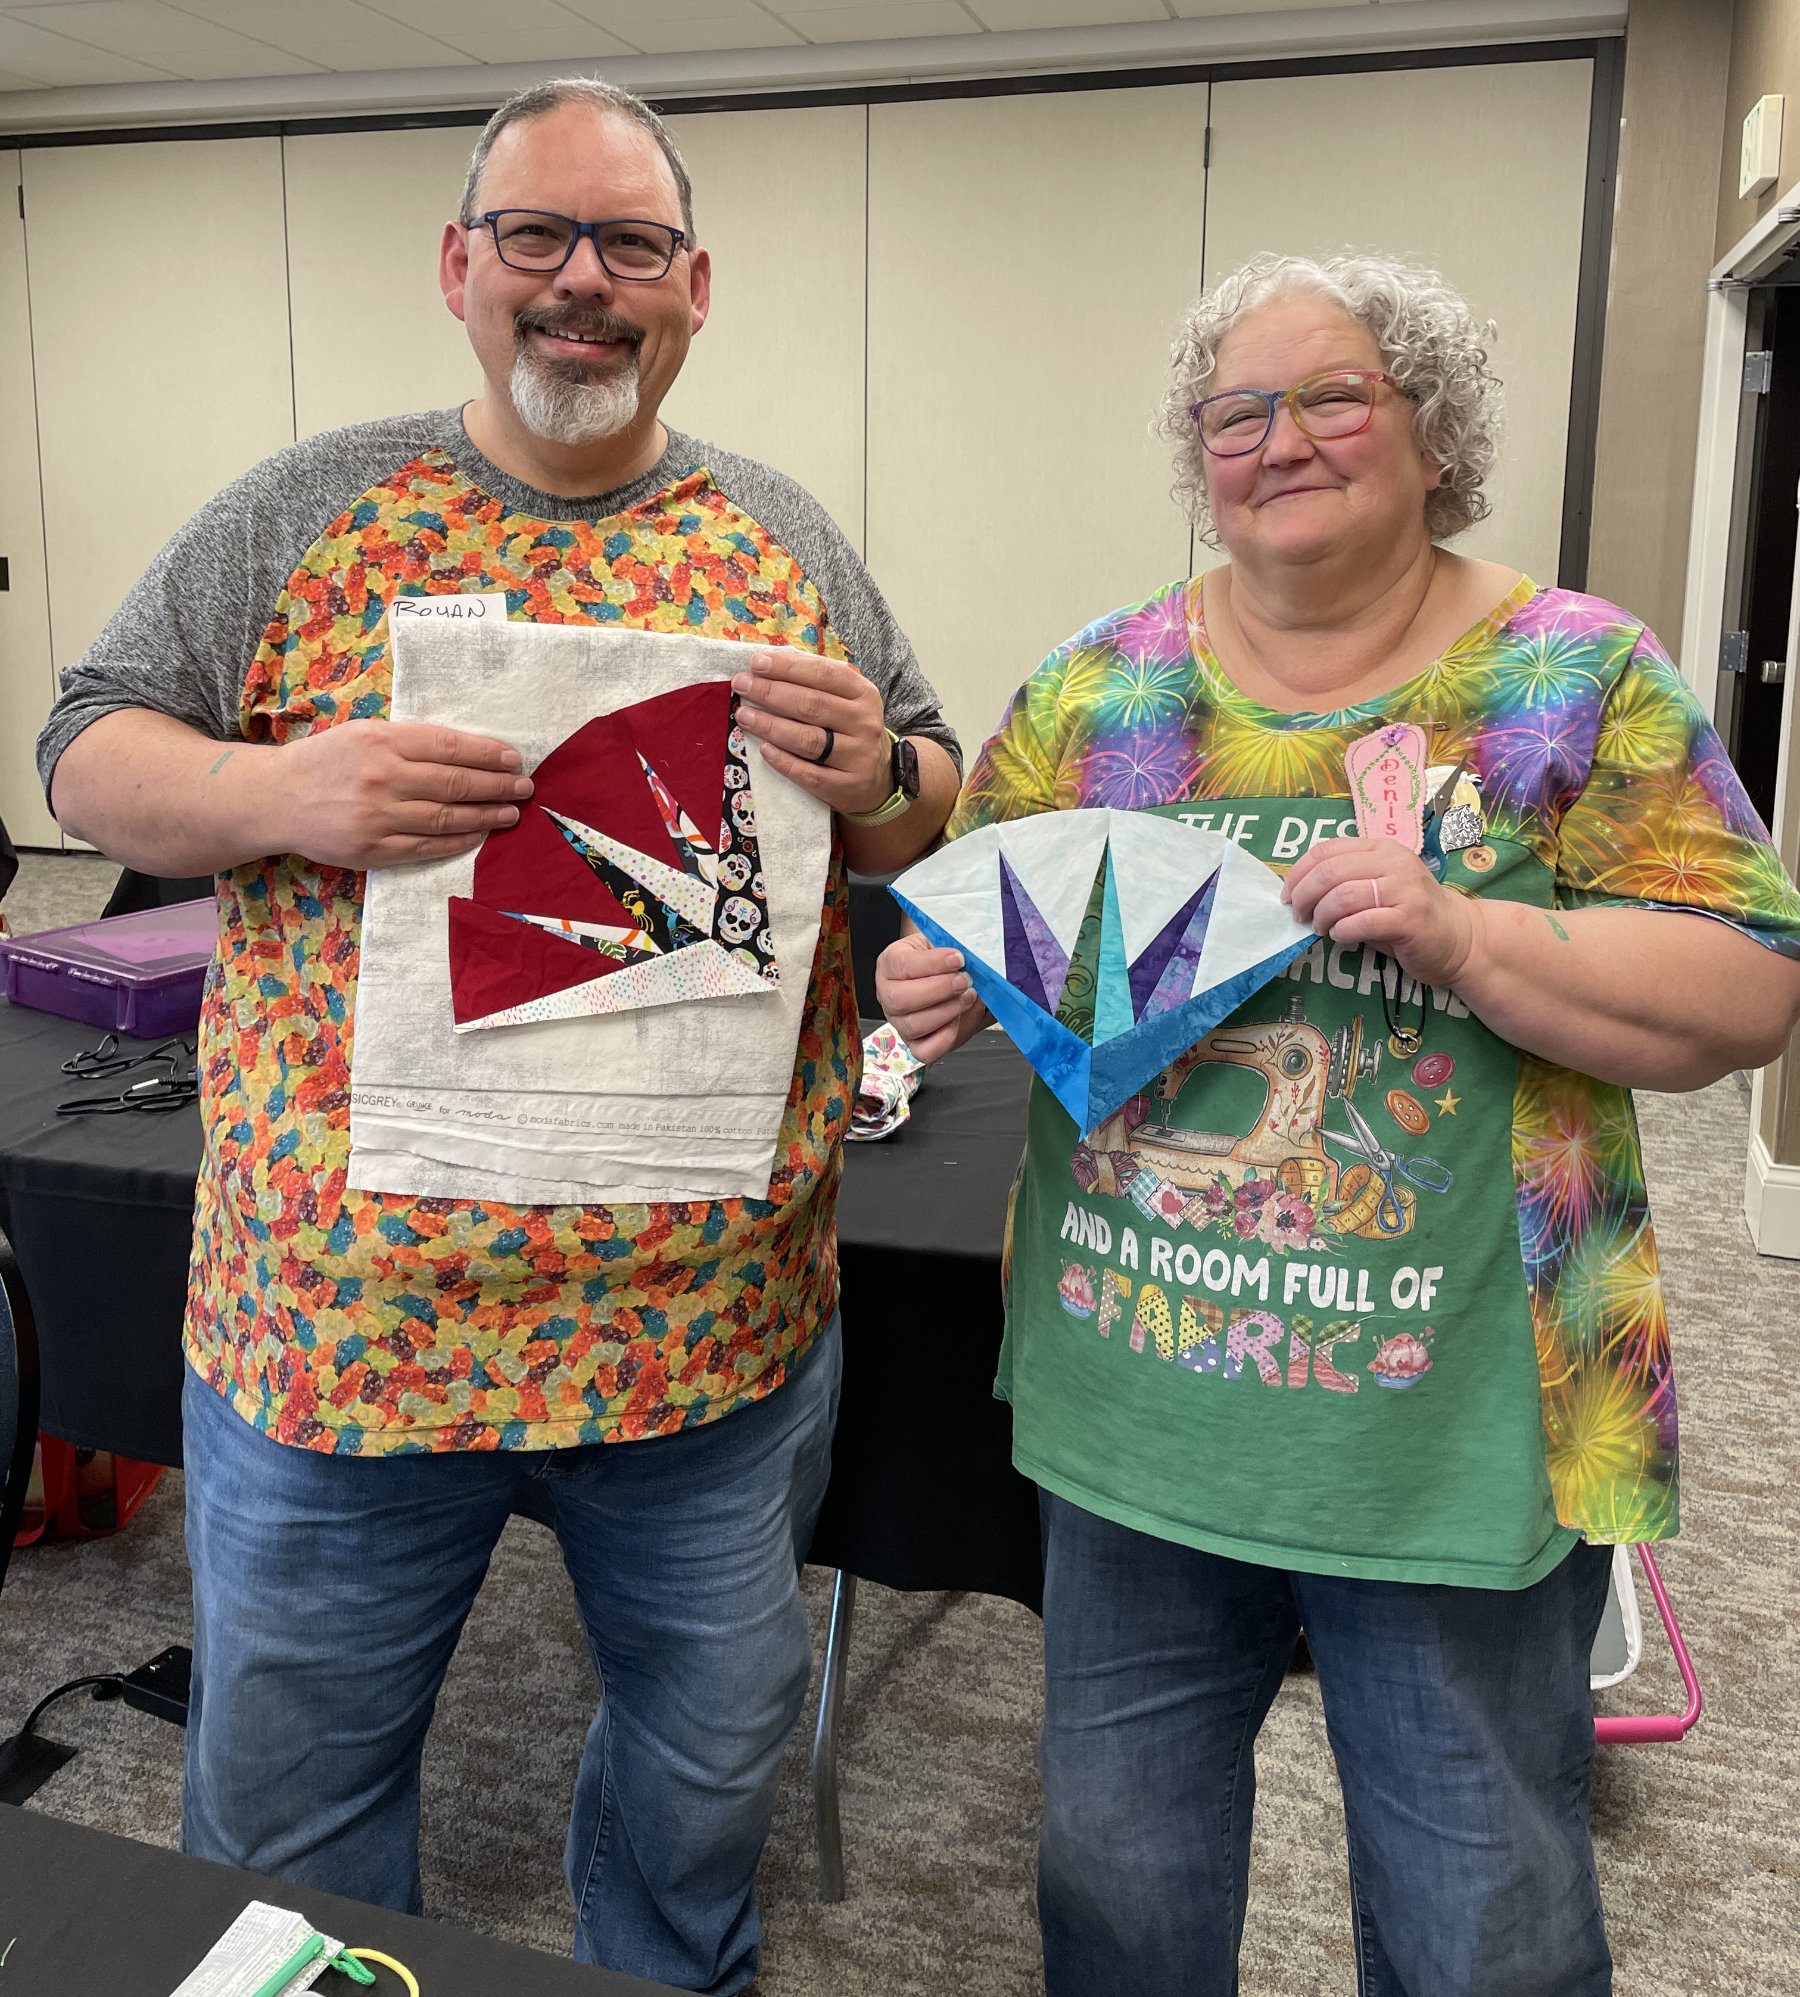
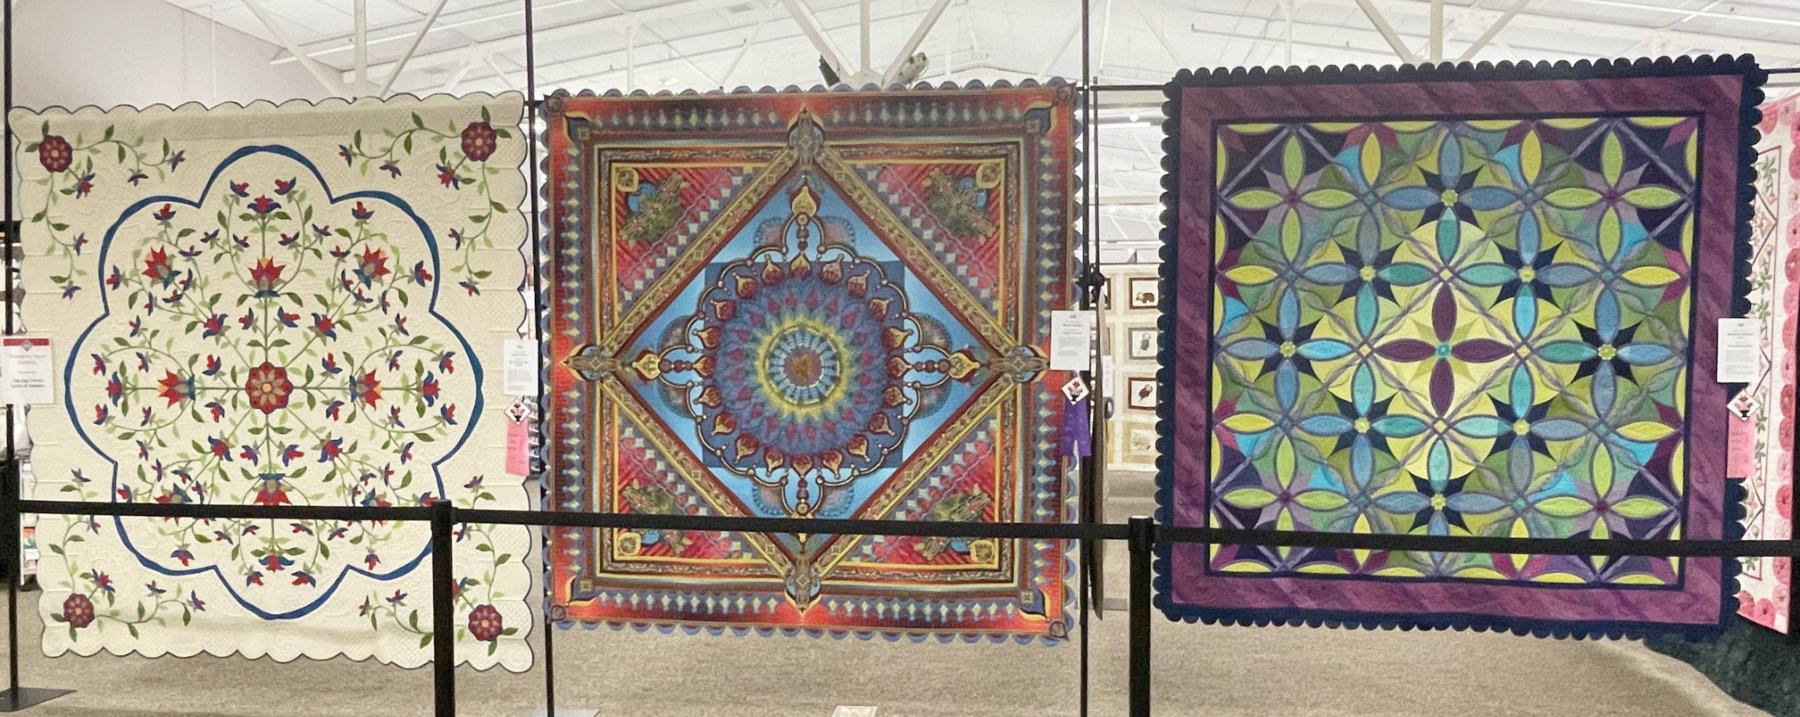
I always love the Crazy Quilter’s show, and have been honored to be one of the judges for the show many times over the years. This year had an added blessing. My friends and I were at a retreat at Tall Pines in Mukwonago this week. The retreat ended on Friday ~ and I was to judge the show at one o’clock that afternoon. The judging was a joy, and the quilts were wonderful. I took pictures of my favorites and I’ll share them with you in next week’s post. Until then… I have a true confession that I hope will make you laugh, or at least help you to remember what not to do the next time you’re basting your quilt sandwich together.

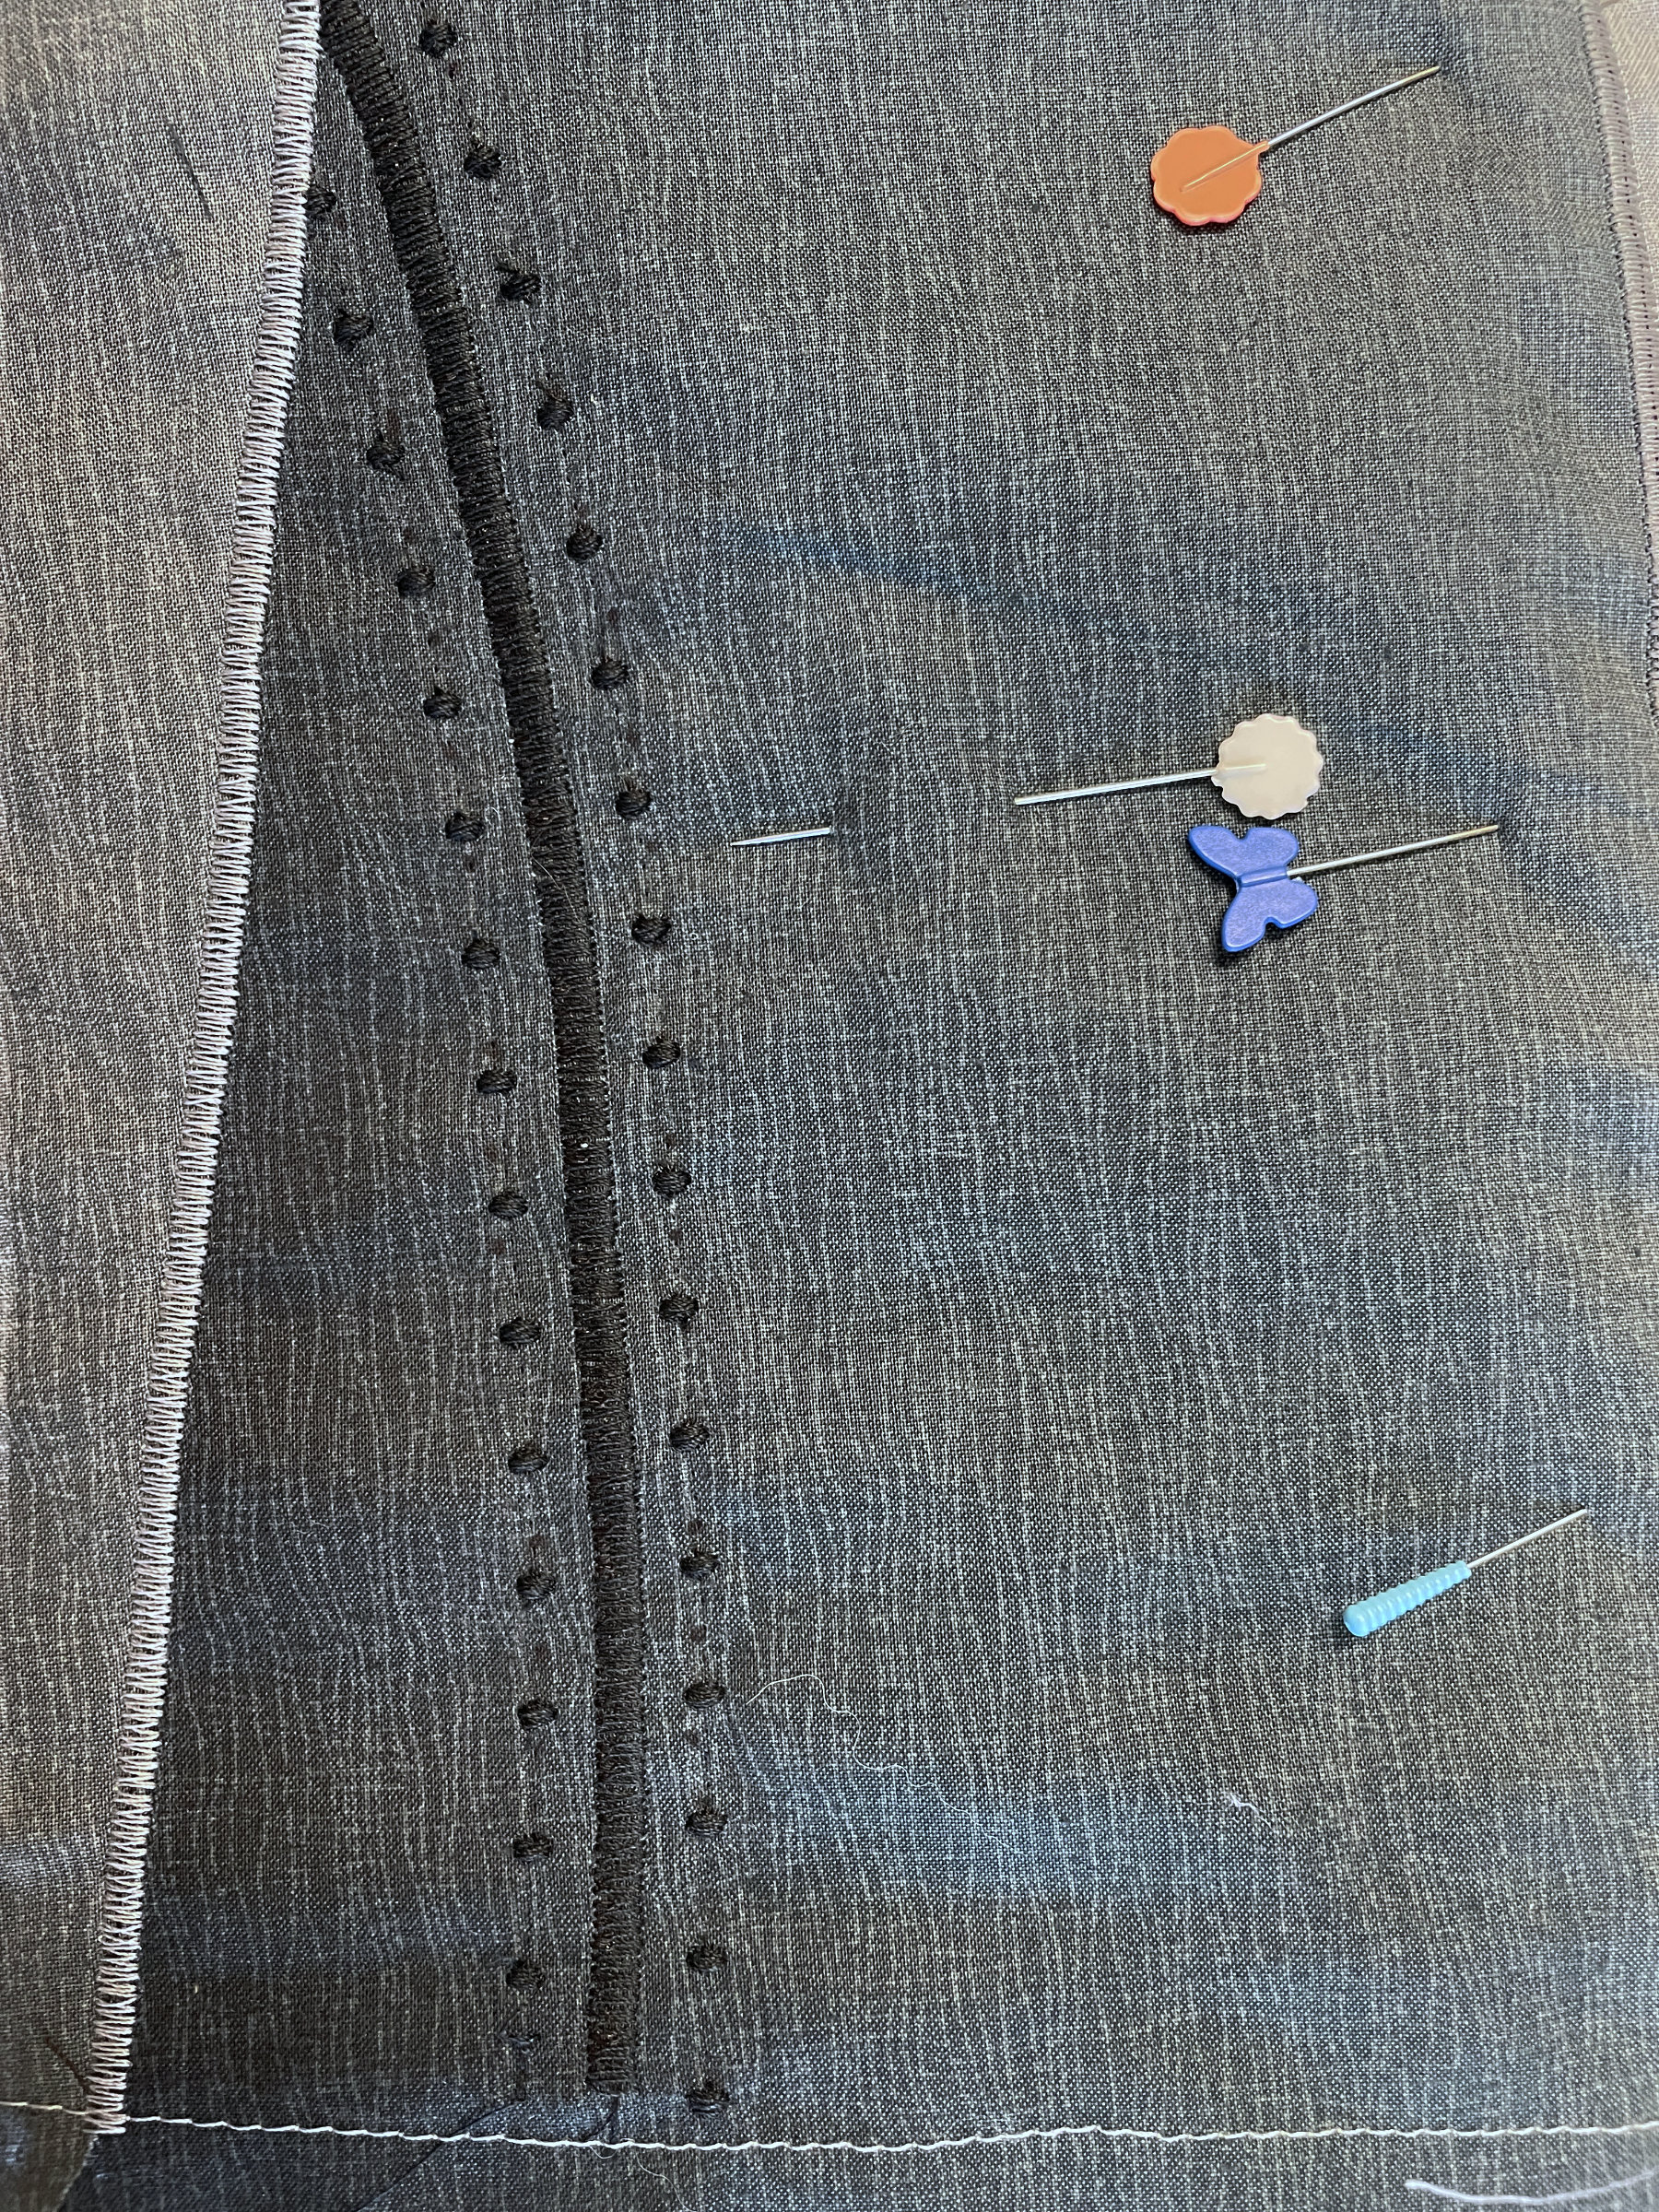
I chose a Wisconsin “Shop Hop” fabric from may stash to put on the back of the Spring Thaw quilt.

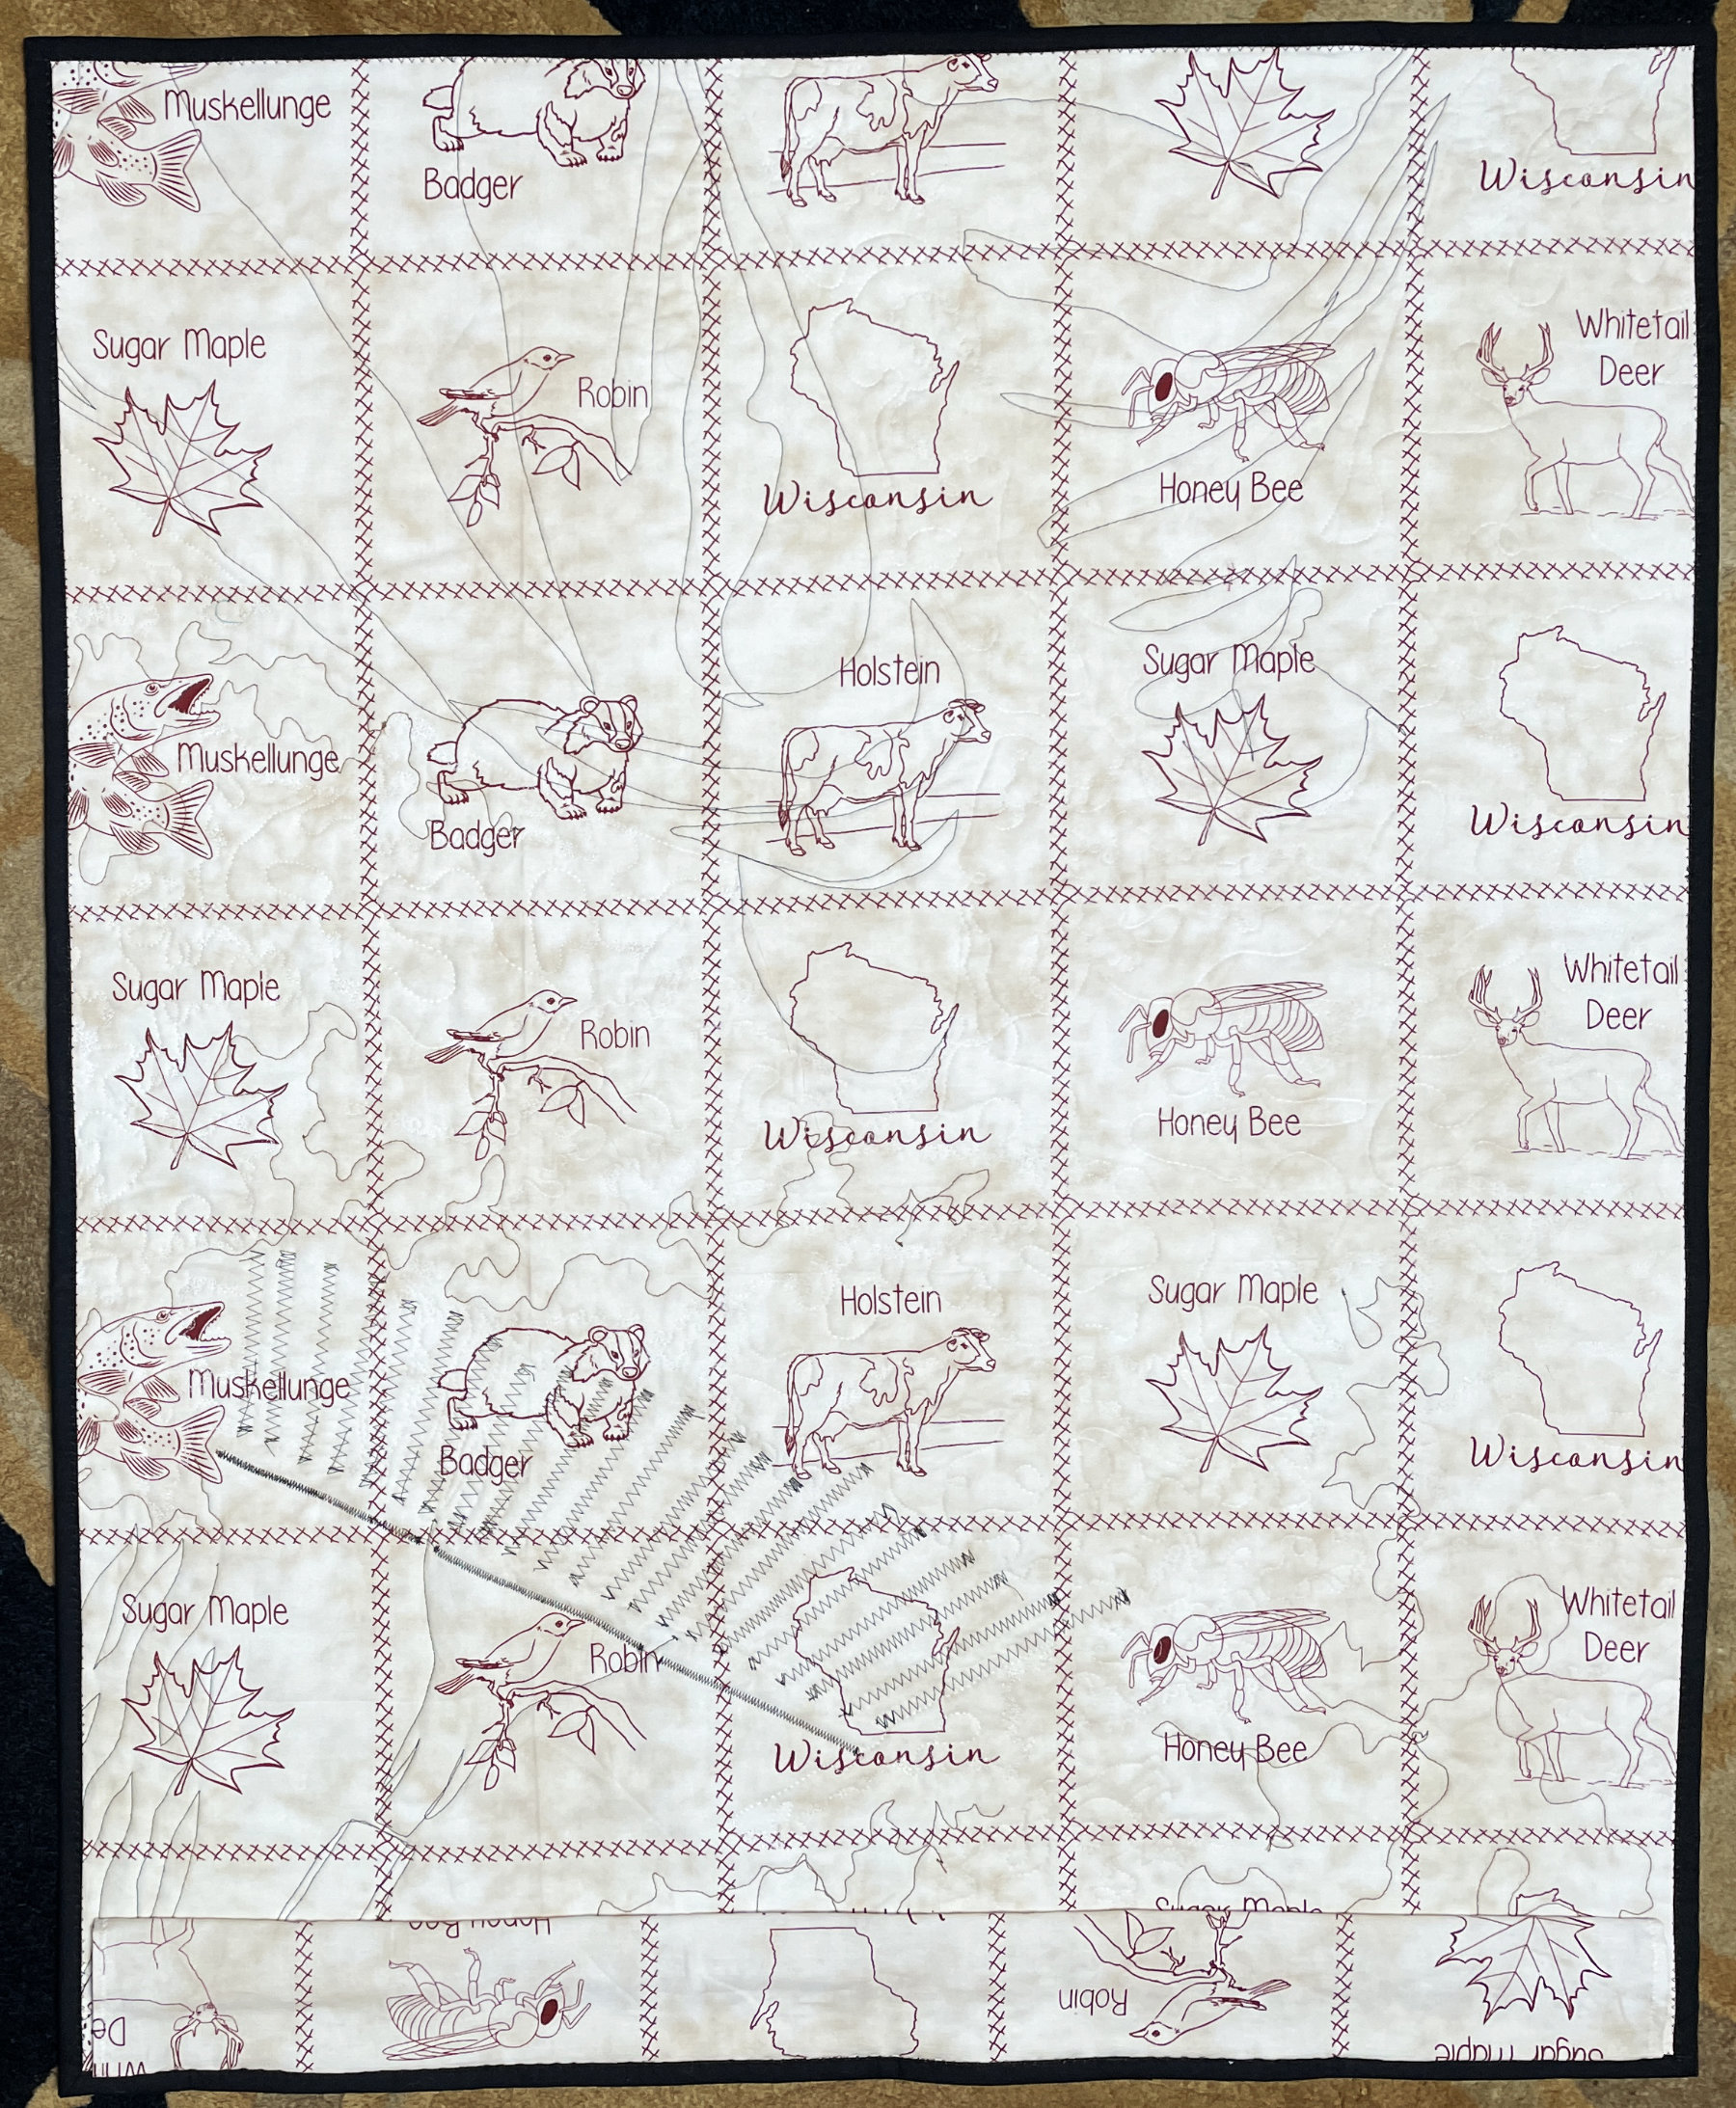
It seemed like the perfect choice. As I was beginning to pin the layers together I actually said to myself “Chris, check to make sure the back is positioned so the top is at the top”. I checked and decided I had it right. WRONG! Thus the sleeve is at the bottom of the quilt in the above photo, and when hanging the back is upside down 😩. It was all quilted before I noticed. I’ve decided to say I wanted it that way 🤣.

Quilting in Bloomington ~ Part 2

March 22, 2026 3 Comments

Last week I enjoyed sharing part of my adventure at the Indiana Heritage Show. This week I’d like to feature my wonderful students. I was invited to teach my three favorite classes (although it’s hard to pick favorites 😊). I started the show with Architectural Repliqué, arriving early to arrange everything.

None of the students had done this type of appliqué before ~ and they all caught on fast!

Because I was able to drive to the show I had room in the car to take all the samples I wanted. Each time I teach this class I make a block along with the students ~ and I have quite a collection of them. In 2015 I did a post about the 70 blocks I’d collected up to that point (click here to read that post). I’ve added many more since then. Hopefully they’ll become a “neighborhood” quilt (or 2, or 3) someday.

The following day I switched gears and jumped into drafting and stitching Mariners Compasses. It was a special group of quilters for many reasons, not the least of which was the kindness they all showed me when I tripped over my suitcase and landed face first on the floor. I’d never done that in front of a class before, and I don’t plan on doing it again. Thankfully I only had minor injuries and I learned some good lessons (“watch where you’re going” and “slow down”). After a brief break we were back at it and the students did great.

I have two additional sweet memories from that class. Prior to it I ran into Mary Ellen. She and her friend Maureen traveled with me to the Tokyo Quilt Festival in 2020. A few years later they invited me to come to Indianapolis and teach Mariners Compass for their guild. Mary Ellen didn’t need to take my class this time, because she really caught on the first time (see photo!) I’m so pleased she thought to bring her quilt so I could share it with my students. Isn’t is amazing?!?

And this is her label. Thanks Mary Ellen!

Also, I had a husband/wife sewing team in class. Bryan and Denise were so much fun, and their compasses were each beautiful ~ but definitely different. Don’t you just love Bryan’s red background?!?

It was a wonderful day in spite of my clumsiness ☺️.

The Saturday class was “Where Do I Start With Fiber Art”, and it was the perfect finale. I was joined by a group of very creative quilters.

And here are some of the fascinating designs that resulted.

I’m so blessed to be able to share my passion for quilting with wonderful, creative people.

Each day we were blessed with a long lunch, and I was very grateful because I wanted to visit the vendors too. I was able to catch up with a few of them who have become friends over the years, simply because we’ve met at different shows. One who was new to me was Chris Schulte who owns Green Light Quilts. Her patterns and quilts were lovely, but what intrigued me was a new line of fabrics she’s designed for Marcus Fabrics.

Each segment of fabrics on the sample card above represents what is printed on a bolt. The segments are 8 different fabrics in one hue (color). So, when you purchase yardage, you get 8 different coordinated fabrics. The card above was for her brights, but her more muted pieces were lovely too. The collection is called “Strip-It”. According to the Marcus Fabrics website the brights won’t be available until July,

but the softer colors were in her booth. I decided to buy a yard of off-white prints. It will be a blessing the next time I want a variety of background fabrics in a quilt (I apologize for not pressing the fabric first).

After class on Saturday I went for a walk and had a lovely stroll on part of the Indiana University campus (praise the Lord ~ the rain had stopped). A block away from the Convention Center was a parking garage with oodles of half square triangles decorating the outer walls. I started my post about this show last week with quilt designs on carpet, and now I’ll end with more hanging from buildings.

Sunday’s ride home was bright and sunny! It was a wonderful trip!

***************

And one more note for the ladies in my fiber art class on Saturday. I mentioned a fused binding technique that I like to use on my art quilts, and I said there was a tutorial on my blog. I was so sure I’d written one, but I can’t find it. One of the quilters in the class wrote to tell me she’s finished her piece and wants to know how to do the fused binding (I hope this encourages others to complete theirs 😁 – atta girl Tearle!) Since the technique is not original to me, I went online and found a video that’s similar to the way I do it: https://www.youtube.com/watch?v=DrrARxm9JH0. The only change I’d make is to use a wavy blade cutter on both sides of the strips so that none of the long raw edges fray, on the front or the back.

The Indiana Heritage Quilt Show ~ 2026

March 15, 2026 9 Comments

Last weekend I had the great privilege of teaching in Bloomington, Indiana. Every aspect of the show was delightful. It was held in the Bloomington Convention Center near the campus of the and Indiana University, and I stayed in the hotel connected to the Convention Center. This was such a blessing because they were experiencing a lot of rain last week (some students couldn’t even attend my classes because of flooding 😞). As I checked into the hotel I couldn’t resist taking a photo of the carpet outside my room – loads of blue half square triangles!

Upon my arrival on Wednesday night I was able to help hang my “faculty” quilt. I brought “How Beautiful Liberty” in honor of our nation’s 250th birthday. It hung in a hallway, which was perfect because of it’s 3-dimensionality, and it got a lot of attention. I enjoyed standing near it and sharing the story when I could.

After hanging “Liberty”, I was able to wander through the competition quilts without the crowds.

The image at the top of this post is of the top three prize winning quilts. They were made by Barbara Clem, Marilyn Badger and Margaret Solomon Gunn. It was impressive to see quilts from such prestigious quilters in the show, hanging with so many other wonderful quilts made by local and “not-so-local” quilters. And there was so much more!

I was honored to be asked to choose one of the quilts in the show as my favorite. I LOVE these opportunities! I don’t have to put my judges hat on. I can just pick a quilt that makes my heart sing. I chose “Dutch Whimsy” by Judith Craddock. Judith did every aspect of this quilt well: fabric choices, appliqués, embroidery, prairie points, and her quilter fit the design perfectly.

My favorite part was finding all the sweet critters she lovingly stitched throughout the quilt.

It brought back many memories of the quilting tour/cruise Wendy and I led to Holland way back in 2007.

So, as I walked through the show before the crowds (without the wooden shoes 😁), I snapped a few photos of some of my other favorite quilts. This one also reminded me of a previous quilting adventure. Wilhelmina’s quilt “Nature’s Garden” is a beautiful tribute to Mt. Fugi during cherry blossom time.

In January of 2020 I took a group of quilters to Japan. We spent a foggy winter night at the foot of Mt. Fugi. The next morning the fog broke for only about 20 minutes – but I was able to see the mountain from my balcony:

I loved seeing it again through Wilhemina’s work.

I admire hand piecing, but am not very good at it. So, I’m often drawn to quilts by piecers who are. “Milli” by Jennifer Hope is a stunning example:

Her fussy cutting was also very well done.

“1,196 Ways to Go Wrong” is a sweet little quilt, and Marty’s description made me laugh out loud.

And while I’m on the subject of great piecing, “Radiance and Stone” by Annie Bullock-Yoder has flying geese galore, along with a spikey center medallion. I really like her color palette.

And I think my favorite pieced quilt was “In Search of Lost Time” by Julie Parmenter. She chose to use leftover scraps to make the hour glass squares in 4 different sizes, and arranged them in a very pleasing way. Imagine my delight when I discovered that Julie was in 2 of my classes!

I loved her simple use of a very traditional block.

And one more pieced quilt just had to make my list. “My Sampler Quilt” by Mary Wahle does something that always fascinates me. It’s a sampler quilt in a setting that doesn’t scream “sampler quilt”. It obviously is, but there is so much additional piecing that it really draws all the diverse blocks into a pleasing whole.

I think she accomplished her goals.

And the last quilt I want to share is a wall hanging of flowers with fun quilting and delightful tiny yo-yos. Jackie’s hand-quilting “knocked my socks off”:

And that was just the show quilts! There were also special exhibits and a fantastic array of vendors. And then there were the wonderful quilters! I think I need to save the rest for next week’s post. Stay tuned!

Bird’s Eye View

March 8, 2026 5 Comments

Last week I did a silly post about birds, and in it I had a link to view my video of a starling murmuration. I didn’t realize I’d posted it to YouTube as “private”, and some of you weren’t able to see it. I fixed that problem – so if you missed it please click here.

Thanks to my many readers who have sent photos of their bird quilts. I will be sharing them in a future post, and if you have one you’d like to have featured in my blog ~ there’s still time to email them to me 😊. Please send them to .

This week’s post isn’t silly, and it’s not really about birds. It’s the theme of our current “BIG” challenge at ThreadBenders. I got the idea for this challenge when I was flying home from Florida last winter. The South had been hit with an unexpected snow storm, and the view out my window as my second flight took off out of Kansas City was fascinating!

The snow showed off the texture of the fields in such an interesting way. I assumed the dark branching lines were water, but upon closer examination I discovered they were all tree lines. And the jet engine gave the the photo perspective. This type of photo could be called a “birds eye view”. I presented this idea to the group and it was voted in as our current challenge theme. I was pleased because I really wanted to make this into a quilt. I began by enlarging the photo to the correct size on paper in order to repliqué the different areas. I chose a bunch of fabrics from my stash to accomplish this:

Once the fabric was ready I began, but after quite a bit of stitching, the results of my efforts were disappointing (sorry – no photo). I was still excited about the project, but there had to be a better way. That’s when I decided to have my photo printed on fabric at Spoonflower.com. Wouldn’t it be even more fun to thread paint and embellish the photo I loved? And it was. I began by covering the shadows of the trees with tulle and stitching in the tree trunks. Then I repliquéd the wooded areas in a dark fabric. Next I machine quilted around many of the furrows in the fields and made them 3D by running yarn through them with a large needle – trapunto style.

This photo shows the yarn tails sticking out of the furrows.

The main highways were added with fusible bias tape.

The jet engine was repliquéd with a “black to gray” gradation fabric. I noticed the photo had a “seam” inside the engine with rivets. The seam was easy enough to stitch from behind on the pattern, and then widen with satin stitches on the fabric side. But how would I do the rivets? I found a stitch on my Janome that might work.

But after stitching it I didn’t like the stitches that connected each “rivet”. So I placed a dab of glue on the back of each one to secure the threads, and then removed the stitches between them.

It was looking good. That’s when I measured it and found the entire quilt was 1″ too short. Ugh – how do I do this to myself? I decided the frame of the plane window (which I’d cropped off of the original photo) needed to be put back in. And that worked! All that was left was some sort of an edge finish. Binding or facing???

I decided facing this quilt would be the best option. And it’s finished!

We had the big reveal of our Birds Eye View quilts at our last meeting, and it’s a fascinating collection. To see them all together click here. Oh, and they will all be displayed at the Crazy Quilters Quilt Show in Mukwonago, WI, March 28th and 29th. Click here for the show information (and a map with information about parking because of construction issues).

PS If you ever want to put a facing on a quilt rather than a binding, please go to the previous blog post about my favorite facing technique. You can access it by clicking here. The advantage to this method is that it has a slick trick for removing the bulk in the corners.

The Birds

March 1, 2026 9 Comments

Before I get to my “Topic of the Week”, I want to mention an upcoming event. I’ll be teaching at the Indiana Heritage Quilt Show this week! It’s taking place at the Bloomington Convention Center in Bloomington, Indiana.

The show runs from March 5-7. I’ll be teaching all 3 days along with a great list of talented instructors. If you live in the area, or want to get away for a fun adventure, you can click here for all the information! Maybe I’ll see you there!

And now for “the Birds”!

Last summer after we spent months cleaning out my parent’s condo, we spent quite a bit of time cleaning out their cottage too. My dad always referred to himself as a “depression baby”, and that was his excuse for keeping everything!!! Since emptying their condo I’ve become quite good at tossing or donating stuff. Mike, on the other hand, has a little of my dad in him (please don’t tell him I said so 🤣). On the cottage’s screened porch I found 3 stone birds with parts missing. The cardinal and blue jay no longer had beaks, while the terra cotta bird was missing it’s head. I took them home to dispose of them, and the next thing I knew they were standing in front of the garage. I gently mentioned to Mike that I didn’t want to keep broken bird statues ~ to no avail. So there they sat. After about a month I placed them around a bush on the north side of the garage. At least they weren’t the first things I saw when coming home.

A week or so later they disappeared. Mike said they must have flown away. The next day I went down to sew in my studio and was a bit startled when I looked out the window.

Mike had painted the broken spot where his beak was supposed to be, attached a greeting, and placed him on our overturned canoe. It made me smiile. A week or so later as I started the hot water for a relaxing bath, I turned around and was surprised to see the headless terra cotta bird ~ “peeking” at me from behind the Victorian tissue box holder..

This one really made me laugh out loud! Now where would I find the cardinal??? I waited for weeks, and Mike claimed innocence. Months later, on the evening I returned from Italy, I went in the master bathroom and was greeted by… you guessed it… the avian welcoming commitee:

My parents always said that the secret to a good marriage was to keep it funny. My husband certainly does this!

So what does this story have to do with quilting? Nothing really (unless it counts that the blue jay was outside the window of my studio). But it’s a good segue into bird quilts. Have you made any? I have a lovely vintage quilt from the 1940s with embroidered blocks of the State birds and flowers:

I’ve also made a number of bird blocks in classes I’ve taken with other teachers. They ended up flocking together in one of my Modular Memory Quilts:

I made this next quilt when we moved from Sun Prairie to Dousman in 1994. As a birthday gift many years ago, Mike and the kids built me an aviary post with feeders hanging from it and a bird house at the top. I loved it, but couldn’t take it with us when we moved because it was set in concrete. Sew I made a quilt about it using my Repliqué technique. I call it: “The View From My Window”:

The squirrels always make me smile.

And I think you’ll enjoy a fascinating video I took of a group of birds while in Rome. Will and I had just finished dinner and were walking back to our hotel from the Colosseum when we noticed everyone around us looking up. There we saw what I now know is a murmuration. We walked on for a while and the murmuration continued. At first we thought it might be some sort of drone thing. But when we realized it really was birds – starlings to be precise – I had to take a video. Here’s a photo, but it doesn’t give you the full effect. To watch the short video click here.

To learn more about starling murmurations click here.

Do you have any bird quilts you’d like to share? Please send photos to me at: .

Sew Much Creativity

February 22, 2026 2 Comments

A number of photos and stories have been accumulating in my blog folder. They hadn’t made it into a post until a recent retreat completed the collection. I hope you’ll enjoy them.

I met Pat years ago when I taught for her guild in Janesville, WI. Each time they invite me back we reconnect and she always has something interesting to show me. This time she presented me with a lovely gift. She made this “catch all” (I think that’s what she called it) from vinyl on her embroidery machine.

It has snaps so that it can open flat for travel. Sew perfect!

It’s very clever! I love it and enjoy using it. Thanks Pat!

*************

A few months ago I met Kristin when I was teaching for the Willow River Piecemakers in northern Wisconsin. I presented my Journey With a Compass workshop one evening, and the following day everyone in class made a compass for themselves. I was able to stay with my cousin Kathy, and she was in my class too. What a fun adventure! A week later I received an email from Kristin with these photos:

She wrote:

“The one I did in class has not been appliqued on yet, but it is to show what it might look like. I wanted to reinforce what you taught and try something different – as my husband encouraged me to do with sewing, so I made that rectangular compass for the placemat challenge due at next month’s meeting.” 

WooHoo! I love her husband’s idea! And her compass placemat turned out great! She later sent me a photo of a pillow she made for her daughter. I think she’s as hooked on this pattern as I am.

I’ve taught my mariners technique a number of times recently and I hope Kristin’s work inspires some of my students to try a new shape or two while it’s all fresh in their minds 😊.

*************

After my post about silk cocoons, my friend Patti sent me these photos of a small art quilt she made by dying cocoons, cutting them into flower shapes, and peeling apart the layers. I knew silk took dye well, but just look at how beautiful these cocoon pieces are in this tiny 12″ square quilt!

And here’s a close up:

Such lovely, precise work. Patti ~ you are truly an artist!

*************

And now for our recent retreat. I’m blessed to spend time at the lovely Cattail Retreat Center near Poynette, WI with dear friends three times each year. This time we had two new quilters join us. Vicki and her sister Cheryl were a wonderful addition to our group.

We stitched, laughed, talked, feasted… and had a wonderful time. Stay tuned for the story of the tote bag I’m holding – and the new “lady” who helped me to make it!

And for my final photo, I snapped this one of a hanging at Cattail:

Isn’t it charming? I’d love to have a sampler like this to refer to when I can’t figure out what stitch would work best in a particular project. Now to find the time to start stitching one!

A Last Minute Baby Quilt

February 15, 2026 7 Comments

Life was a bit crazy after I returned from Italy. Not only were there snail mail and emails to go through, but the jet lag was real. On top of that ~ while I was gone Apple deleted everything on my iphone calendar!!! I don’t know how it happened, but I hadn’t looked at it the entire time we were traveling and I was shocked to find it empty when I finally did. Everything was gone ~ past and future. My inability to recover it has a lot to do with my lack of savvy in backing it up. But now I think I have it recreated as it should be, and I hope I don’t end up missing something important – Ugh.

These all add up to the reason why four days before my cousin’s daughter’s baby shower I realized I HADN’T MADE HER A QUILT! A slight panic ensued, as I’d made her sister a quilt for her baby shower last year, and I couldn’t not make one for Carly (plus I really wanted to 😊). Sew ~ I went in the studio and started looking through my stash. The fabric that grabbed me right away was a lovely floral I’d purchased from a designer who had a booth in Paducah last year (I wish I hadn’t cut away the selvedges, because I don’t remember her name). I needed to make this quilt cute but simple. Using the fabric as my inspiration, I drew a fun flower.

The baby girl’s name is Reagan, so I decided I needed to make one block a pretty “R”. All the blocks would be made with my repliqué technique because it doesn’t use fusibles which make the quilt stiff (click here to read about my Snuggle and Learn Quilts for Kids book). Colorful fabrics were chosen for the petals, and the stitching began: straight stitching from behind for the first step ~

And then trimming and satin stitching to cover the edges for the second.

These blocks were alternated with blocks of the feature fabric in a 9-patch set, and borders were added. I layered it with batting and Shannon Cuddle™ in a lovely soft aqua. I quilted around the appliqués and spiraled the backgrounds. Then, in the alternate squares, I cut a flower from freezer paper, ironed it in place, and quilted around it.

The soft back was turned to the front as a binding and it was done at 10pm the night before the shower!

That’s when I looked at the shower invitation and discovered that the theme for the baby’s room is “wild flowers”. God is good 😁!

I can’t wait to share a photo of Reagan with her quilt sometime soon.

*************

And one more thing…

Penny sent me an email and photo recently, and this seemed like the perfect post in which to include another Repliqué project!

“Hi Chris, I took your class last year with CVQG in Gardnerville, NV. Just wanted to share this with you. Just finished this using your technique instead of applique. I’m very proud of it & think it turned out pretty good. Blessings to you and Your family for 2026. God Bless.”

Don’t you love the little animal appliqués too!?! Well done Penny! Thanks for the photo!

Memories and Making Memories

February 8, 2026 3 Comments

This week it struck me that it’s been one year since my dear friend Evelyn passed away. So many memories came flooding back (please click here if you’re new to my blog and would like to read my tribute to her from last year).

Then I thought about her daughter Gwen, and how difficult it all was for her. Evelyn’s passing drew Gwen and I together for a span of weeks, but then we lost touch. I felt compelled to pray for Gwen, as this must be so hard. It occurred to me that I should visit Evelyn’s Facebook page and see if there were any new posts. This is what Gwen wrote:

“This is Evelyn’s daughter, Gwen. Next Tuesday is the one year anniversary of Mom’s passing, and I want to do sometihng special to remember her in joy instead of sadness. Those who knew her, if you could post a special memory on this page over the next week, I would be extremely grateful. I miss her more each day.“

I was happy to add a few photos, and I mentioned to her that my mom is currently on hospice care (Mom is still with us, but I’m quite sure she’ll be with her Savior soon). Gwen sent me a lovely email after that, and told me that she still has some of her mom’s quilts available on Etsy. Evelyn was a very talented quilter, and I enjoyed seeing some of her pieces once again. I thought that some of you might want to visit her Etsy page too. Click here to link to quilts by Evelyn Link 😁. This is just a sampling from that page:

I’m grateful for sweet memories to get us through the times of missing those we love.

And now on to some newly made memories! Last month I had the wonderful opportunity to teach for the Colorado Quilting Council in Denver. It was cold and snowy when I left Wisconsin (-17 with windchills at -40), while the weather in Denver was much milder… 10 degrees above zero! But the quilters there were warm and welcoming, and I had a great time. My class and lecture went very well, and I had a wonderful time getting to know these dear ladies.

On many of my teaching trips I’ve been invited to do something special by program chairs who go above and beyond in their care for me. A few months ago Amy took me to see Lake Tahoe on my non-teaching day with her guild – WOW! (click here to read about that adventure). On this trip Susan took me to the:

Denver has one of the largest Stock Shows in the country and Susan is very involved with it. She was a wonderful guide! I must admit I wasn’t really sure what a Stock Show was, but I’m always up for learning new things – and I enjoyed every moment of it. We began our time there by getting pulled pork on Texas Toast sandwiches at a food truck, and watching the judging of wagons with 8 horse hitches (I hope I’m saying that right). They were beautiful!

Then we watched judgings in other arenas. The show was held in the Denver Stock Yards, and it was huge! They even had a beautiful new building that housed an amazing collection of western art by local artists ~ which was inspiring.

I especially enjoyed watching the long horn steers. The winner had horns that measured 130″ from tip to tip! That’s wider than a king sized quilt!!!

Thanks to Susan and everyone at the Colorado Quilting Council for a memorable time!

**************

And I’d like to share a recent photo. The very cold morning before I left for Colorado I awoke, pulled up the blinds, and this was on my window. It was about 1 1/2″ across – and beautiful!

I’ve seen a lot of God’s frosty artwork on our windows in the past, but this was by far the prettiest!

**************

So… I thought that was the end of this week’s post, but yesterday Mike and I decided to go for a ride. We ended up in Cedarburg, WI and were able to see the current exhibit at the Wisconsin Museum of Quilts and Fiber Arts. The Japanese quilts from Quilt Nihon were amazing!

They are only there until March 8th ~ so time is short if you decide you want to go!

In the entryway of the museum they have some of the winning miniature quilts from the exhibit, and they alone were worth the trip. This was my favorite ~ the logs were 1/8″!

There were so many quilts I’d like to share, but I only have room for a few more. This bed sized hand appliquéd, hand quilted piece was incredible:

After seeing the miniature with the tiny logs, I thought the maker of this next bed sized, pieced quilt must be crazy. Upon closer examination I realized she was just clever. The triangles are made of striped fabrics! What a great illusion!

The appliquéd circles in the next bed sized art quilt were made of silk, and stuffed trapunto style. Yet I couldn’t see a single stitch! And the hand quilting was some of the tiniest I’ve seen.

I saved my absolute favorite for last. I’ve always admired Baltimore Album quilts and we know those amazing blocks are typically placed in a horizontal set. This quilter created wonderful hand appliqués and then set them in fan shaped, curved blocks. Her color palette was also atypical ~ and then she bordered them with Hawaiian style appliqué in a gradation of fabric! What a feast for the eyes!

And her hand quilting was as well done as her appliqué.

I highly recommend a trip to the show if you’re able to go!

  • Page 1
  • Page 2
  • Page 3
  • Interim pages omitted …
  • Page 78
  • Go to Next Page »

Primary Sidebar

Archives

Recent Posts

  • Spring Thaw
  • Quilting in Bloomington ~ Part 2
  • The Indiana Heritage Quilt Show ~ 2026
  • Bird’s Eye View
  • The Birds

Recent Comments

  • clkquilt on Spring Thaw
  • Mary Alice Hart on Spring Thaw
  • clkquilt on Spring Thaw
  • judy raddatz on Spring Thaw
  • Lois on Spring Thaw

Categories

Footer

My Guide

Whatever you do, do your work heartily, as for the Lord rather than for men.

—  Colossians 3:23

Contact Chris!

  • Home
  • About
  • Gallery
  • Classes
  • Trips
  • Books
  • Blog
  • Contact
  • Sign Up For My Blog

Copyright © 2026 · Chris Quilts · Website by Adunate · Privacy Policy