I recently completed a challenge quilt I’d been working on since the beginning of the year and it was time to do something easy. Months ago I’d picked up a kit to make a charity kid’s quilt while at my quilt guild – Patched Lives. This is a very generous guild and I’m proud to be a part of it. Our wonderful charity quilt committee recently wrote in the newsletter that since they began working on the committee, the guild has donated 207 quilts! The fabric in the kits is donated, and the kit I picked up was especially cute. It contained a pre-printed panel, borders and backing. This proved to be the perfect simple project for my mood. I added the borders and safety pinned the layers together. As I began to think about the quilting, I thought it might be fun to share my process on the blog.
First, I like to do a bit of machine guided quilting to hold things together. Since I hate to stitch in the ditch, I chose to quilt 1/4″ from the seam using the walking foot and my “3 pin technique“. When quilting long straight lines it’s not uncommon to have the top layer shift a bit by the end of the line, resulting in puckers, even with a walking foot. To prevent this I sink the needle into the quilt at the beginning of the line, then place 3 straight pins, about 1 1/2” apart, in front of the needle.
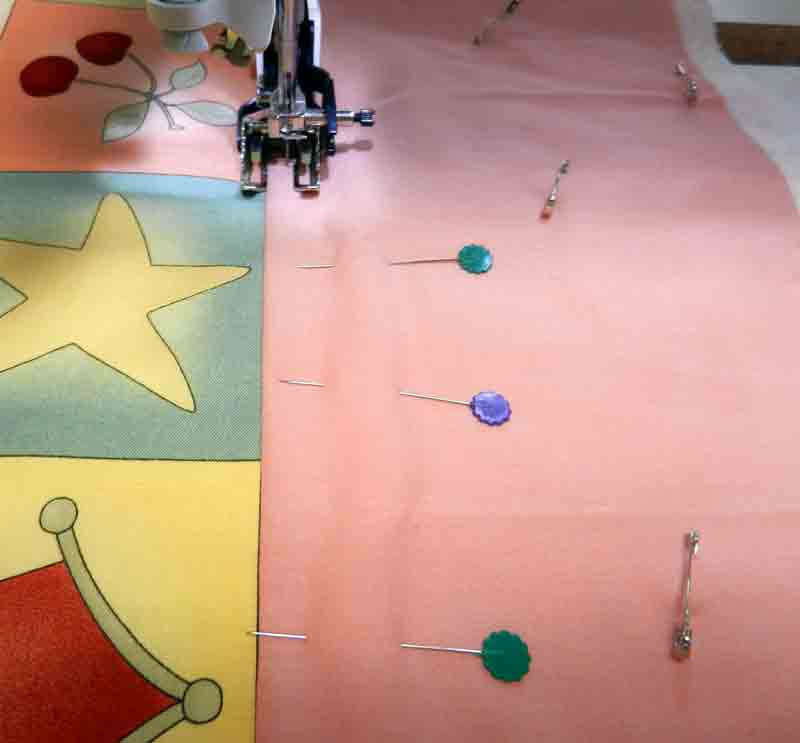 I pull the pins out as I sew up to them, and when I reach the third pin, I re-pin once again. It may seem a bit tedious, but I get great results!
Next, it was time to free motion quilt. I moved to my Sweet 16 and positioned the quilt in my Quilt Float. When I was teaching Beyond Meandering at the FVTC Quilt Expo recently, I explained the quilt float to the students and told them I’d put a photo on the blog. Here it is:

If you’d like to know how to make your own (and it works great with a domestic machine too!), just click here.
I recently received a delightful email from Sheila about the Quilt Float. She gave me permission to share it here:
“A little late for starting to use a Christmas present. A busy schedule and a knee replacement didn’t help me start using my Christmas gift from my husband. I had shared with him the description in one of your blogs showing a plan for hanging a quilt sandwich in a way that made the quilting easier to do on my “regular” Viking machine (floating with the poles and clamps). So he purchased the needed supplies for the project as my Christmas gift. Was I ever surprised that he remembered my sharing your blog with him so long ago.
Today we set up the equipment and I started quilting a sandwich that I plan to give to his grand-nephew and bride at their June wedding. I had a wonderful afternoon with the floating process. The system made it so much easier to move the quilt sandwich through my machine.”
When I asked Sheila if I could quote her she said “I hope others enjoy the system like I do”. Thanks so much Sheila, I’m really glad it’s worked so well for you!
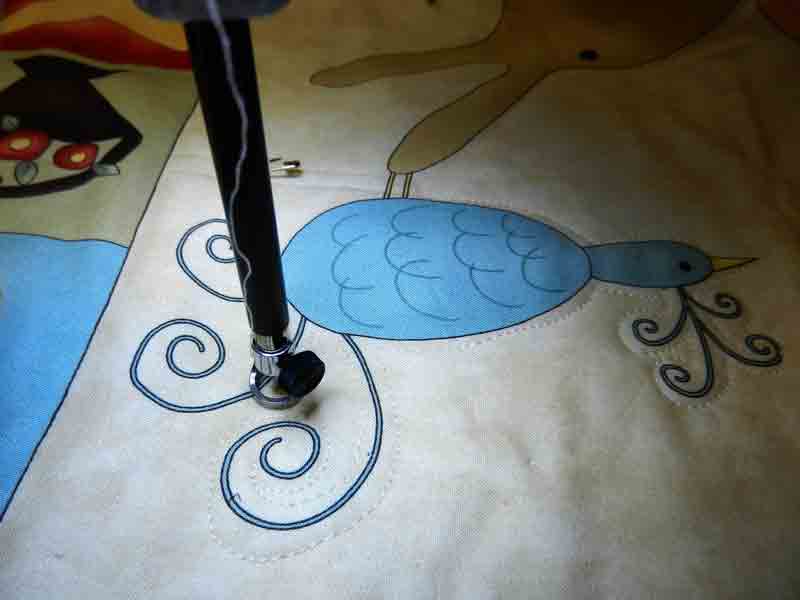
As I had stated previously, the kit was made up of a panel, so how should I quilt it? Well, if I stitch on the lines of the design, I will need to stay on the lines – ugh! It would be much more fun to stitch 1/8″ away (or there abouts – notice how I used thread to match the background so it wasn’t obvious if my 1/8″ wasn’t consistant?).
 It was fun, and I had the center quilted in no time. Then I got to the plain, peach borders and, without much thought, decided to “spiral”. This is my “default”, because I love to “spiral”. I put in a matching thread and got the machine humming. After a while, Mike walked by and I stopped and said “have I thanked you recently for buying me this wonderful machine?” (that was a story from last year called “Sweet 16” – click here to read about it :-))
He walked over, looked at my quilting and said: “how do you keep the spacing between your lines of stitching so even?”
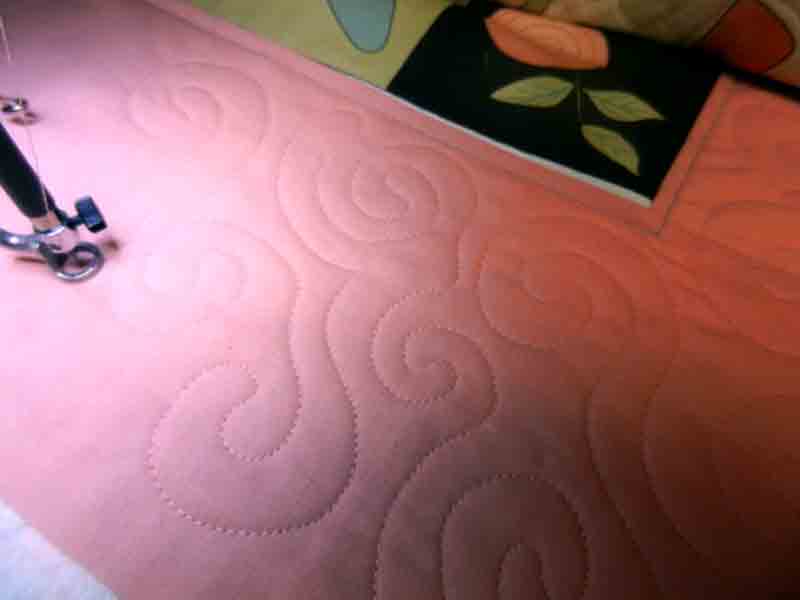
I jumped up and gave him a big kiss! Sometimes he says just the right thing. And the answer is… practice! And aren’t charity quilts the perfect place to get that practicing done?
I have one more trick that came in handy on this quilt, but this has gone a bit long, so I think I’ll save it for next week. Stay tuned for a slick way to cut your bobbin thread from the top!
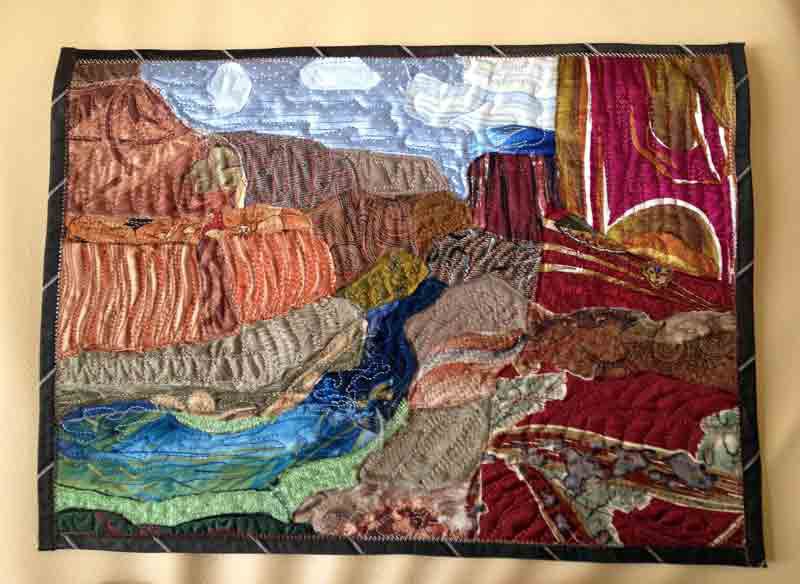
And just one more thing! I continue to be very busy traveling and teaching. I had the privilege of judging the Evergreen Quilters Show in Green Bay, WI this weekend. It’s a wonderful guild and the show was great. I’d like to share a picture of the Best of Show award winner, Toni Bergeon, and her quilt: “Reverie”. It was spectacular!