Last week I shared a technique for bordering a block quilt-as-you-go, but have you ever finished the quilting on a project and realized it would look nicer with one more border? or maybe it needs to be just a little bigger? I’ve had this happen a number of times and, before I bound the outside edge, I did something about it! This also works for quilts that have been constructed “quilt-as-you-go” fashion and need borders, and it works on any quilt – small or large. It’s as simple as:
1. Measure the top and bottom edges of the quilt, decide the border width, and make two border strips this width and length from each of: (a) the border fabric for the front of the quilt, (b) the backing fabric and (c) batting. (Please be aware I’m using a sample quilt sandwich as my “quilt” for this demo – I was practicing feathers 🙂 )
2. Choose 1 set of borders and lay the border fabric (a), right sides together, and even with the top edge of the front of the quilt.
3. Pin this strip in place and flip the quilt over to the back. Lay the back border strip (b) even with the same edge of the quilt, right sides together.
4. Lay the batting strip (c) on top of this back border strip.

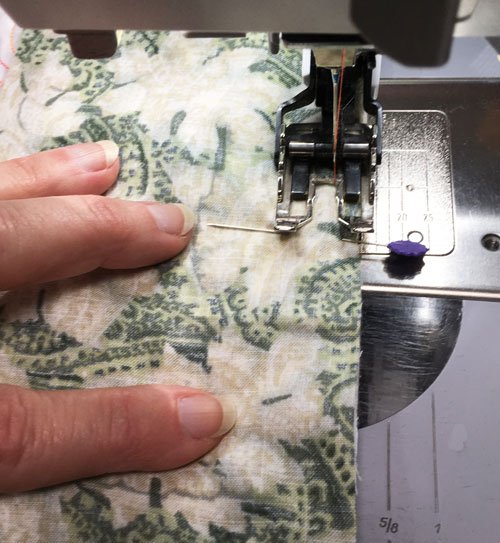
5. Add more pins along the edge through all the layers

and sew through all six layers with a ¼” seam allowance (a walking foot is very helpful).
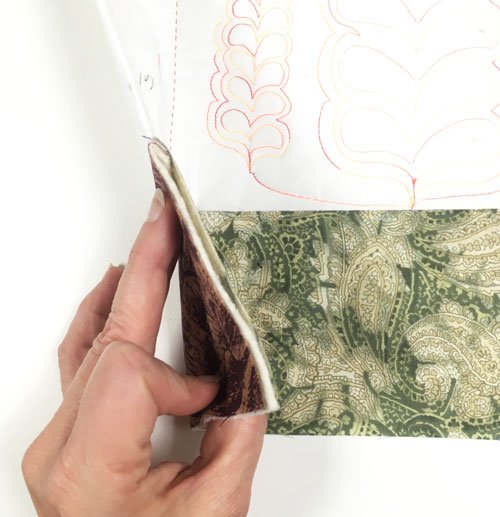
6. Fold all the border strips away from the quilt, and on top of each other to make a flat border:

Here’s a side view:
7. Press this new quilted border along the edge, pin if desired, and repeat for the bottom of the quilt.
8. Measure the sides of the quilt and repeat from step 1 above to add the side borders.
The borders may now be quilted (if needed) and the binding attached. I like to quilt a straight line ½” from the border seam all the way around. This encases the seam allowance and it’s thickness adds a nice fill to this narrow quilted area.
I hope this was helpful and easy to understand. It is a very do-able technique :-).
**********************************
Continuing Stories:
A few weeks ago I shared the story of a shirt and tie quilt made by my friend Jean. She recently wrote to tell me she made a label for the quilt using a pattern for an origami Hawaiian shirt ornament she’d made as Christmas gifts in 2014. I was a lucky recipient of one of those ornaments:
And here’s the label (name removed to protect privacy):
Adding the “dry clean only” advice on the label was a great idea too. She also said she tucked some leftover tie fabric in a few of the border pockets.

I was so glad she included these pictures. Thanks again Jean!
Also, in response to Debbie’s quilt for little Grace, Beth emailed me this: “I saw your picture of the memory quilt with the clothes. I thought I would share the quilts I made for my great niece and great nephew with their onesies!”

So many great ideas – thanks Beth!


Jodi Grzeczka says
I meant to ask you about that little shirt. Adorable!
Linda Woltmann says
I was at the demo this morning at Ben Franklin,I was so glad I went .I’m adding borders to a way right now your method of adding borders is so easy to understand.Thank you,I really enjoyed the demo at Quiltfest.
Marsha J Ransom says
What a helpful tutorial – thanks. I have a birthday quilt to finish tonight and this gives me a boost to get right to it.
Linda says
Thank so much for sharing your technique. I tried a Quilt as you go and bombed miserably when I tried to do borders. With your idea, I will try another QAYG.
Debbie picco says
I would have loved to see a picture of the final project
clkquilt says
Hi Debbie, I’m guessing you meant the shirt and tie quilt. You can see the finished project at: https://www.chrisquilts.net/10415/
Jennie says
Hi, I am attempting my first quilt as you go baby quilt and it really needs a border! Going to give this a try. Thank you for this tutorial!