First of all, I must begin with a huge thank you to everyone who responded with opinions concerning the cover for my new book. I was blown away by the number of responses and grateful for all of the thoughtful comments. I did not take that decision lightly and feel good arguments were presented for both covers. That being said, I’m not telling which way I went yet :-)! “Where Do I Start With Fiber Art?” is now at the printers and should be ready for my classes at Expo in Madison next month. It will be available on my website shortly after that.
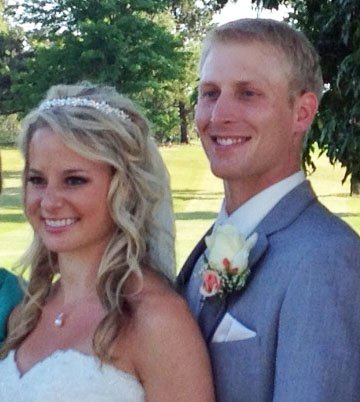
Now for this week’s topic. My August 11th post began with a picture of me basting a quilt in the driveway. I was making it for my niece’s wedding and Brianne and Scott were married this past Friday. They are a very sweet and special couple and their day was beautiful! It was such a blessing to celebrate this joy filled time with family and friends.
Quilting and finishing their quilt was an adventure for me and I’d like to share some of the things I tried and the results. It was actually made for a class sample last semester and as soon as I got the top together and decided on a border (click here for that story :-)) I knew it was the one I wanted to finish for Brianne and Scott. The colors are bright and modern, and I could just picture them cuddled up under it.
When it came time to layer and quilt it, I chose to use a washable wool batt to make it extra snuggly and, while basting it in the frame, I had a thought: I’m always telling my students that quilting the quilt should be as much fun as making the top. So, how should I quilt it?
Sparingly was the answer. No tight and tiny filler designs this time! I didn’t want to flatten the nice poofy wool. I also didn’t want to drive myself crazy with a lot of marking and planning. This quilt wasn’t going to competition, it was meant to keep 2 people I love warm. Here’s what I did:
1. Gridded the quilt on the diagonals, through the dark squares, with a walking foot.
2. Prepared to make fast and fun feathered wreaths by marking a circle around an embroidery hoop, straight pinning up to the circle and removing any safety pins that were in the way.
3. I began by free motion quilting the marked circle and then “feathering” around the outside. I’ve found feathers to be much easier since I took a class with Diane Gaudynski and she taught that a feather is half of a heart. I doodled loads of hearts when I was a young girl, so I had the shape down. She also showed us how it was easier to “draw” a half heart from the indent at the top, around to the point at the bottom. Here is my first “outside the circle” feather. I’ve come back up from the point and am at the top of the bump which will be the second feather.
 4. As you can see – my feathers are big. Once I made all of the feathers around the outside, I stitched a second circle inside the first to create a “spine” and then I feathered the inside.
5. They were a joy to make and the wreath was done so quickly I couldn’t wait to start the next one. Here’s a view of a wreath from the top:
and from the back:
Notice how the feathers are not consistent in size or shape and yet they look good when all were done? Don’t agonize over each little stitch – revel in the finished effect!

I did the free motion quilting on my HQ Sweet 16 and I used my “Quilt Float” system to lift the quilt and keep the weight of it from dragging me down. Quilts can be floated with a domestic machine also. For info on the “Quilt Float” from 2 previous posts, click here and then here :-).
When all the wreaths were made it was time to fill in the open areas. I did this with free motion hearts.
The adventure didn’t stop there, but the post is getting a bit long. Next week I’ll share my thoughts on border quilting and working with a wool batt.
Oh – just one more thing. I’ll be presenting a program at the library in McHenry, IL in September and I wanted to share their flyer in case you can make it!


Lori M says
Just beautiful! I’m breathlessly awaiting the next time where you discuss more about the wool batting. I’ve only used it on a wallhanging and loved the puffier designs after quilting. Have fun at Expo! One of my friends is taking your class. We both love your wonderful quilts and great teachings!