Many years ago a member of my quilt guild brought in a pattern for pillow cases and invited us to make them as Christmas gifts for members of the military. The response was great. Problem was, the pattern was very simple and all the seams were raw edged on the inside of the case. This bothered me because I knew they would not wear as well with those exposed seams. On the way home I began to noodle on this and, since I don’t own a serger, I had to come up with another option. I harkened back to my days of garment sewing and knew the case itself could be sewn with French Seams. But how to do the seam between the case and the cuff??? An idea came to me and I couldn’t wait to get home and try it. It worked, so I made a new handout to share with my guild and called it the Enclosed Seam Pillow Case.
I shared it at the next meeting and many of us had a great time making pillow cases. The following month one of our members came up to me with a handout she’d printed off the internet. The author was using the same technique I came up with, but was calling it the “hot dog roll” technique. This made me smile. Someone else had come up with the same idea, just a different name! Either way – it works!
In early December this year, one of my Open Lab students asked if I’d do a refresher demo on the cases, because she wanted to make Christmas gifts. It was about time I made my grandkids new ones too – so I did the demo and many students participated:

Great job ladies!
Here are my instructions for making pillow cases. Many of you probably know how to make them, but you may enjoy some of the additional helpful hints I’m including 🙂 . I’m hoping this post might be just in time for you to make a few for Christmas gifts too.
Enclosed Seam Pillow Cases
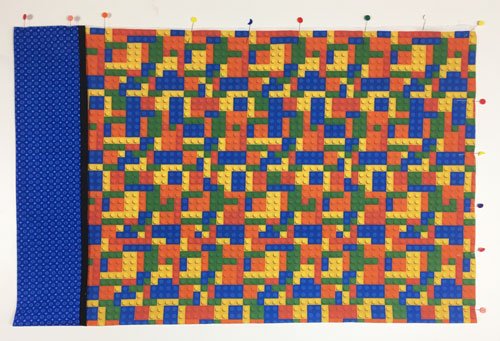
Supplies: ¾ yard main fabric, ¼ yard cuff fabric and a 1 ½” accent strip (pressed in half lengthwise). Make sure the main and cuff fabrics are squared up to the right size and not just the way they were cut at the store. Things will just fit better this way.

• Place the main fabric right side up on your work surface, with a cut edge laid out horizontally in front of you.
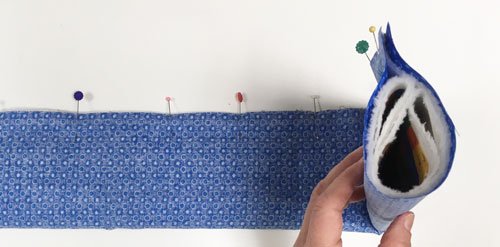
• Lay the raw edges of the accent strip along this cut edge and pin about every 8″ (flower head pins).
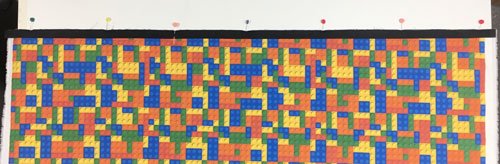
• Lay one long cut edge of the cuff fabric, right sides together with the other raw edges and pin in between the previous pins (ball head pins – I have my reasons for pinning this way and I’ve used different pin heads so you can see the difference).
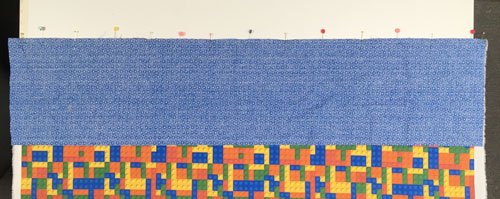
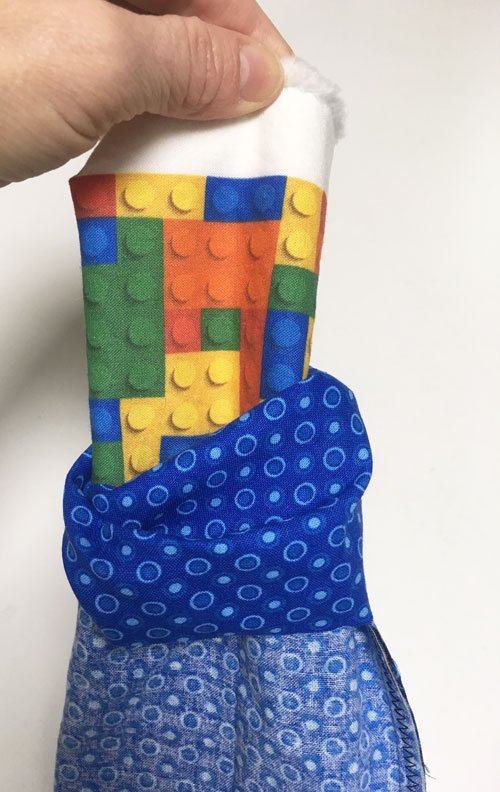
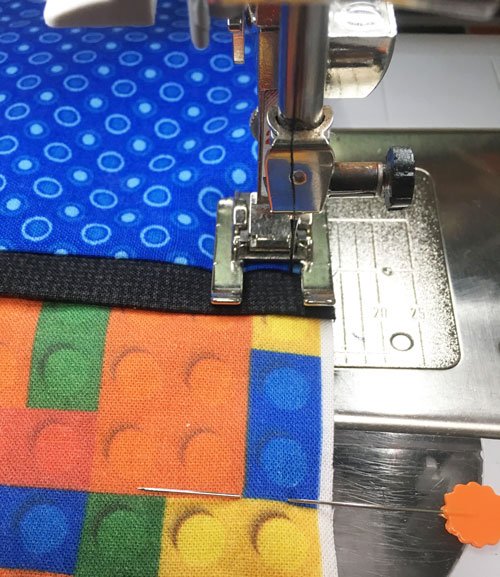
• Flip this entire unit over so the cuff is against the work surface, and the wrong side of the main fabric is facing up.
• Roll up the main fabric until you see the cuff peeking through from underneath.
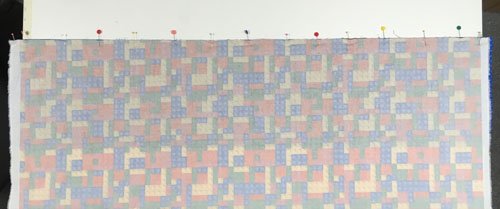
• Bring the remaining cut edge of the cuff fabric up to the other raw edges and re-pin each of the pins through all the layers. Be sure the main fabric doesn’t get caught in this pinning.
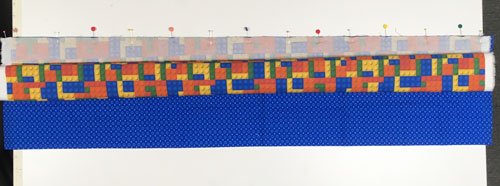
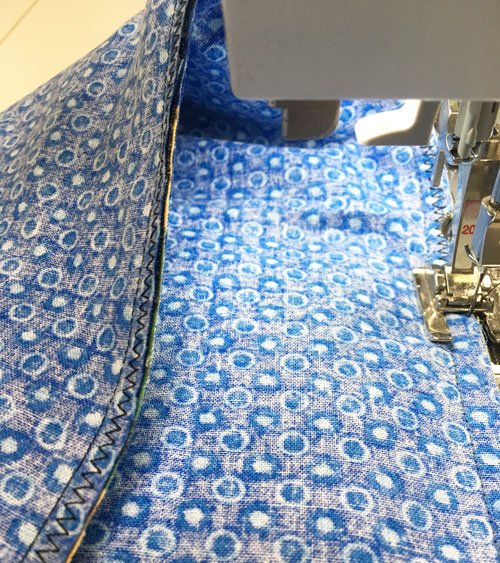
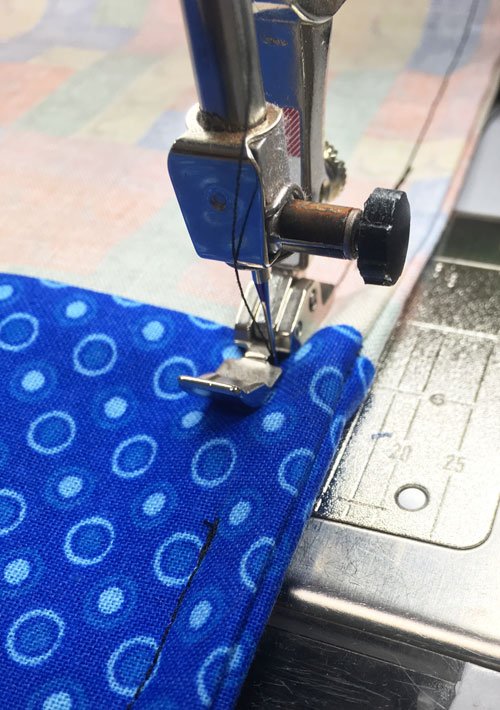
• Sew with a 3/8″ seam allowance. If you are using flannel, you can strengthen the seam with an added line of zig-zag stitching in the seam allowance. Be sure to backstitch at both ends to secure.
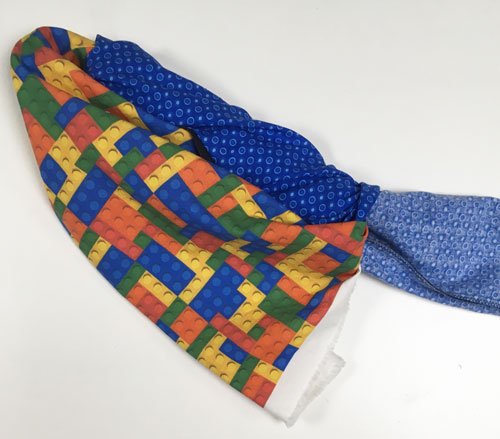
• Turn this tube right sides out. Press.
• Rotary cut the selvedges off both sides of the unit, making sure the cuts are straight and the angles remain at 90 degrees.

• To make the French Seams: Fold the case, wrong sides together, and pin along the two unfinished sides.
Sew with a ¼” seam allowance. Sewing through the cuff seam can be difficult. I can usually make it through on this seam, going slow and with a bit of tugging from behind (stay tuned for hints to sew it the second time).
Trim off all three corners (don’t forget the one at the end of the cuff).
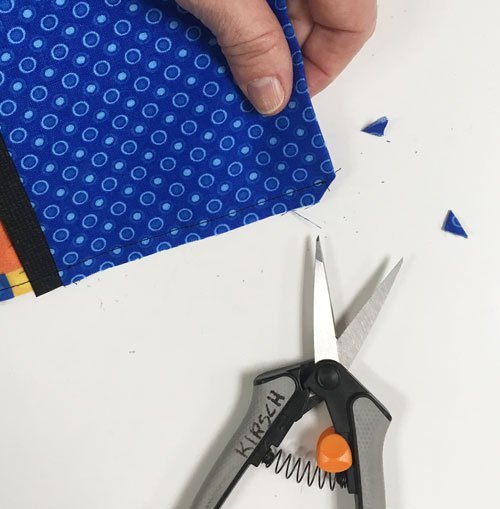
I like to trim the seam allowance at the cuff seam to 1/8″ at this time.

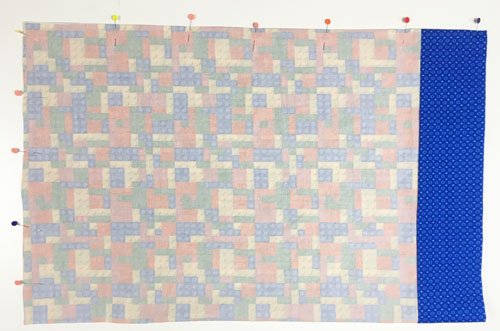
• Turn the case wrong side out, push out the corners, press and pin.
• Sew these two edges one more time, this time using a 3/8″ seam allowance to enclose all the raw edges, and backstitching at each end. If you can’t sew through the thickness at the cuff seam, leave that area open, and once the rest of the seam is complete, go back and fill in the seam using a zipper foot to avoid the thickness.
• Turn right side out and press. DONE!
My tip for trimming the corner at the cuff (5 pictures back) gets rid of any loose threads peeking out of the seam at the finished cuff edge.

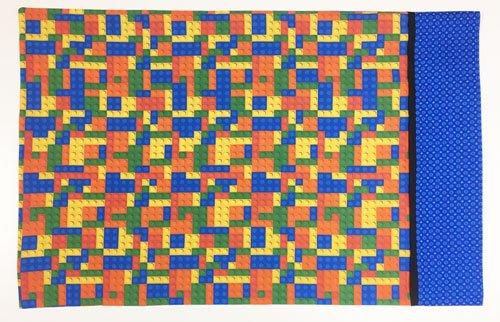
And here are the ones I’ve made for my family this year.
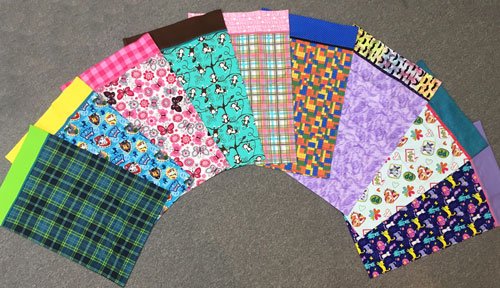
I hadn’t tried flannel before, and I like it!

I love to give homemade gifts to my loved ones! What homemade gifts are you working on? Did you make pillow cases this year? I’d love to see pictures! Please send them to me at .


Linda says
I have had the French seam pillowcase pattern for over 7 years. We make them as such for a church fundraiser every holiday season.
Cindy Boyd says
I also have had Chris’ awesome pillowcase pattern – I’ve made these for church fundraisers, and for seasonal pillowcases for my kids and nieces/nephews. My brother is getting both cotton and flannel Green Bay Packer pillow cases for Christmas this year!