Before we jump into this week’s topic, I would really like to share the creative gift my dear friend, Wendy, made for my birthday. As many of you know, Wendy and I lead quilting adventures, and our upcoming trip will take us to the Baltic Sea in May. We’ve been working on project ideas for the trip and both of us have been stitching Russian Nesting dolls that don’t nest :-)! These are Wendy’s:

I appliquéd mine to a shoulder bag:

They are such fun to make and we’re sure they’ll be a hit with the hand stitchers on our cruise. So, Wendy took this a step further for my birthday and used her amazing skills with wool to make me new mittens!
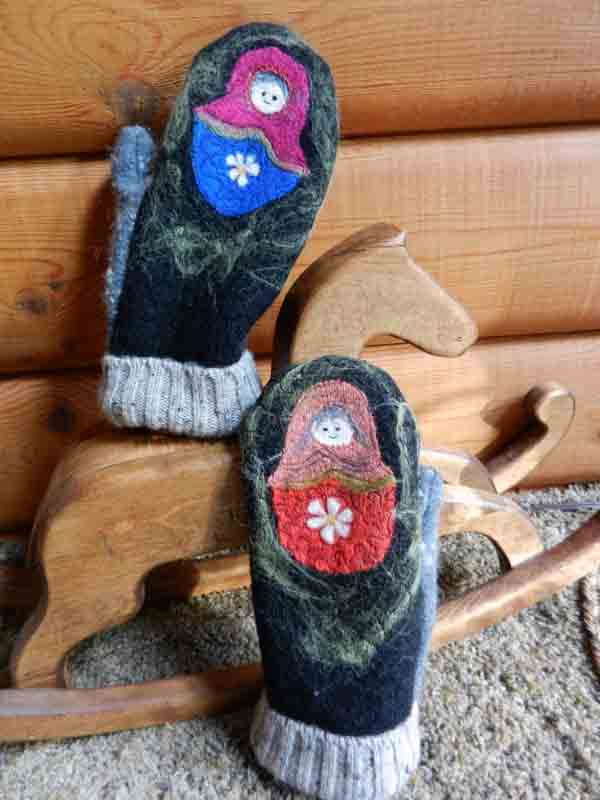
I’m hoping they won’t be needed on our trip, but I love them and will enjoy wearing them all winter long here in Wisconsin!
Now for this week’s topic!
Last week I taught a class at WCTC called Scrap Happy. The idea behind it was to use up all the “orphan” blocks, strips and scraps leftover from previous projects.
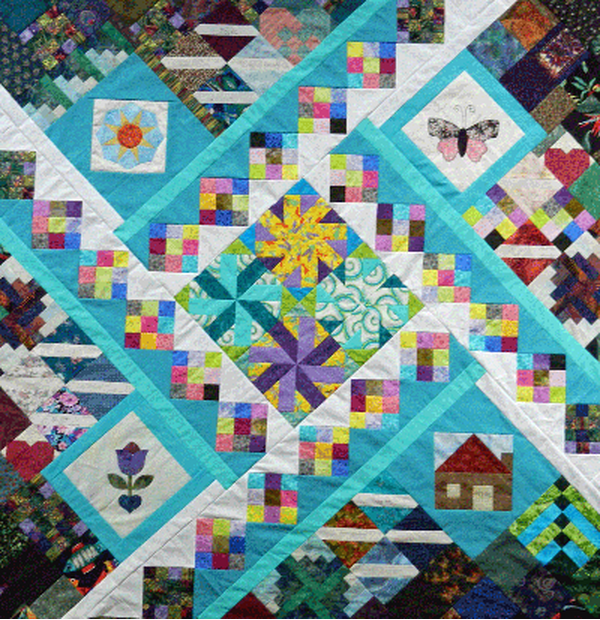 One of the techniques we used in class was to enlarge a block by adding corners to it, and thus turning it “on-point” (as in the Sun block in the upper left and the house block in the lower right). It struck me this would make a good blog topic! When I’m turning blocks I like them to have a bit of “float” around the original square. By adding this extra fabric at the block corners, there is no danger of chopping them off. I’ve discovered that I don’t like to go to the effort of turning these blocks to an exact size, so I make them a bit larger and square them back to the size I want. It’s a “non-math”, “seat of your pants”, method and I hope you like it.
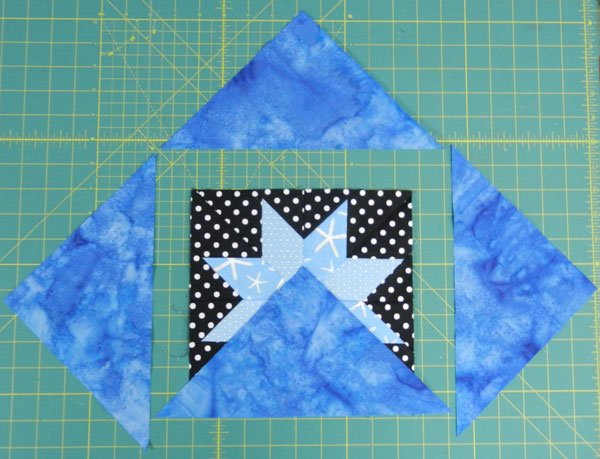
1. Square up the block. Then place a square ruler over the block as in the picture:
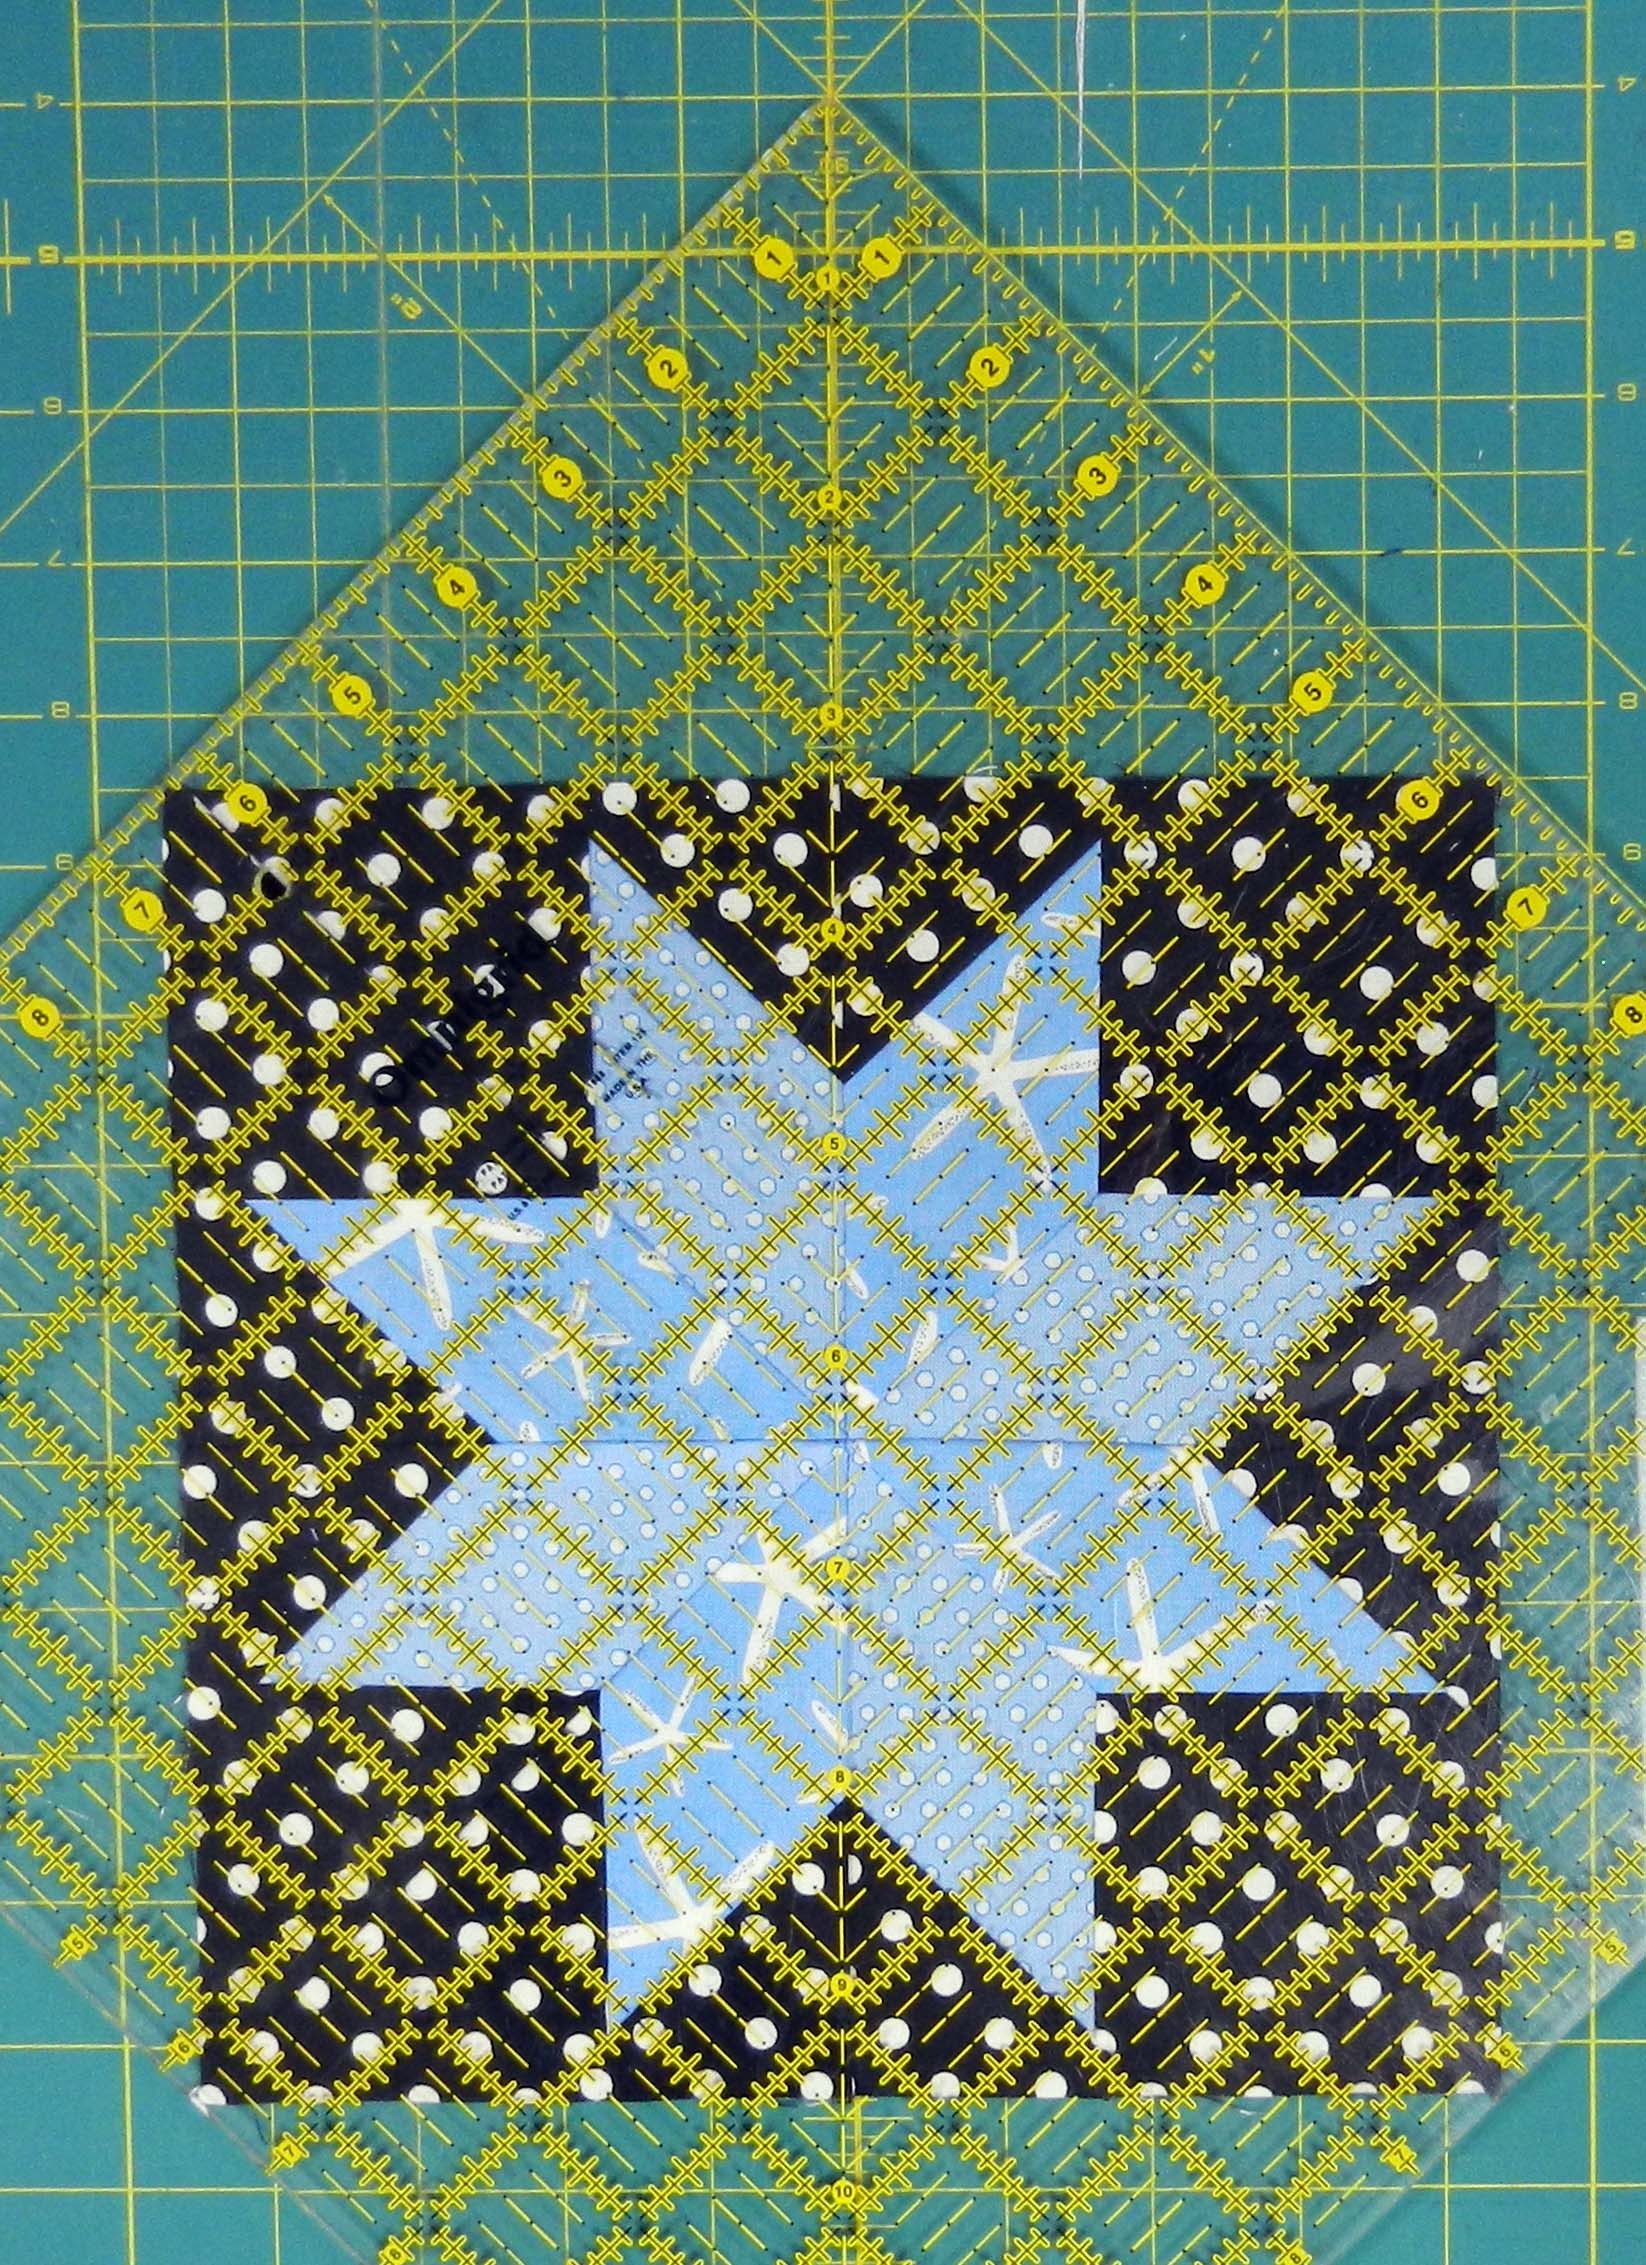
The diagonal line of the ruler is lining up along the vertical center of the block, and the upper corners of the block are at the same measurement along the rulers edges (mine are at about 6 1/4″).
2. Add 2″ to this measurement and cut 2 squares of your chosen corner fabric this size (mine were cut 8 1/4″). Cut both these squares on 1 diagonal.
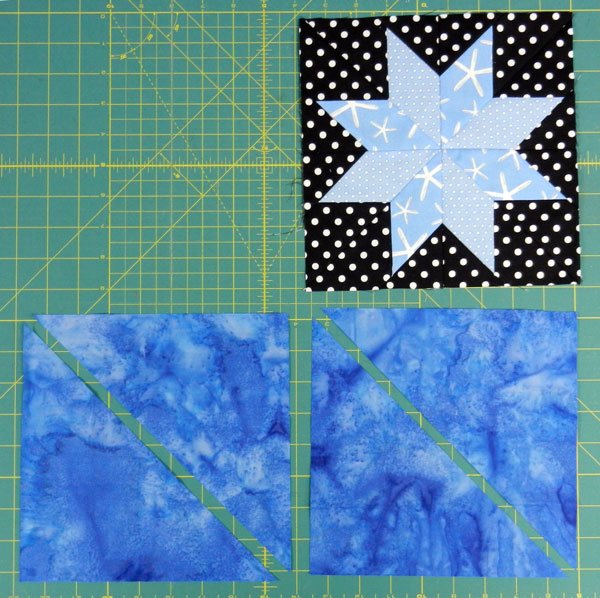
This will yield 4 triangle with the bias on the long, diagonal edge. By cutting the triangles this way, the outside of the block being created will be on the straight-of-grain.
3. Place a triangle, right sides together, along one side of the original square. To center it, make sure the point of the triangle is on the center seam of the block. If your block doesn’t have a center seam, press it in half in both directions, and line the point of the triangle up with your creases.
4. Stitch with a 1/4″ seam allowance and press the seam towards the triangle. There will be portions of the triangle not stitched down on the sides.
5. Repeat for the opposite side of the block.
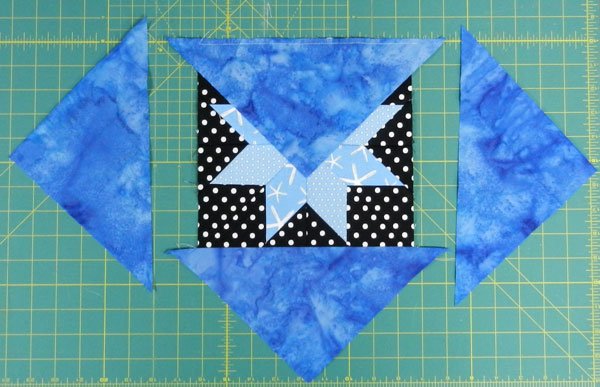
6. Repeat for the remaining 2 sides. This time the seam will go the entire length of the long edge of the triangle.
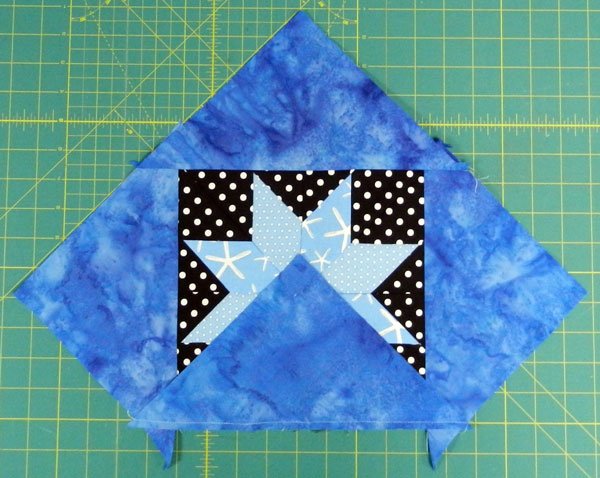
7. Square up the block to the desired size.
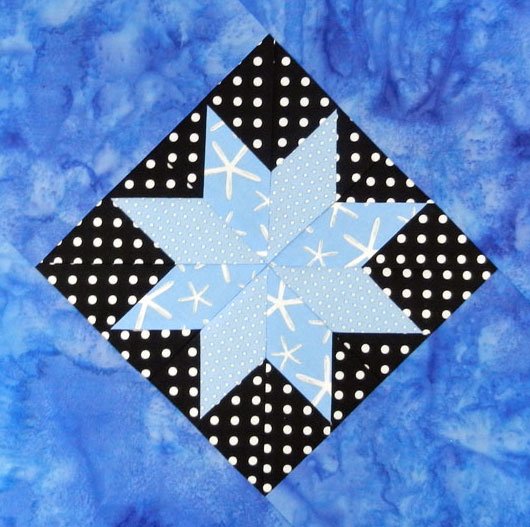
I find this a simple way to turn a block and I hope it was helpful.

Bonnie Camp says
And I just finished cutting some half sq triangles for a huge project. And figured out my diagonals the same way. Planning some easy sewing projects for the winter. Mike having shoulder joint replacement surgery on Dec 26th. So both of us will be housebound for several weeks. While he naps or watches the history channel, I will straight sew this project.
Love your mittens. Wendy is a wonderful person!! Amen to that!!!
Julia says
Super! Doing the math is ok, but this is quicker and for me easier. Thanks!
Jeri Schulz says
Great idea!!
Love the “nesting dolls!
Betty says
Thanks for the easy way to put blocks on point!! I think I’ve been needing that.
Love the inspiration, Betty
Holly says
Thank You! I’ve been trying to figure out how to put together a sampler quilt that has blocks of different sizes. This is perfect!
Kind regards,
Holly
clkquilt says
You’re welcome! I’m glad it was helpful. I reread that blog and think I may need to revisit it soon – so thanks to you too!
June says
thanks for sharing that was very helpful
Rose says
Thank you so much for sharing. I need to find the pattern for the star. Would you tell me where to purchase the pattern. I cannot do anything with a pattern……to know how to make the star block…then thanks to your blog . I will be able to make any block larger !
clkquilt says
Hi Rose,
I made the LeMoyne Star blocks using Debbie Tucker’s great “rapid fire” technique. You can watch a video on it and get the pattern/ruler at: http://www.studio180design.net/videos/?id=1
Karen says
I rarely use patterns that have all the measurements for the blocks, etc. and as a result, have avoided setting my blocks on point. I have “pinned” several charts but it seems like my block size doesn’t match the sizes on the charts. The math equations just hurt my head:) and I’m a fairly experienced quilter. But using your method is so easy. I just did my first quilt using this method and I couldn’t be happier. It works perfectly. Thanks so much.